

Recipe
April 16, 2014
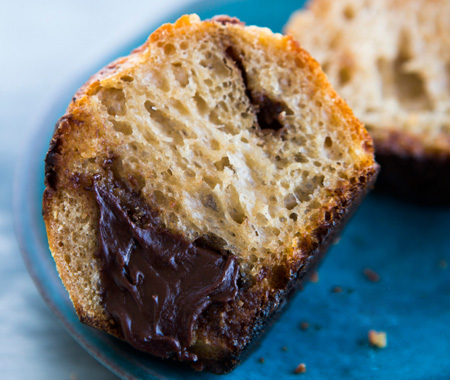
Chocolate Peanut Butter Pocket Bread Recipe
Sourdough Starter:
Step 1: Mix together 1/2 cup whole wheat flour and 1/2 cup cool water. Stir with a spoon. You want it to be the consistency of a thick pancake batter, so add a little more flour or water if it needs it. But don’t worry too much about it; exact measurements aren’t important here. Loosely cover the container with its lid and let it sit for about two days at room temperature.
Step 2: After two days, compost most of the starter. Leave about 1 tbsp’s worth in the container.
Step 3: Feed your starter. Pour in 1/2 cup cool water and stir and dissolve the starter that’s left in the container. Add 1/2 cup whole-wheat flour. Stir it up, loosely cover and ignore for 2 days at room temperature.
Step 4: Repeat. There will be two weeks of this—every 2 or 3 days compost most of your starter and mix in roughly equal parts whole-wheat flour and water. After two weeks you’ll have a healthy sourdough starer.
Pocket Bread:
Step 1: Make your sourdough pre-ferment. Use starter that is sour smelling in a good way, most likely between 12 and 24 hours old. Make your pre-ferment 8 – 12 hours before you want to start mixing your dough—likely in the evening before you go to bed or in the morning. You want it to be the consistency of thick pancake batter.
Step 2: Put sourdough starter, the 1/2 cup cool water and whole-wheat flour in a big bowl and mix. Cover with a plate or plastic wrap for 8 – 12 hours.
Step 3: Chop your peanut butter cups into roughly 1/4″ pieces.
Step 4: Uncover the bowl of sourdough pre-ferment, and take a big whiff. It should be putting off a pretty strong smell, nice and yummy, maybe a touch sour. Add lukewarm water, bread flour, sea salt and chocolate peanut butter cups. Mix everything together so that it’s evenly combined, just for 30 seconds to a minute. Cover with a plate or plastic wrap, and let it simmer for 30 minutes to an hour.
Step 5: Gently stretch and fold the dough. Dip your hand in a bowl of water, then reach down into the side of the dough bowl, grab a little bit of it and pull it up and push it down on top of the dough. Rotate the bowl a little bit and do it again to another portion of the dough. Give the dough about ten stretches and folds. Cover the dough, and let it sit for 1/2 hour.
Step 6: Stretch and fold a few more times. After 1/2 hour, stretch and fold the dough another ten times. Cover the dough, and leave it alone for another 1/2 hour or so. Do this another two times, at 15 – 30 minute intervals.
Step 7: If you want to shape your pocket breads in 3 – 4 hours, let the dough sit out somewhere in your kitchen. If you want to shape your pocket breads anywhere from 12 – 48 hours later, stick it in the fridge.
Step 8: Grease your muffin tin. Use vegetable oil or nonstick spray to coat the individual cups.
Step 9: Shape your pocket breads. Flour your counter and dump out the dough. Cut the dough into 3/4 cup pieces (to fill up your muffin tin about 2/3 of the way) and use a little bit of flour on your hands to shape them into round balls. Plop the pocket breads into your muffin tin, seam-side down. When you’re all done, put the whole thing in a plastic bag, so that the tops don’t dry out. (A clean garbage bag works great.)
Step 10: If you want to bake your pocket breads in 3 – 4 hours, let them sit out somewhere in your kitchen. If you want to bake them anywhere from 6 – 24 hours later, stick them in the fridge.
Step 11: Once your pocket breads have risen, preheat your oven to 450°F for 20 minutes. If you put the pocket breads in the fridge, take them out while the oven is preheating so that they can warm up to room temperature before you bake them.
Step 12: Bake your pocket breads. Take the pans out of the plastic bag, slash the top of each pocket bread with a razor, spray their tops with water, using a spray bottle and get them in the oven. Bake for 5 minutes, then quickly open the oven, spray them again, and just as quickly close the oven. Bake for another 25 minutes, and check on them. You’ll know they are done when the slashed portions are good and dark brown.
Step 13: Take the breads out of the pan, and let them cool on a cooling rack.
See more recipes from Josey Baker Bread.
Reprinted with permission from Josey Baker Bread (2014, Raincoast Books).
Directions
Yield:
Sourdough Starter:
Step 1: Mix together 1/2 cup whole wheat flour and 1/2 cup cool water. Stir with a spoon. You want it to be the consistency of a thick pancake batter, so add a little more flour or water if it needs it. But don’t worry too much about it; exact measurements aren’t important here. Loosely cover the container with its lid and let it sit for about two days at room temperature.
Step 2: After two days, compost most of the starter. Leave about 1 tbsp’s worth in the container.
Step 3: Feed your starter. Pour in 1/2 cup cool water and stir and dissolve the starter that’s left in the container. Add 1/2 cup whole-wheat flour. Stir it up, loosely cover and ignore for 2 days at room temperature.
Step 4: Repeat. There will be two weeks of this—every 2 or 3 days compost most of your starter and mix in roughly equal parts whole-wheat flour and water. After two weeks you’ll have a healthy sourdough starer.
Pocket Bread:
Step 1: Make your sourdough pre-ferment. Use starter that is sour smelling in a good way, most likely between 12 and 24 hours old. Make your pre-ferment 8 – 12 hours before you want to start mixing your dough—likely in the evening before you go to bed or in the morning. You want it to be the consistency of thick pancake batter.
Step 2: Put sourdough starter, the 1/2 cup cool water and whole-wheat flour in a big bowl and mix. Cover with a plate or plastic wrap for 8 – 12 hours.
Step 3: Chop your peanut butter cups into roughly 1/4″ pieces.
Step 4: Uncover the bowl of sourdough pre-ferment, and take a big whiff. It should be putting off a pretty strong smell, nice and yummy, maybe a touch sour. Add lukewarm water, bread flour, sea salt and chocolate peanut butter cups. Mix everything together so that it’s evenly combined, just for 30 seconds to a minute. Cover with a plate or plastic wrap, and let it simmer for 30 minutes to an hour.
Step 5: Gently stretch and fold the dough. Dip your hand in a bowl of water, then reach down into the side of the dough bowl, grab a little bit of it and pull it up and push it down on top of the dough. Rotate the bowl a little bit and do it again to another portion of the dough. Give the dough about ten stretches and folds. Cover the dough, and let it sit for 1/2 hour.
Step 6: Stretch and fold a few more times. After 1/2 hour, stretch and fold the dough another ten times. Cover the dough, and leave it alone for another 1/2 hour or so. Do this another two times, at 15 – 30 minute intervals.
Step 7: If you want to shape your pocket breads in 3 – 4 hours, let the dough sit out somewhere in your kitchen. If you want to shape your pocket breads anywhere from 12 – 48 hours later, stick it in the fridge.
Step 8: Grease your muffin tin. Use vegetable oil or nonstick spray to coat the individual cups.
Step 9: Shape your pocket breads. Flour your counter and dump out the dough. Cut the dough into 3/4 cup pieces (to fill up your muffin tin about 2/3 of the way) and use a little bit of flour on your hands to shape them into round balls. Plop the pocket breads into your muffin tin, seam-side down. When you’re all done, put the whole thing in a plastic bag, so that the tops don’t dry out. (A clean garbage bag works great.)
Step 10: If you want to bake your pocket breads in 3 – 4 hours, let them sit out somewhere in your kitchen. If you want to bake them anywhere from 6 – 24 hours later, stick them in the fridge.
Step 11: Once your pocket breads have risen, preheat your oven to 450°F for 20 minutes. If you put the pocket breads in the fridge, take them out while the oven is preheating so that they can warm up to room temperature before you bake them.
Step 12: Bake your pocket breads. Take the pans out of the plastic bag, slash the top of each pocket bread with a razor, spray their tops with water, using a spray bottle and get them in the oven. Bake for 5 minutes, then quickly open the oven, spray them again, and just as quickly close the oven. Bake for another 25 minutes, and check on them. You’ll know they are done when the slashed portions are good and dark brown.
Step 13: Take the breads out of the pan, and let them cool on a cooling rack.
See more recipes from Josey Baker Bread.
Reprinted with permission from Josey Baker Bread (2014, Raincoast Books).