

Recipe
September 30, 2009
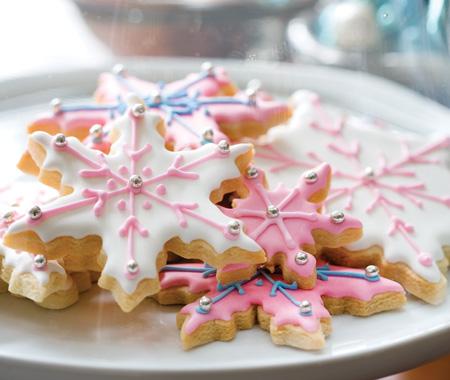
Suzanne Dimma’s Frosted Cookies Recipe
Cookies
Step 1: Using electric mixer, beat butter and sugar in large bowl until fluffy.
Step 2: Beat in egg and vanilla.
Step 3: Sift flour, baking powder, salt and nutmeg over; stir to blend well.
Step 4: Turn dough out onto lightly floured surface and knead gently one minute. Shape dough into 1/2″-thick rectangle.
Step 5: Cut into 4 equal pieces; wrap in plastic and refrigerate at least 3 hours and up to one day. Let dough soften slightly at room temperature before rolling out.
Step 6: Position rack in centre of oven and preheat to 350°F. Butter large baking sheet.
Step 7: Working with one dough piece at a time, roll out dough on lightly floured surface to 1/8″ thickness, lifting and turning dough often and dusting surface very lightly with flour to prevent sticking.
Step 8: Using floured 3-4″ cutters, cut out cookies. Pull away excess dough from around cookies. Transfer cookies to prepared baking sheet, spacing 1″ apart (cookies will not spread).
Step 9: If using cookies as hanging ornaments, push one end of a drinking straw through dough near top of each cookie; lift straw, then remove small dough round from straw.
Step 10: Gently re-roll dough scraps, cut out more cookies. Transfer to same sheet.
Step 11: Bake cookies until light brown for about 11 minutes. Let cool 5 minutes on sheet. Transfer cookies to rack and let cool.
Step 12: Repeat with remaining dough pieces, baking one sheet of cookies at a time. Cool baking sheet completely and butter sheet lightly between batches.
Frosting
Step 1: Whisk 9 cups sugar and powdered egg whites in large bowl to blend.
Step 2: Whisk in 12 tbsp water. If necessary, whisk in more water by teaspoonfuls or more sugar by tablespoonfuls until frosting is medium thick and very smooth.
Step 3: Place 1/2 cup frosting into each of four small bowls; mix colours as per instructions (can be prepared one day ahead). Cover bowls and remaining frosting with plastic wrap to keep frosting from drying out. Store at room temperature.
Step 4: Thin frosting in each bowl as needed by mixing in 1/4 tsp water at a time.
Step 5: Using pastry brush or small metal offset spatula, spread frosting on cookies, set cookies aside and let frosting dry. About 30 minutes.
Step 6: Cut off small tip from end of one disposable pastry bag (cut off slightly more if planning to insert metal tip). Fold down top 2″ of bag, forming collar.
Step 7: Holding bag under collar and using small rubber spatula, fill bag with one colour of frosting.
Step 8: Repeat with remaining pastry bags, filling each with one colour of frosting.
Step 9: Pipe decorations onto frosted cookies in desired patterns and colours.
Step 10: Let cookies stand until decorations are firm and dry, at least 4 hours. (Can be prepared 3 days ahead, place cookies in single layer between sheets of waxed paper in airtight container; store at room temperature.)
Makes about 36 cookies
Directions
Yield:
Cookies
Step 1: Using electric mixer, beat butter and sugar in large bowl until fluffy.
Step 2: Beat in egg and vanilla.
Step 3: Sift flour, baking powder, salt and nutmeg over; stir to blend well.
Step 4: Turn dough out onto lightly floured surface and knead gently one minute. Shape dough into 1/2″-thick rectangle.
Step 5: Cut into 4 equal pieces; wrap in plastic and refrigerate at least 3 hours and up to one day. Let dough soften slightly at room temperature before rolling out.
Step 6: Position rack in centre of oven and preheat to 350°F. Butter large baking sheet.
Step 7: Working with one dough piece at a time, roll out dough on lightly floured surface to 1/8″ thickness, lifting and turning dough often and dusting surface very lightly with flour to prevent sticking.
Step 8: Using floured 3-4″ cutters, cut out cookies. Pull away excess dough from around cookies. Transfer cookies to prepared baking sheet, spacing 1″ apart (cookies will not spread).
Step 9: If using cookies as hanging ornaments, push one end of a drinking straw through dough near top of each cookie; lift straw, then remove small dough round from straw.
Step 10: Gently re-roll dough scraps, cut out more cookies. Transfer to same sheet.
Step 11: Bake cookies until light brown for about 11 minutes. Let cool 5 minutes on sheet. Transfer cookies to rack and let cool.
Step 12: Repeat with remaining dough pieces, baking one sheet of cookies at a time. Cool baking sheet completely and butter sheet lightly between batches.
Frosting
Step 1: Whisk 9 cups sugar and powdered egg whites in large bowl to blend.
Step 2: Whisk in 12 tbsp water. If necessary, whisk in more water by teaspoonfuls or more sugar by tablespoonfuls until frosting is medium thick and very smooth.
Step 3: Place 1/2 cup frosting into each of four small bowls; mix colours as per instructions (can be prepared one day ahead). Cover bowls and remaining frosting with plastic wrap to keep frosting from drying out. Store at room temperature.
Step 4: Thin frosting in each bowl as needed by mixing in 1/4 tsp water at a time.
Step 5: Using pastry brush or small metal offset spatula, spread frosting on cookies, set cookies aside and let frosting dry. About 30 minutes.
Step 6: Cut off small tip from end of one disposable pastry bag (cut off slightly more if planning to insert metal tip). Fold down top 2″ of bag, forming collar.
Step 7: Holding bag under collar and using small rubber spatula, fill bag with one colour of frosting.
Step 8: Repeat with remaining pastry bags, filling each with one colour of frosting.
Step 9: Pipe decorations onto frosted cookies in desired patterns and colours.
Step 10: Let cookies stand until decorations are firm and dry, at least 4 hours. (Can be prepared 3 days ahead, place cookies in single layer between sheets of waxed paper in airtight container; store at room temperature.)
Makes about 36 cookies
Virginia Macdonald