

Recipe
December 1, 2010
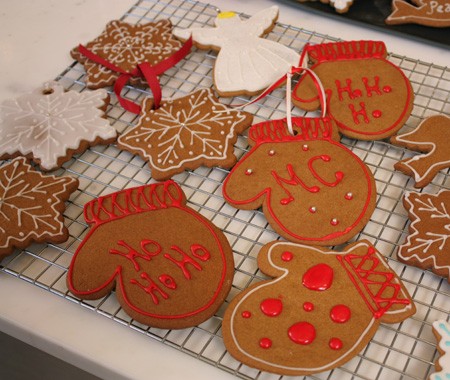
Gingerbread Cookies Recipe
Step 1: Place the flour, ginger, cinnamon, nutmeg, baking soda, salt and cloves in the work bowl of a food processor fitted with the steel blade (or whisk in a large bowl). Pulse 2 or 3 times to combine. Empty the mixture onto a sheet of wax paper and set aside.
Step 2: Place the sugar in the processor bowl and process for 8-10 seconds to remove any lumps. Add the butter and pulse 4 or 5 times, or until a smooth paste is formed. Add the molasses and the egg, and pulse 4 or 5 times just to incorporate. Scrape down the work bowl as needed.
Step 3: With the machine off, add the dry ingredients, scrape around the side of the bowl, then pulse until the dough just begins to hold together. The dough will be soft.
Step 4: Tear three 12″ pieces of plastic wrap. Place 1/3 of the dough onto each sheet. Fold the plastic wrap over the dough and shape it into a disc. Chill for 2 hours or until firm. (The dough may be refrigerated at this point for up to 3 days or frozen for 1 month.)
Step 5: Position the shelves in the upper and lower thirds of the oven. Heat the oven to 350°F. Dab the corners of the cookie sheets lightly with butter and line with baking parchment.
Step 6: Lightly flour a pastry cloth or flat surface. Working with one disc at a time, roll the dough until 1/8″ thick and cut into desired shapes (be sure to dip the cutters in flour before cutting shapes). For tree ornaments, roll to 1/4″ for sturdier cookies. Place on the cookie sheets. If dough is becoming sticky, place the cookie sheet with cut cookies into the refrigerator for 15 minutes before baking.
Step 7: Bake for 9-11 minutes for small cookies or 10-12 minutes for large cookies, until browned around the edges. To ensure even baking, toward the end of baking time rotate the sheets from top to bottom and front to back. Let rest on the cookie sheets for 2-3 minutes before loosening with a thin metal spatula. Transfer to wire racks. The cookies will firm as they cool.
Step 8: When the cookies have thoroughly cooled, prepare the vanilla glaze. Partially fill a plastic squeeze bottle with the glaze and have fun decorating! Be sure to snip or cut the decorating tip to the appropriate size and test the consistency of the glaze before you start. Store cookies in an airtight container, layered between strips of wax paper, for up to 4 weeks. These cookies may be frozen.
Makes about 72 2″ x 3″ cookies, or about 30 6″ x 4″ cookies
Watch Lynda Reeves and Bonnie Cook demonstrate this cookie recipe in Episode 52 of H&H Online TV.
Reprinted with permission from Carole Walter’s Great Cookies (2003 Clarkson Potter).

Directions
Yield:
Step 1: Place the flour, ginger, cinnamon, nutmeg, baking soda, salt and cloves in the work bowl of a food processor fitted with the steel blade (or whisk in a large bowl). Pulse 2 or 3 times to combine. Empty the mixture onto a sheet of wax paper and set aside.
Step 2: Place the sugar in the processor bowl and process for 8-10 seconds to remove any lumps. Add the butter and pulse 4 or 5 times, or until a smooth paste is formed. Add the molasses and the egg, and pulse 4 or 5 times just to incorporate. Scrape down the work bowl as needed.
Step 3: With the machine off, add the dry ingredients, scrape around the side of the bowl, then pulse until the dough just begins to hold together. The dough will be soft.
Step 4: Tear three 12″ pieces of plastic wrap. Place 1/3 of the dough onto each sheet. Fold the plastic wrap over the dough and shape it into a disc. Chill for 2 hours or until firm. (The dough may be refrigerated at this point for up to 3 days or frozen for 1 month.)
Step 5: Position the shelves in the upper and lower thirds of the oven. Heat the oven to 350°F. Dab the corners of the cookie sheets lightly with butter and line with baking parchment.
Step 6: Lightly flour a pastry cloth or flat surface. Working with one disc at a time, roll the dough until 1/8″ thick and cut into desired shapes (be sure to dip the cutters in flour before cutting shapes). For tree ornaments, roll to 1/4″ for sturdier cookies. Place on the cookie sheets. If dough is becoming sticky, place the cookie sheet with cut cookies into the refrigerator for 15 minutes before baking.
Step 7: Bake for 9-11 minutes for small cookies or 10-12 minutes for large cookies, until browned around the edges. To ensure even baking, toward the end of baking time rotate the sheets from top to bottom and front to back. Let rest on the cookie sheets for 2-3 minutes before loosening with a thin metal spatula. Transfer to wire racks. The cookies will firm as they cool.
Step 8: When the cookies have thoroughly cooled, prepare the vanilla glaze. Partially fill a plastic squeeze bottle with the glaze and have fun decorating! Be sure to snip or cut the decorating tip to the appropriate size and test the consistency of the glaze before you start. Store cookies in an airtight container, layered between strips of wax paper, for up to 4 weeks. These cookies may be frozen.
Makes about 72 2″ x 3″ cookies, or about 30 6″ x 4″ cookies
Watch Lynda Reeves and Bonnie Cook demonstrate this cookie recipe in Episode 52 of H&H Online TV.
Reprinted with permission from Carole Walter’s Great Cookies (2003 Clarkson Potter).