

Decorating & Design
September 17, 2015
DIY: Modern Wall Organizer
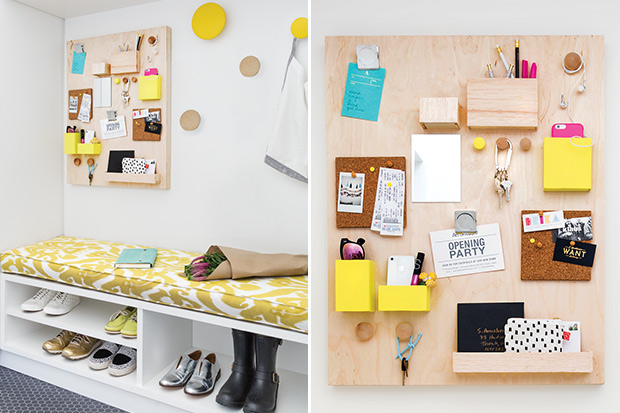
H&H’s senior design editor Sally Armstrong shares step-by-step instructions on how to make a DIY wall organizer.
 I love having a place to put sunglasses, my tortoise shell glasses, keys and mail when I walk in the door, and a wall organizer is a tidy solution. But they can be expensive or too cutesy for my modern mudroom. I decided to make my own customized version out of a birch artist’s panel and balsa wood (available at craft and art supply stores).
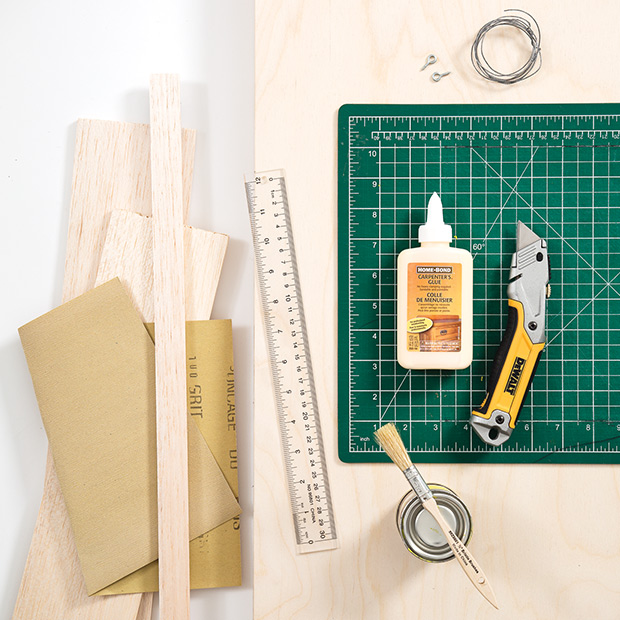
Materials
You’ll need birch artist’s panel, balsa wood, cutting mat, craft or utility knife, ruler, sandpaper, wood glue, knobs, paint, eye hooks and picture-hanging wire.
Tip: Pick sheets of balsa wood that are substantial enough to support the weight of papers and phones but thin enough to cut easily; mine were 1⁄4″ thick.
Step 1: Gather Materials And Determine Box Sizes
Pick a birch artist’s panel as the base for your organizer and determine the sizes of the boxes you want to add to the panel. (Mine ranged from 2″ by 11″ by 2″ deep for mail to 4″ by 4″ by 1″ deep for a phone. Items like sunglasses, mail or makeup will need deeper boxes, whereas boxes for phones and notes can be shallower.)
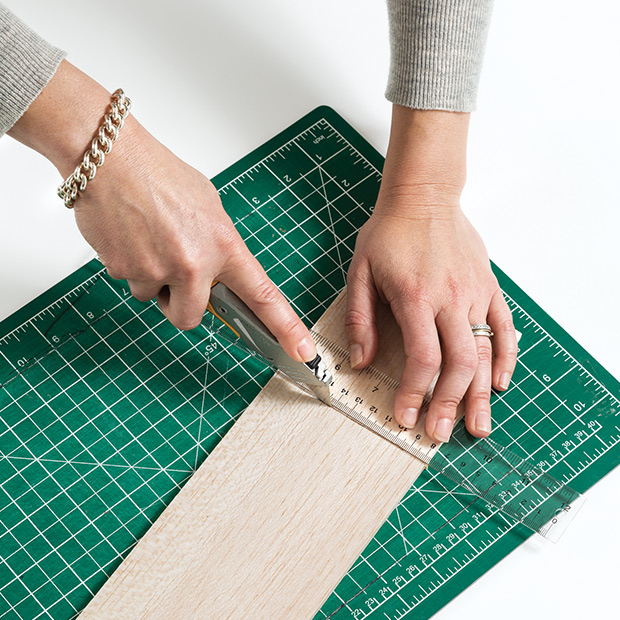
Step 2: Cut Balsa
I used two sheets of balsa, measuring 4″ by 36″ and 1″ by 36″. I used the 4″ panel for the fronts of all the boxes and the sides and bottoms of the deeper boxes, and the 1″ piece for strips to form the sides and bottom of the shallower boxes. Lay the balsa on a cutting mat or other protective surface, and use a craft or utility knife and ruler to cut each piece to the dimensions you want.
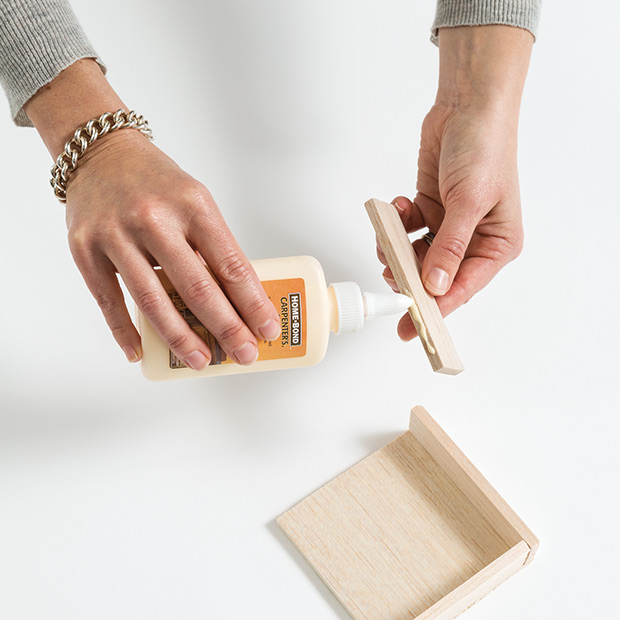
Step 3: Glue Balsa To Form Boxes
If cutting has left rough edges on the balsa, give them a light sanding. Using a strong craft glue or wood glue, attach the four pieces of balsa to form each box. (Glue the sides and bottom of each box behind the front panel, as shown, so the edges can’t be seen from the front.) Set aside and let each box dry for at least one hour.

Step 4: Paint Boxes And Knobs
Once the glue has dried, give boxes and knobs a coat of paint. I chose to paint three of my boxes and one knob a bright yellow to match the hooks and bench upholstery in my mudroom and left the rest unfinished for a modern look, but you could pick any cheerful, welcoming color you like. Let paint dry for a few hours.
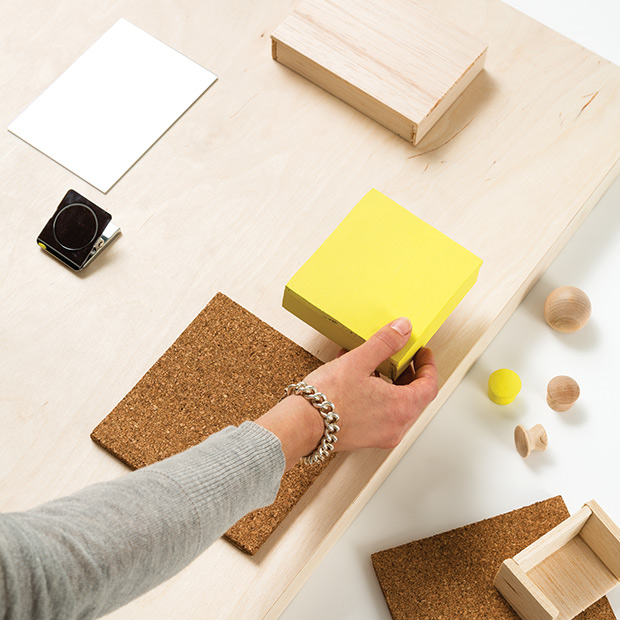
Step 5: Arrange And Attach Items
Lay out the boxes and knobs on the birch panel, along with any other storage or organizing elements — like a section of corkboard, small mirror or metal clip. Leave enough clearance around each item to make it usable. Attach the boxes, knobs, cork and more to the panel with strong craft or wood glue.
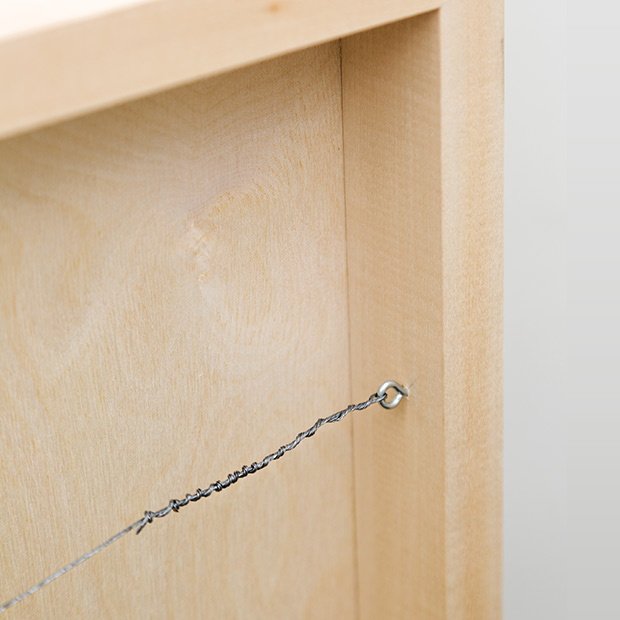
Step 6: Attach Wire And Hang Organizer
Let the glue set for at least one hour. Then, attach an eyehook to each side of the back of the panel, one-third of the way down, and string picture-hanging wire between. Hang the panel using the wire and enjoy the finished organizer!
Note: I hung my organizer in my mudroom, but you could also use it as a hub in a busy kitchen or in a small front entryway.
Donna Griffith
Birch panel, DeSerres; wood knobs, Lee Valley; box and knob colour, Citron (74), Farrow & Ball; architecture, Atelier Kastelic Buffey
House & Home September 2015
Sally Armstrong