

Recipe
November 18, 2011
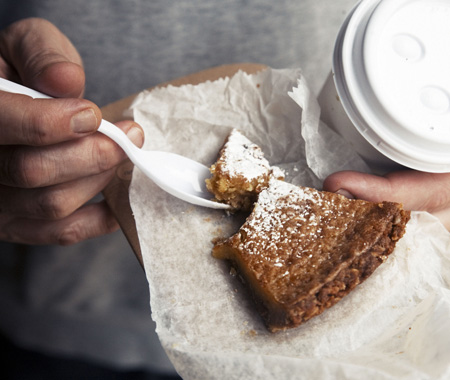
Momofuku Milk Bar’s Crack Pie Recipe
Pie
Step 1: Heat the oven to 350°F.
Step 2: Put the oat cookie, brown sugar, and salt in a food processor and pulse it on and off until the cookie is broken down into a wet sand. If you don’t have a food processor, you can fake it till you make it and crumble the oat cookie diligently with your hands.)
Step 3: Transfer the crumbs to a bowl, add the butter, and knead the butter and ground cookie mixture until moist enough to form into a ball. If it is not moist enough to do so, melt an additional 14 to 25 g (1 to 1-1/2 tbsp) butter and knead it in.
Step 4: Divide the oat crust evenly between 2 (10″) pie tins. Using your fingers and the palms of your hands, press the oat cookie crust firmly into each pie tin, making sure the bottom and sides of the tin are evenly covered. Use the pie shells immediately, or wrap well in plastic and store at room temperature for up to 5 days or in the fridge for up to 2 weeks.
Step 5: Put both pie shells on a sheet pan. Divide the crack pie filling evenly between the crusts; the filling should fill them three-quarters of the way full. Bake for 15 minutes only. The pies should be golden brown on top but will still be very jiggly.
Step 6: Open the oven door and reduce the oven temperature to 325°F. Depending on your oven, it may take 5 minutes or longer for the oven to cool to the new temperature. Keep the pies in the oven during this process. When the oven reaches 325°F, close the door and bake the pies for 5 minutes longer. The pies should still be jiggly in the bull’s-eye centre but not around the outer edges. If the filling is still too jiggly, leave the pies in the oven for an additional 5 minutes or so.
Step 7: Gently take the pan of crack pies out of the oven and transfer to a rack to cool to room temperature. (You can speed up the cooling process by carefully transferring the pies to the fridge or freezer if you’re in a hurry.) Then freeze your pies for at least 3 hours, or overnight, to condense the filling for a dense final product — freezing is the signature technique and result of a perfectly executed crack pie.
Step 8: If not serving the pies right away, wrap well in plastic wrap. In the fridge, they will keep fresh for 5 days; in the freezer, they will keep for 1 month. Transfer the pie(s) from the freezer to the refrigerator to defrost a minimum of 1 hour before you’re ready to get in there.
Step 9: Serve your crack pie cold! Decorate your pie(s) with confectioners’ sugar, either passing it through a fine sieve or dispatching pinches with your fingers.
Oat Cookie
Step 1: Heat the oven to 350°F.
Step 2: Combine the butter and sugars in the bowl of a stand mixer fitted with the paddle attachment and cream together on medium-high for 2-3 minutes, until fluffy and pale yellow in colour. Scrape down the sides of the bowl with a spatula. On low speed, add the egg yolk and increase the speed to medium-high and beat for 1-2 minutes, until the sugar granules fully dissolve and the mixture is a pale white.
Step 3: On low speed, add the flour, oats, baking powder, baking soda, and salt. Mix for a minute, until your dough comes together and any remnants of dry ingredients have been incorporated. The dough will be a slightly fluffy, fatty mixture in comparison to your average cookie dough. Scrape down the sides of the bowl.
Step 4: Pam-spray a quarter sheet pan and line with parchment, or just line the pan with a Silpat. Plop the cookie dough in the centre of the pan and, with a spatula, spread it out until it is 1/4″ thick. The dough won’t end up covering the entire pan; this is okay.
Step 5: Bake for 15 minutes, or until it resembles an oatmeal cookie — caramelized on top and puffed slightly but set firmly. Cool completely before using. Wrapped well in plastic, the oat cookie will keep fresh in the fridge for up to 1 week.
Filling
Step 1: Combine the sugar, brown sugar, milk powder, corn powder, and salt in the bowl of a stand mixer fitted with the paddle attachment and mix on low speed until evenly blended.*
Step 2: Add the melted butter and paddle for 2-3 minutes until all the dry ingredients are moist.
Step 3: Add the heavy cream and vanilla and continue mixing on low for 2-3 minutes until any white streaks from the cream have completely disappeared into the mixture. Scrape down the sides of the bowl with a spatula.
Step 4: Add the egg yolks, paddling them into the mixture just to combine; be careful not to aerate the mixture, but be certain the mixture is glossy and homogenous. Mix on low speed until it is.
Step 5: Use the filling right away, or store it in an airtight container in the fridge for up to 1 week.
Step 6: It will be the death of your wildly dense pie filling if there is any bit of egg white in the mixture. I believe the easiest, and best, way to separate an egg is to do so in your hands. You may also use the two half-shells to separate the eggs, but the cracked shells can tear the yolk open, and you may not totally separate all the white. If you do this by hand, you can feel when you get every last bit of white away from the yolk. Remember to wash your hands under warm soapy water for 30 seconds or more before and after you handle raw eggs!
* You must use a stand mixer with a paddle attachment to make this filling. It only takes a minute, but it makes all the difference in the homogenization and smooth, silky final product. I repeat: a hand whisk and a bowl or a granny hand mixer will not produce the same results. Also, keep the mixer on low speed through the entire mixing process. If you try to mix the filling on higher speed, you will incorporate too much air and your pie will not be dense and gooey — the essence of crack pie.
Reprinted with permission from Christina Tosi’s Momofuku Milk Bar (2011 Clarkson Potter).
Directions
Yield:
Pie
Step 1: Heat the oven to 350°F.
Step 2: Put the oat cookie, brown sugar, and salt in a food processor and pulse it on and off until the cookie is broken down into a wet sand. If you don’t have a food processor, you can fake it till you make it and crumble the oat cookie diligently with your hands.)
Step 3: Transfer the crumbs to a bowl, add the butter, and knead the butter and ground cookie mixture until moist enough to form into a ball. If it is not moist enough to do so, melt an additional 14 to 25 g (1 to 1-1/2 tbsp) butter and knead it in.
Step 4: Divide the oat crust evenly between 2 (10″) pie tins. Using your fingers and the palms of your hands, press the oat cookie crust firmly into each pie tin, making sure the bottom and sides of the tin are evenly covered. Use the pie shells immediately, or wrap well in plastic and store at room temperature for up to 5 days or in the fridge for up to 2 weeks.
Step 5: Put both pie shells on a sheet pan. Divide the crack pie filling evenly between the crusts; the filling should fill them three-quarters of the way full. Bake for 15 minutes only. The pies should be golden brown on top but will still be very jiggly.
Step 6: Open the oven door and reduce the oven temperature to 325°F. Depending on your oven, it may take 5 minutes or longer for the oven to cool to the new temperature. Keep the pies in the oven during this process. When the oven reaches 325°F, close the door and bake the pies for 5 minutes longer. The pies should still be jiggly in the bull’s-eye centre but not around the outer edges. If the filling is still too jiggly, leave the pies in the oven for an additional 5 minutes or so.
Step 7: Gently take the pan of crack pies out of the oven and transfer to a rack to cool to room temperature. (You can speed up the cooling process by carefully transferring the pies to the fridge or freezer if you’re in a hurry.) Then freeze your pies for at least 3 hours, or overnight, to condense the filling for a dense final product — freezing is the signature technique and result of a perfectly executed crack pie.
Step 8: If not serving the pies right away, wrap well in plastic wrap. In the fridge, they will keep fresh for 5 days; in the freezer, they will keep for 1 month. Transfer the pie(s) from the freezer to the refrigerator to defrost a minimum of 1 hour before you’re ready to get in there.
Step 9: Serve your crack pie cold! Decorate your pie(s) with confectioners’ sugar, either passing it through a fine sieve or dispatching pinches with your fingers.
Oat Cookie
Step 1: Heat the oven to 350°F.
Step 2: Combine the butter and sugars in the bowl of a stand mixer fitted with the paddle attachment and cream together on medium-high for 2-3 minutes, until fluffy and pale yellow in colour. Scrape down the sides of the bowl with a spatula. On low speed, add the egg yolk and increase the speed to medium-high and beat for 1-2 minutes, until the sugar granules fully dissolve and the mixture is a pale white.
Step 3: On low speed, add the flour, oats, baking powder, baking soda, and salt. Mix for a minute, until your dough comes together and any remnants of dry ingredients have been incorporated. The dough will be a slightly fluffy, fatty mixture in comparison to your average cookie dough. Scrape down the sides of the bowl.
Step 4: Pam-spray a quarter sheet pan and line with parchment, or just line the pan with a Silpat. Plop the cookie dough in the centre of the pan and, with a spatula, spread it out until it is 1/4″ thick. The dough won’t end up covering the entire pan; this is okay.
Step 5: Bake for 15 minutes, or until it resembles an oatmeal cookie — caramelized on top and puffed slightly but set firmly. Cool completely before using. Wrapped well in plastic, the oat cookie will keep fresh in the fridge for up to 1 week.
Filling
Step 1: Combine the sugar, brown sugar, milk powder, corn powder, and salt in the bowl of a stand mixer fitted with the paddle attachment and mix on low speed until evenly blended.*
Step 2: Add the melted butter and paddle for 2-3 minutes until all the dry ingredients are moist.
Step 3: Add the heavy cream and vanilla and continue mixing on low for 2-3 minutes until any white streaks from the cream have completely disappeared into the mixture. Scrape down the sides of the bowl with a spatula.
Step 4: Add the egg yolks, paddling them into the mixture just to combine; be careful not to aerate the mixture, but be certain the mixture is glossy and homogenous. Mix on low speed until it is.
Step 5: Use the filling right away, or store it in an airtight container in the fridge for up to 1 week.
Step 6: It will be the death of your wildly dense pie filling if there is any bit of egg white in the mixture. I believe the easiest, and best, way to separate an egg is to do so in your hands. You may also use the two half-shells to separate the eggs, but the cracked shells can tear the yolk open, and you may not totally separate all the white. If you do this by hand, you can feel when you get every last bit of white away from the yolk. Remember to wash your hands under warm soapy water for 30 seconds or more before and after you handle raw eggs!
* You must use a stand mixer with a paddle attachment to make this filling. It only takes a minute, but it makes all the difference in the homogenization and smooth, silky final product. I repeat: a hand whisk and a bowl or a granny hand mixer will not produce the same results. Also, keep the mixer on low speed through the entire mixing process. If you try to mix the filling on higher speed, you will incorporate too much air and your pie will not be dense and gooey — the essence of crack pie.
Reprinted with permission from Christina Tosi’s Momofuku Milk Bar (2011 Clarkson Potter).
[img_assist|nid=2077176|title=|desc=|link=popup|align=middle|width=225|height=280]Gabriele Stabile/Mark Ibold