Decorating & Design
DIY: Holiday Lantern
Updated on May 19, 2016

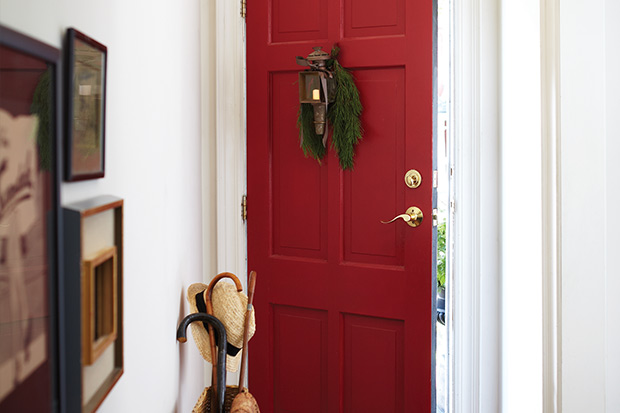
Interiors director Meg Crossley shares step-by-step instructions on how to make a carriage lantern for a festive entry.
 I love the idea of a sconce or lantern on the inside of a front door — it has an old world feel and cozies up an entry. Taking inspiration from a foyer designed by Darryl Carter, I scaled down the project to suit my own house. Here’s how:

Materials
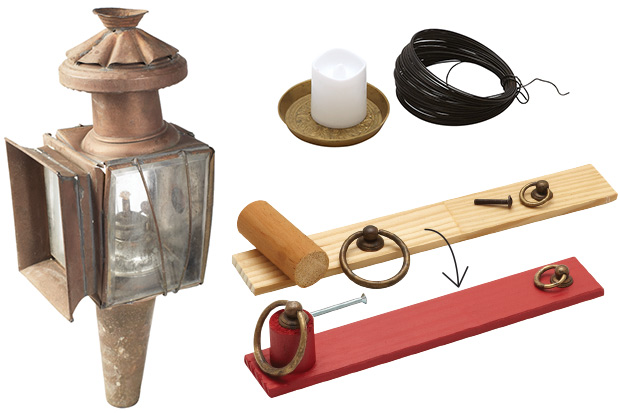
You’ll need an antique lantern, finger-jointed pine trim, saw, 1″-diam. dowel, paint, small and large round drawer pulls, screws, drill, small dish or votive holder, wire or ribbon and a battery-powered candle.
Tip: Bring your lantern to the store to ensure its base fits inside the larger drawer pull.
Step 1: Cut Trim And Level Lantern
Measure the height of your lantern, and cut a length of finger-jointed pine trim to 1″ longer. (Make sure the width of the trim is narrower than the center panel of your door, too.) Next, you’ll need to cut a length of dowel to ensure the lantern sits straight against the door, instead of tilting forward at an angle. Set the lantern on the wood, and lift the base until it’s parallel to the trim. Measure the distance between the wood and the lantern base, then cut the dowel to that length. (I cut my dowel to 1 1⁄2″.) Paint the pine trim and the dowel the same color as the door so they blend into the background.
Step 2: Create Lantern Holder
Pick out two round drawer pulls in similar styles but different sizes. The smaller pull simply screws into the pine trim using the included hardware. The larger pull, however, will need to be attached through the dowel, so buy a longer screw if needed. For example, my dowel was 1 1⁄2″ long, so I needed a 2″ screw. Attach the smaller pull 1⁄2″ from one end of the trim, and the larger pull 1⁄2″ from the other end.
Step 3: Attach Trim To Door
Measure 2 1⁄2″ in from each end of the trim, and make two marks. These are the points where you’ll screw the trim to the door. Measure the distance between the marks, and drill two corresponding holes in the interior side of the door. Screw the trim to the door, with the larger drawer pull at the bottom, and cover all screw heads with paint.
Step 4: Assemble Lantern And Set In Holder
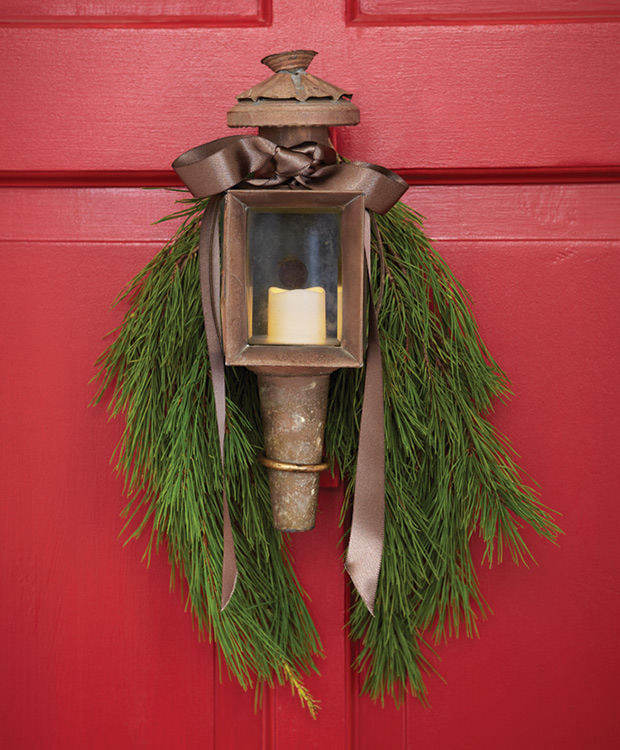
If your lantern has an oil canister inside, remove and replace with a brass dish or glass votive holder. Set the lantern in the larger drawer pull, and tie the top of the lantern to the smaller drawer pull with wire or ribbon to hold it in place. Switch on the candle, place in the dish or votive holder and enjoy.

Tip: Using a battery-powered candle means it’s safe to tuck a few small branches of greenery behind the lantern.
Valerie Wilcox and Felix Wedgwood
Battery-operated candle, Bed Bath & Beyond; trim, dowel, screws, The Home Depot; drawer pulls, Lee Valley.
House & Home December 2013

