

Decorating & Design
September 4, 2015
DIY: Leather Storage Basket
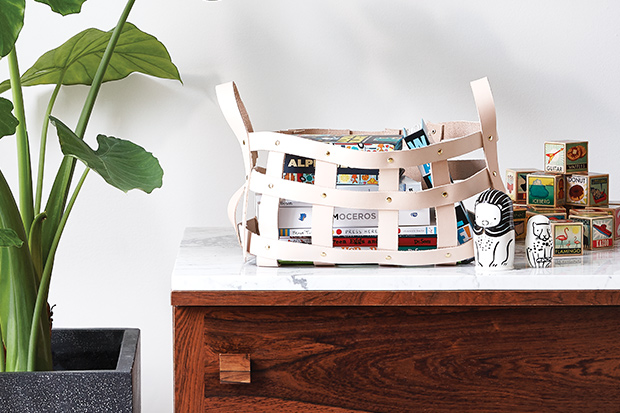
Sarah Hartill shares step-by-step instructions on how to create your own stylish leather storage basket.
 It’s always handy to have a basket or two around, but sometimes wicker or fabric ones look out of place in my modern rooms.
I decided to make one with a more contemporary shape from
a pale natural leather. It’s easy to find leather tools at craft and notions stores, and because I cut the material myself, the finished basket came in under $100.
It’s always handy to have a basket or two around, but sometimes wicker or fabric ones look out of place in my modern rooms.
I decided to make one with a more contemporary shape from
a pale natural leather. It’s easy to find leather tools at craft and notions stores, and because I cut the material myself, the finished basket came in under $100.
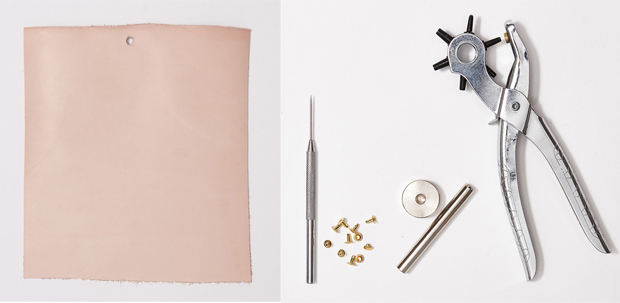
Materials
You’ll need: Leather, rivets, rotary knife, metal ruler, cutting mat or protective surface, needle-nose awl, small mallet, leather punch, rivet setter.
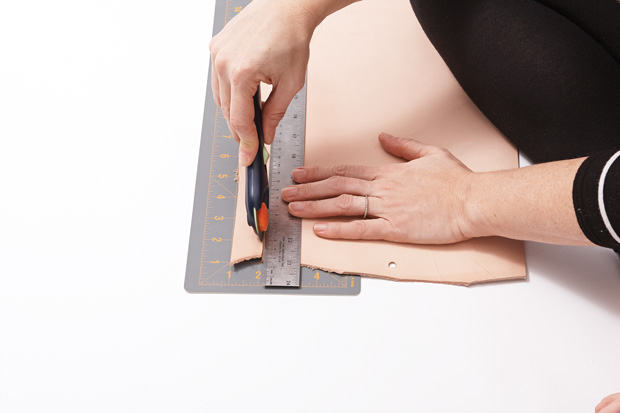
Step 1: Choose and Cut Leather
Pick leather that’s thick enough to feel sturdy but thin enough to cut; mine was 3 mm thick. Cut the leather into 1″-wide strips with a sharp rotary knife. For the basket, you’ll need four 20″-long pieces, three 40″-long pieces and two 26″-long pieces. For the handles, you’ll need two 14″-long pieces.
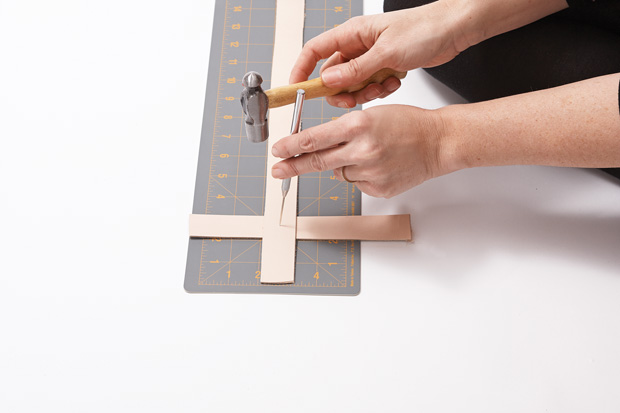
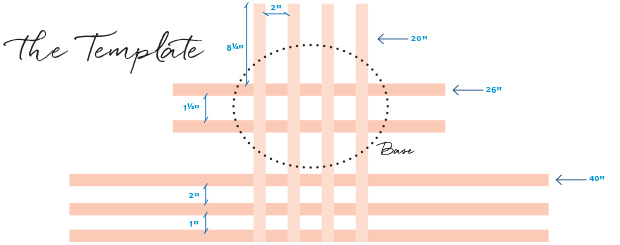
Step 2: Lay Out Basket and Punch Guide Holes
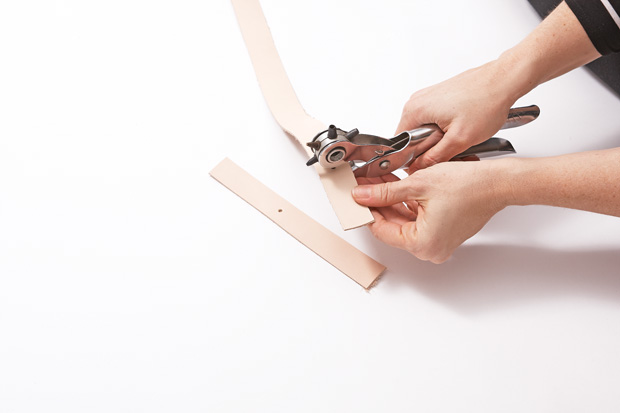
Lay out the strips on a cutting mat or protective surface to form the basket’s framework, as shown in the template (above). The basket is held together by a rivet at each point where the strips overlap. For each rivet, start by punching a guide hole at the centre of the overlap using the mat guidelines or a T-square, plus awl and mallet.
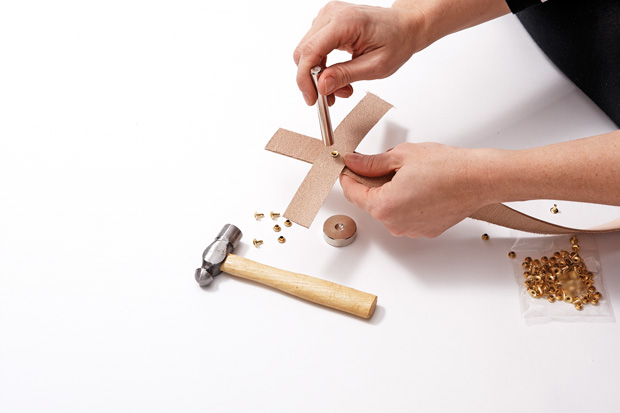
Step 3: Punch Rivet Holes and Attach Rivets
Next, punch a hole for each rivet using a sharp leather punch centred on the guide hole, and attach the rivet using a rivet setter and mallet. (See my tips below on forming the basket.) Choose rivets long enough to fit through two thicknesses of leather. I used 7-mm rivets in a nice brass finish that add a metallic touch against the soft leather.
Tip: As you rivet, start by keeping the strips flat, as shown in the template, and attaching the 40″ and 26″ pieces to the 20″ pieces. Then, rivet the two ends of each 40″ piece so they form three bands. (These will be the basket’s sides.) Fold the 20″ pieces over and rivet to the outside of the bands. (At this point, you should have two longer sides and the base of the basket.) Finish by folding up the 26″ pieces and attaching to the bands to form the two shorter sides.
Step 4: Attach Handles
When the basket is formed, attach the two 14″-long pieces as handles by riveting them to the 26″ pieces. The rivets won’t go through three layers of leather, so be sure to attach at a point with only two layers. Fill with books or toys, and enjoy!
Valerie Wilcox, Alex Lukey (Portrait)
Books, toys, Mini Mioche; artwork by Michelle Glay, Ren-Wil; leather, Perfect Leather Goods; Knife, mat, Fiskars.
House & Home August 2015