Decorating & Design
10+ Colorful Craft Ideas for Your Holiday Decorating
Published on November 24, 2023
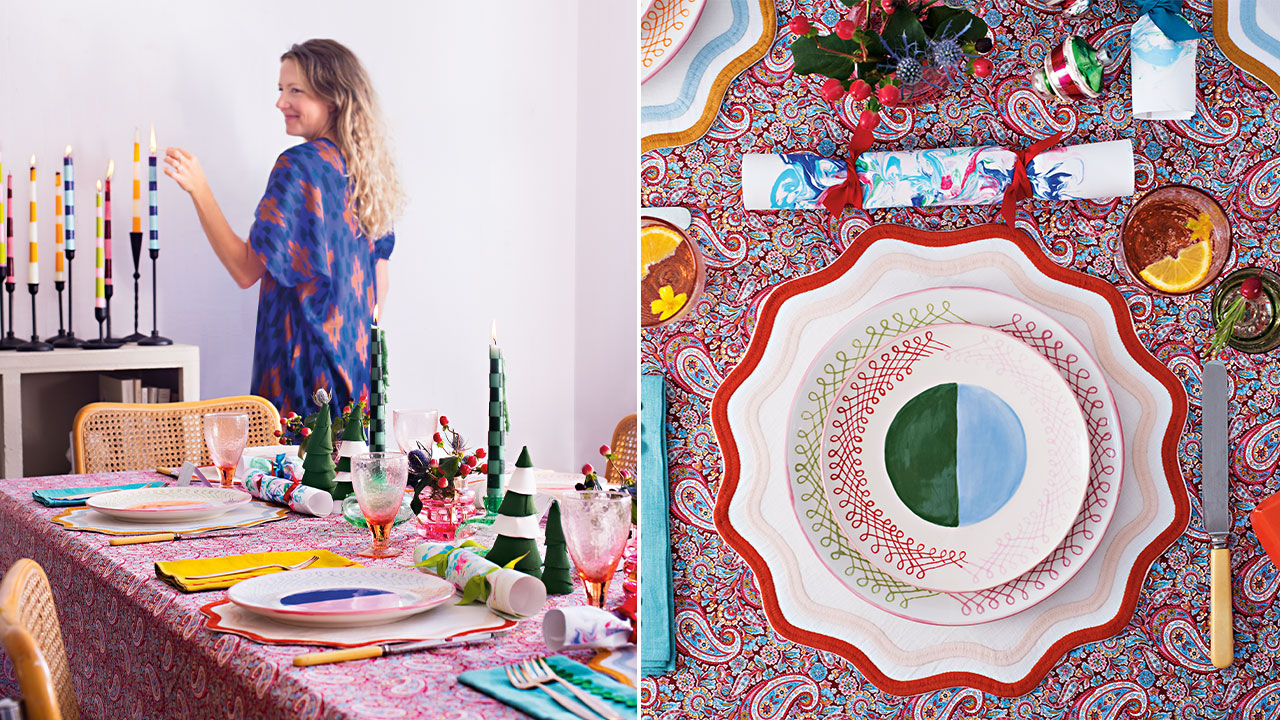
Get in the spirit of the season with some holiday decorating! From flower wreaths to sustainable gift wrap, these colorful craft ideas will spark holiday cheer. Scroll down!
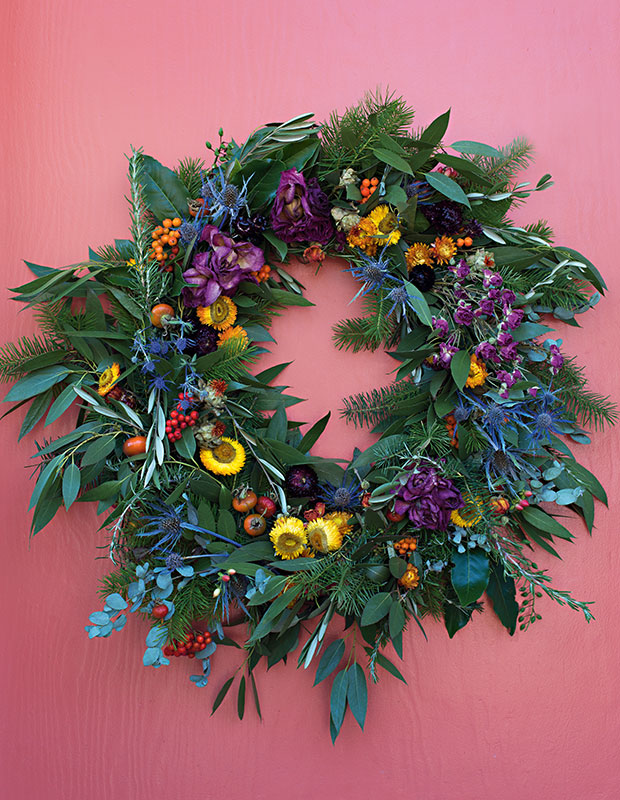
Fresh and Dried Flower Wreath
Using dried flowers as well as fresh means this wreath can last for weeks.
What You’ll Need
- 18″ wire wreath form
- 22-gauge floral wire
- Wire and floral snippers
- Dried strawflowers, roses, spray roses and sea holly
- Fresh ash berries, rose hips, safflower, hypericum berries, mountain ash berries
- Pine sprigs
- Eucalyptus
- Olive branches
- Rosemary
- Laurel
1. Start by wrapping an 8″ piece of 22-gauge wire 5 times around the wreath form in one spot. Overlap the wire so it’s firmly attached, but don’t cut it.
2. Next, gather some evergreen bundles — around 4 sprigs with different types of greenery. Wrap the wire around the bundle and the wreath form 3 or 4 times tightly to attach the evergreens. Gather the next bundle of greens in your hand and wire it to the wreath form. Angle this bundle toward the outside of the form to give your wreath fullness. Continue this process, alternating the angle of the bundles.
3. After all the greenery is attached, cut a 10″–12″ length of floral wire and secure it to the back of the metal wreath form to keep everything in place. This is the only time you cut the floral wire! Once the wreath is full, individually wire in the brightest and largest flowers like the roses and strawflowers. Then, continue to add the remaining floral accents. Finish by wiring in olive branches and more rosemary sprigs.
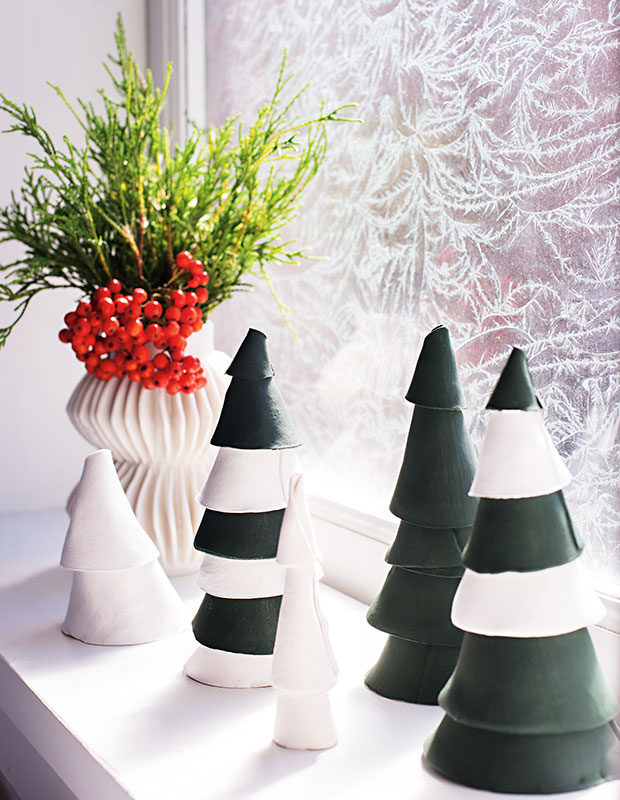
Clay Tabletop Trees
Use these sculptural accents as graphic centerpieces.
What You’ll Need:
- Air-hardening clay
- Compass
- Ruler
- Clay trimming tools including a knife
- Acrylic paint
- Rolling pin
- Water
- Newspaper
1. Roll out a ball of clay until it’s about 1/16″ thick. Score a straight line into the bottom end of the clay using a ruler. Line up your compass on the center point of the line and create a semi-circle. Using a knife, cut out the half-moon shape. (The leftover clay can be rerolled.)
2. Place the clay face down with the straight edge across the top of your work surface. Overlap the right corner over the left corner, creating a cone shape. (Note: The greater the overlap, the narrower the cone will be.) Close up the seams of the cone by dipping your fingers in water and lightly smoothing over the edges. Repeat the process, making a variety of diameters, from 2″–10″.
3. Leave the cones to dry completely (24–48 hours) on newspaper. Dry fit the cones into tree-shaped stacks, labelling the inside of the cones with numbers or letters to remember the order of each stack, then paint the cones with 2–3 coats of acrylic paint. Leave to dry, then restack in finished formation.
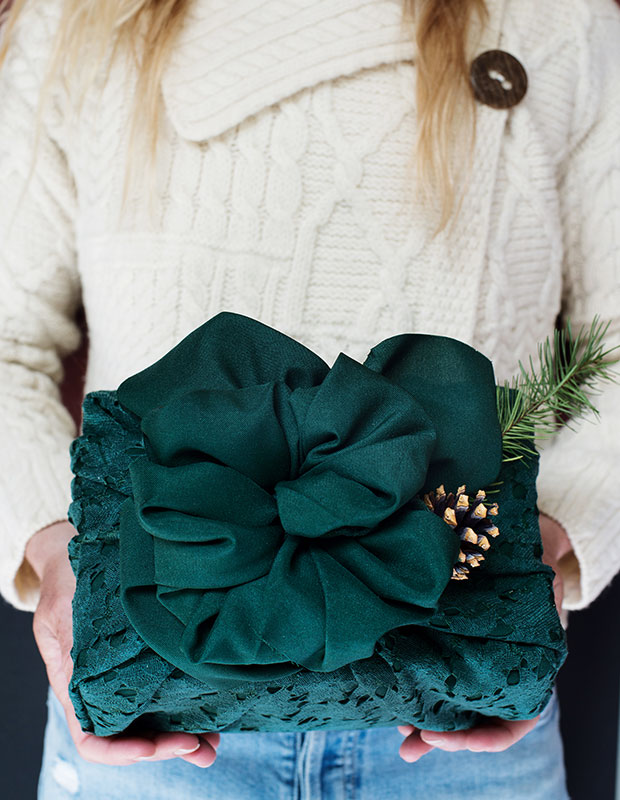
Korean-style Fabric Wrapping
A gift wrapped with a bojagi (traditional Korean wrapping cloth) is a sustainable alternative to using paper. Watch our video here to learn these easy steps!
What You’ll Need:
- 2 squares of matching contrasting fabric
- Sewing materials
- Scissors
- Elastic bands
How to Prepare the Fabric:
If you’re making your own double-sided wrapping cloth, just sew two squares of scrap fabric together back-to-back. Ensure the cloth is twice the size of your gift.
How to Wrap the Gift:
1. Place the gift in the center of the fabric with one corner toward you. Starting with the bottom corner, fold it inward toward the bottom edge of the gift, making sure to leave enough fabric to partially cover, then place overtop of the gift. Repeat the step on the top corner and place it over the previous layer.
2. While holding down the two layers, work on the remaining two corners. Neatly fold the sides of each corner inward before placing them overtop. When you have both the left and right corners pulled over the gift, secure the ends of the cloth using an elastic band and tighten. Flip the ends of the cloth outward so the other side of the wrapping cloth is showing and create a loose bow.
3. Secure the bow using a second elastic band. Fuss with the “flower” until it looks pretty.
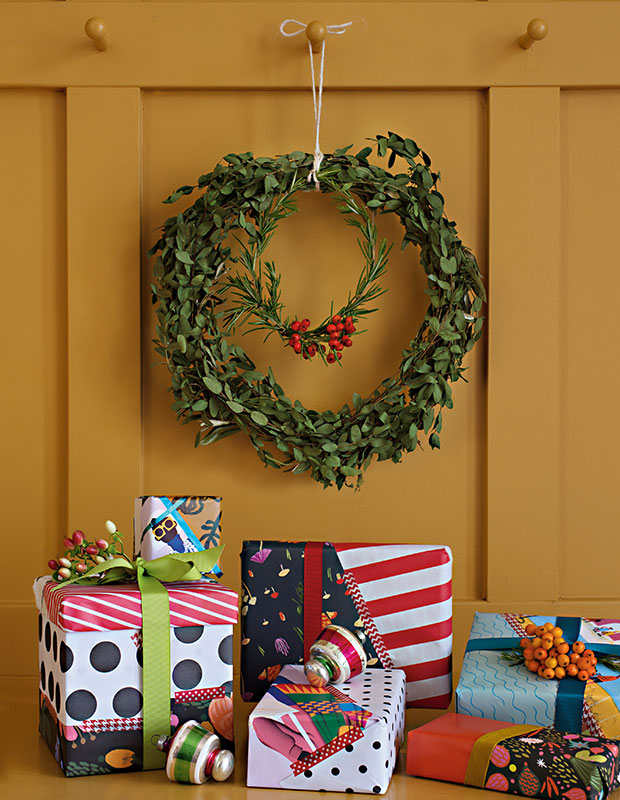
Free-form Wreath
Create an organic look with natural greenery and herbs.
What You’ll Need:
- Greenery, like fresh boxwood or rosemary
- Sprigs of decorative berries or ribbon
- Floral wire
- Grapevine
- Wreath form
- String or ribbon
1. For the rosemary wreath, select 2 large stems of the herb and twist them into a circle, attaching the ends with floral wire. Add an additional sprig of rosemary to the bottom of the wreath to give it some fullness, and then add some berries.
2. For the boxwood wreath, add branches of boxwood with floral wire to a store-bought grapevine wreath form until it’s completely covered. Once the wreath is finished, attach some string or ribbon to hang it.
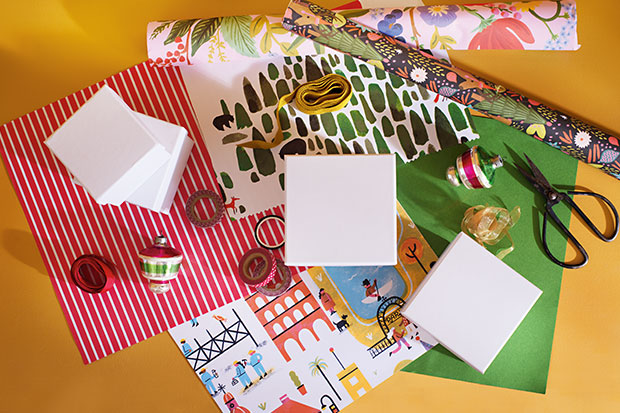
Patchwork Gift Wrap
Instead of throwing away the small ends of paper, combine 2 or more different holiday wraps on one present.
What You’ll Need:
- Leftover wrapping paper
- Ribbon
- Tape
- Decorations, like fresh berries
1. Get creative by applying the paper on an angle and fill it in with a coordinating but different paper. Finish it off with a ribbon and small decorations like berries.
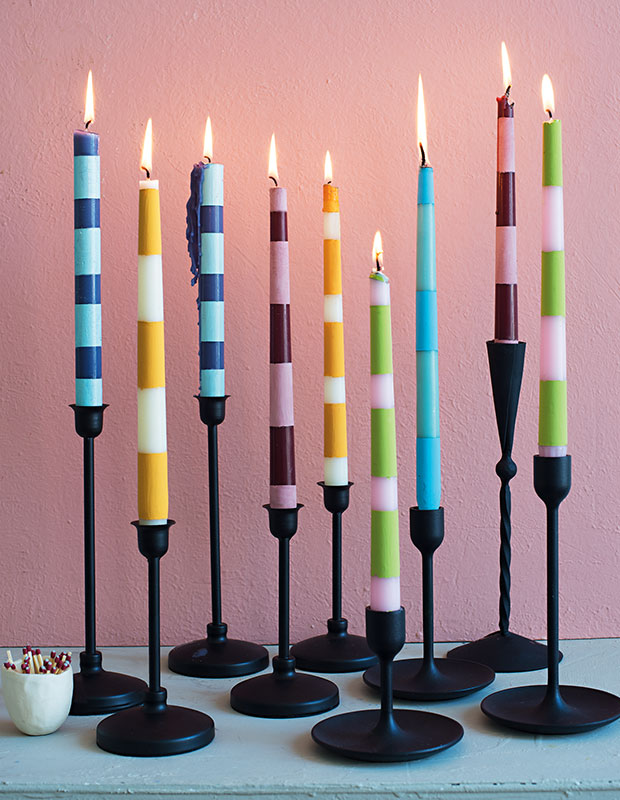
Striped Tapers
Group these colorful candles on a table or mantel for a soft glow with graphic appeal.
What You’ll Need:
- Acrylic paint
- Painter’s tape
- Tapers
- Paintbrush
- Utility knife
1. Apply painter’s tape to areas of the taper candle you want to mask. Using a paintbrush, apply paint to the exposed areas. You’ll need to apply 3–4 coats for a solid finish.
2. Allow the paint to dry completely. Carefully remove the tape (any smudges can be scraped off with a utility knife).
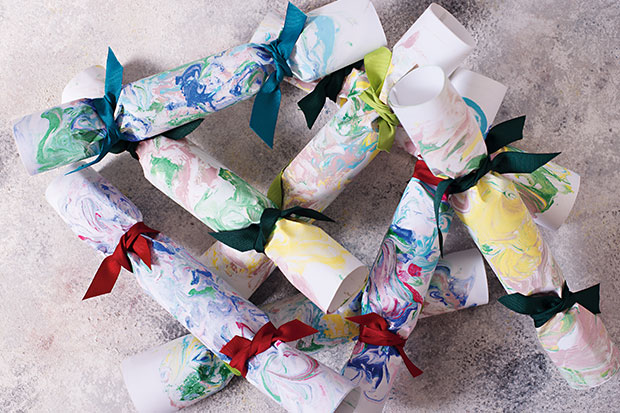
Marble Holiday Crackers
What You’ll Need:
- 12″ x 12″ white cardstock paper
- Foam shaving cream
- Acrylic paint (3–4 coordinating shades per cracker)
- Squeegee
- Stir stick
- Container (large enough for size of paper)
- Newspaper
- Small trinkets and printed jokes for inside the cracker
- Cracker snaps (find these at Amazon or Michaels)
- Double-sided tape
- Ribbon
- Cardboard tubes (or leftover toilet paper rolls)
How To Make Marbled Paper:
1. Fill a container with a layer of shaving cream. Add squirts of acrylic paint in different colors. Swirl the paint gently into the shaving cream with sticks to create streaks of color. Don’t overmix.
2. Place the paper into the container and press down lightly into the shaving cream until all of the paper has come in contact with the foam, around 5–10 seconds. Lift the paper out of the shaving cream and place it on some newspaper or scrap paper. Using a squeegee, remove the excess shaving cream from the paper. Leave to dry.
How To Make Crackers:
1. Lay marble paper upside down on a work surface and position the cardboard tube in the top center of the paper. Apply a piece of double-sided tape to the paper to hold the tube in place. Roll the paper around the tube and secure it with double-sided tape.
2. Pinch the paper on one side of the cracker around the ends of the cardboard tube and fasten it with the ribbon. Place the cracker snap into the open end of the tube and fill the tube with a small trinket, joke, etc. Tie off the other end of the cracker with a piece of ribbon.

Decoupage Cocktail Trail
Create a custom tray using this clever decoupage technique.
What You’ll Need:
- Black tray (or paint a tray black)
- Gift wrap with medium to large pattern
- Decoupage medium, like Mod Podge
- Flat paintbrush
- Scissors
- Black acrylic paint
1. Before you begin, paint your tray black and allow it to dry completely.
2. Cut shapes such as flowers or greenery out of your gift wrap using sharp scissors. Place them on the tray as you go, building the pattern. Add additional layers as needed until you’re happy with the design.
3. Apply Mod Podge to the back of the cutouts, pressing each one down and smoothing out any air bubbles. Repeat with each cutout until the pattern is complete.
4. Cover the entire surface of the tray with the decoupage medium. Allow it to dry and then apply a second coat.
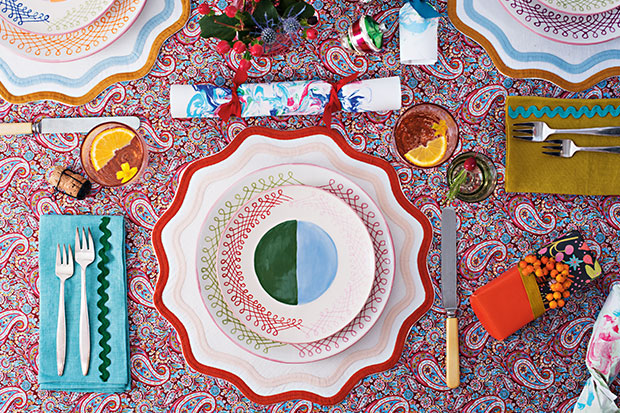
Rickrack Napkins
What You’ll Need:
- Plain fabric napkins
- Scissors
- Rickrack ribbon
- Fabric glue (we used Gorilla fabric glue, which is a 100% waterproof, no-sew solution, washer/dryer safe, permanent bond)
1. Fold a napkin in thirds, and cut the ribbon the exact length of the fabric. Glue rickrack ribbon onto the napkin about ¼” away from the edge and iron in place.
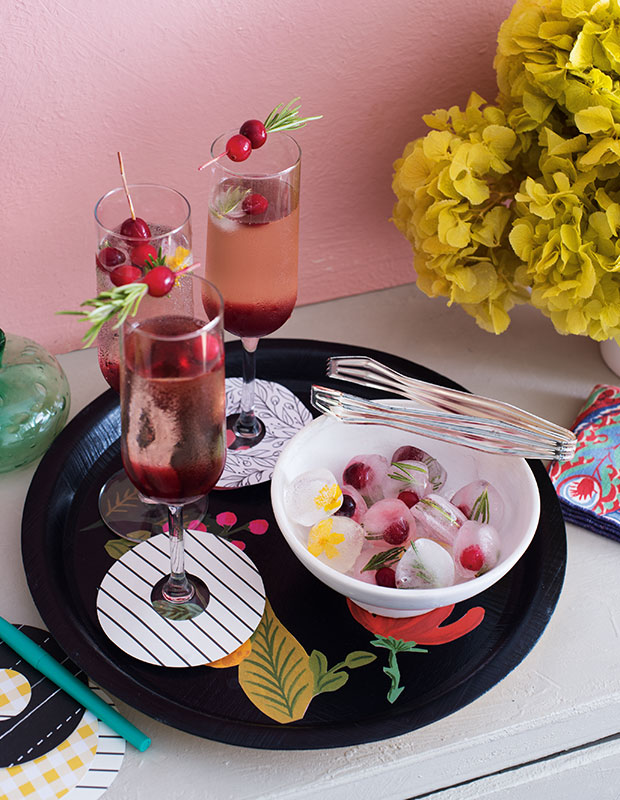
Infused Ice Cubes
These simple ice cubes look festive on your drinks tray.
What You’ll Need:
- Silicone ice cube tray
- Small berries such as currants, raspberries, cranberries and pomegranates
- Rosemary or thyme sprigs
- Calendula flowers
Begin by washing your fresh ingredients and trimming the herbs down to size, about ½”– ¾”. Add the fruit, herbs and flowers to the ice cube tray. Fill the tray with water and freeze for at least 4 hours.
Drink Tags
Help guests keep track of their drinks with these DIY tags in different patterns.
What You’ll Need:
- Cardstock
- Circle templates
- Utility knife or scissors
1. Trace a circle onto cardstock using a template that’s approximately 3″ in diameter. Cut out the circle. Next, find the center and line up a smaller circle template (about 1″ in diameter) so it’s directly in the middle of the larger circle. Trace the smaller circle.
2. Using a utility knife or scissors, make an incision from the outside of the circle to the center point (this makes it easier to cut the smaller circle and allows the tag to slip around the stem). Next, cut out the inner, smaller circle. Leave the tags by your drink station so guests can choose their own tag.
Cathie Ferguson
House & Home


