

Decorating & Design
June 8, 2017
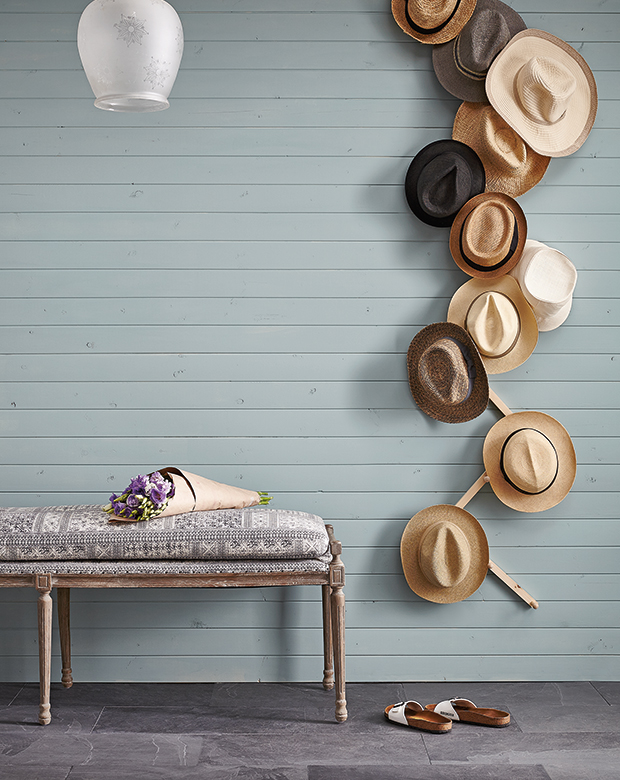
DIY: Wall-Mounted Hat Rack

Senior Design Editor Joel Bray shares step-by-step instructions for a cottage-ready hat rack made from inexpensive wood and pegs.
 Let’s face it: storage is something we could all use a little more of, especially when it looks good and is easy to build yourself. This wooden wall rack is an artistic way to display a collection and it can change seasonally — show off straw hats in the summer and swap in woolly scarves and felt fedoras come winter.
Leaving the rack and hooks raw, without paint or stain, gives it a simple Scandi sensibility. We painted the wall in a serene blue that allows the honey-colored wood to stand out. Keep in mind, the larger the rack the greater the impact.
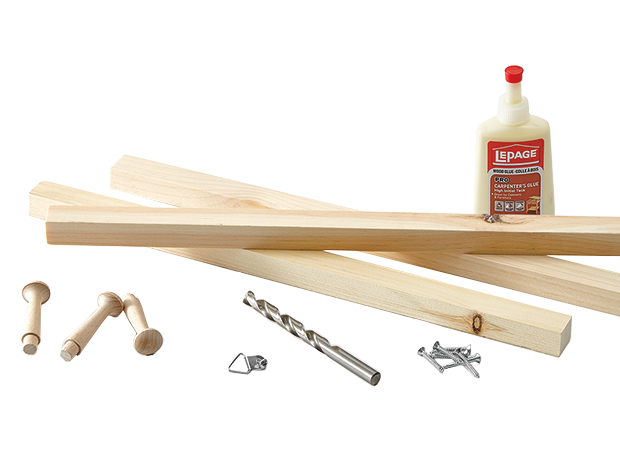
You’ll need unfinished 1″ x 1″ lumber (I used maple), wood pegs, picture hangers, wood glue, drill, screws, screwdriver, ruler and a pencil.
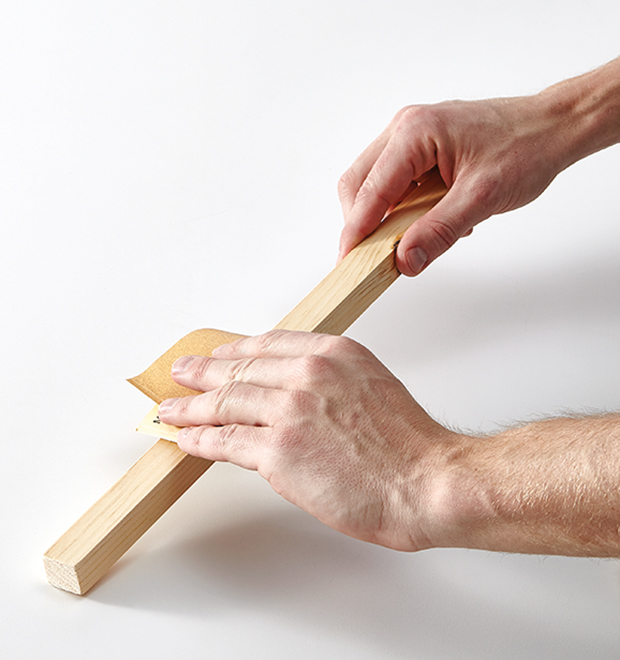
Have seven pieces of 1″ x 1″ wood precut to 16″ long each. Sand each piece using fine-grit sandpaper to eliminate any rough edges.
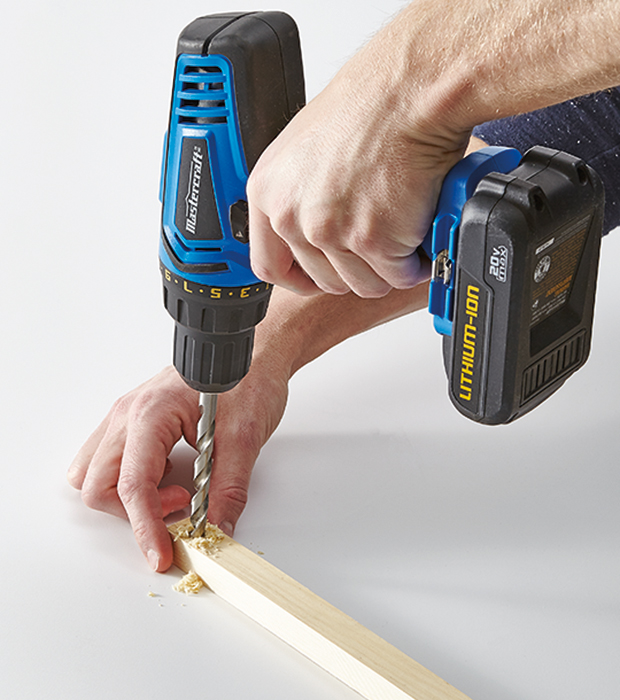
Your drill bit should have the same diameter as your wooden pegs (mine were both 3⁄4″). Place one piece of wood on top of another at a 90° angle. Using the drill, drill a hole partially through the top piece of wood. (The seven pieces of wood will alternate being on top of and underneath each other, so that every other piece, including the first and last, will sit flat against the wall.)
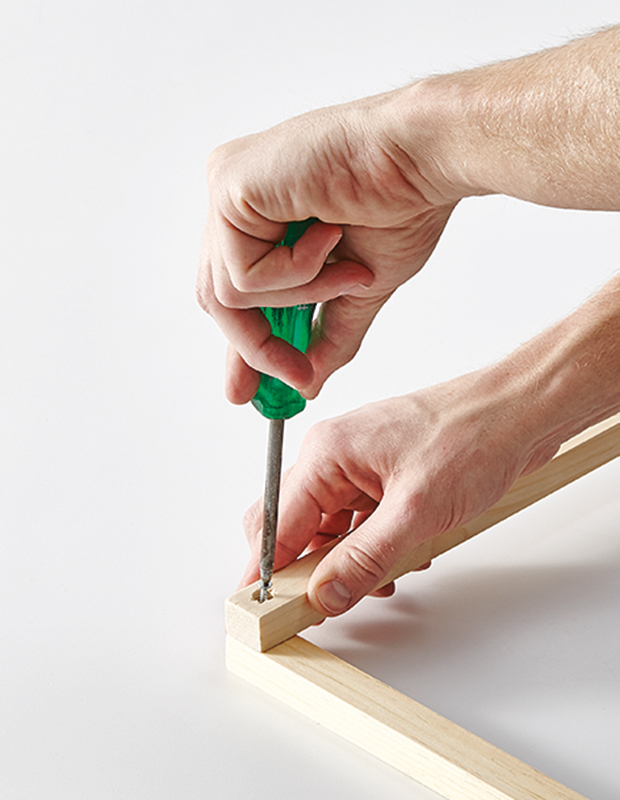
Insert a screw into the hole you drilled in Step 2. Screw it through the top piece of wood and partially into the bottom piece. There should be enough space left in the hole to insert the wooden peg snugly. Repeat Steps 2 and 3 until all seven pieces of wood are screwed together.
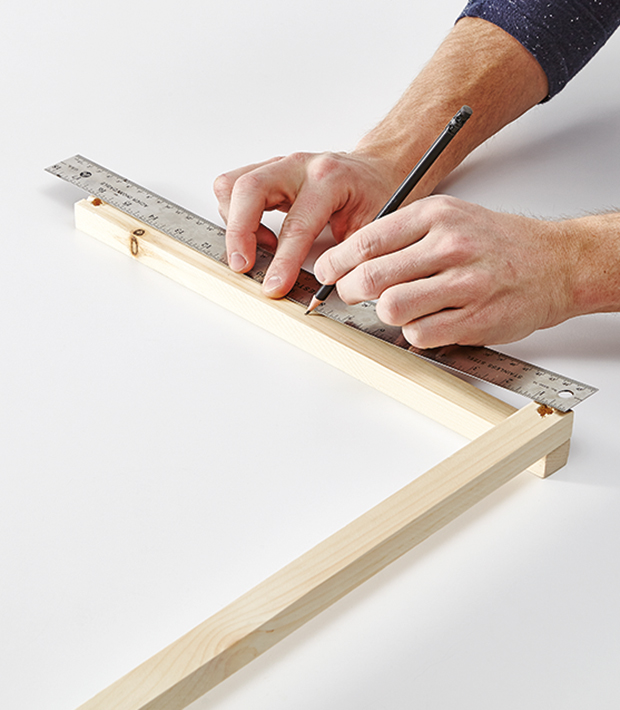
Each piece of wood will have three pegs on it: one at the top, one in the middle and one at the bottom (the top and bottom ones are those inserted over top of the screw that joins the wood pieces together). Using a ruler and pencil, mark the middle peg holes in the center of all pieces of wood. Drill the peg holes at the marks, making sure not to drill all the way through the wood to the other side.
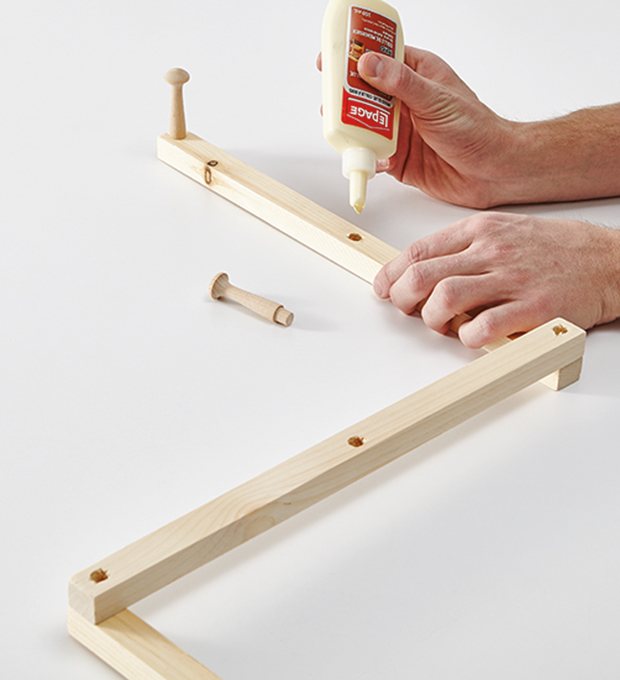
Place a small drop of wood glue into each hole and insert the pegs. The pegs will fit quite snugly, so you shouldn’t need much glue. Let pegs dry for an hour or so.
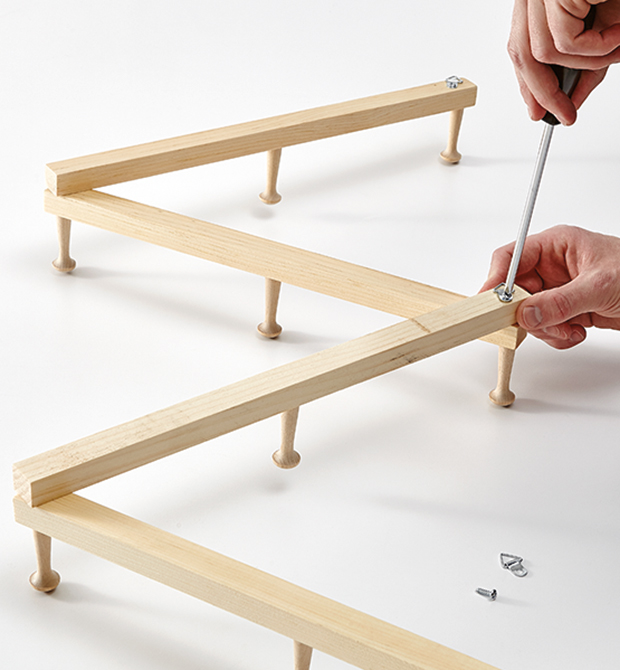
Attach the hangers at the top and bottom of the wall rack and at three other equally spaced points on the back of the rack using a screwdriver and screws. Measure and mark where each wall hook will go on your wall and attach the screws to the wall in these places. Hook the hangers onto the screws. Enjoy!