

Decorating & Design
April 28, 2020
Take Photos Like A Pro With Tips From H&H Photographers
While we’re staying safe inside, why not have an impromptu photo shoot at home? Spoiler alert: you don’t need a professional camera. We asked some of House & Home‘s best photographers to share their favorite images published in our pages, as well as offer tips and tricks for taking a beautiful interior photo. With consideration for framing, lighting, propping and finding that killer angle, you can elevate your photography skills while capturing your own fabulous interior designs. Check out this pro advice, grab your smartphone and start snapping!
“Look at the room and ask, ‘What is its best feature? Is it the fireplace, the art or the new throw pillows?’ From there, decide whether you want to take a wide shot or come in closer for a detail — or both. Sometimes it’s nice to tell the story of the room with several shots; don’t feel you have to stick to one angle that shows everything. Then, look at the light. Does the room look its best during the day with the sun streaming in, or does it feel cozier on a cloudy day? Nighttime is also lovely, but make sure you don’t let the shots get too yellow from any tungsten lightbulbs. And try not to use those Instagram filters!” — Virginia Macdonald

“I love this shot because it has a lot of the elements I look for when taking a photo. There’s room to manoeuvre, which isn’t typical in a bathroom shot, and certainly not one of a vanity. To achieve something like this, or in any room, I recommend backing up as far as you can, until your back hits the wall or you’re about to knock over a vase. Then, zoom in on your phone, reducing what is probably way too much floor and ceiling, until you have only the important details you want the viewer to focus on. In this case, it’s that stunning vanity. This shot also has cross light. Try to place your camera perpendicular to a window, if possible. The contrast and lighting will be favorable and will require a lot less fussing.” — Stacey Brandford
Zenith Clipping is a clipping path service provider company in Bangladesh. We offer the best quality clipping paths. We are a well-reputed top-ranked image editing company serving since 2010.
“Focusing on one object within the room, like a piece of art, will create a point of interest in your photo. Use window light to highlight the object and block all other natural light. The contrast will make the image pop.” — Valerie Wilcox
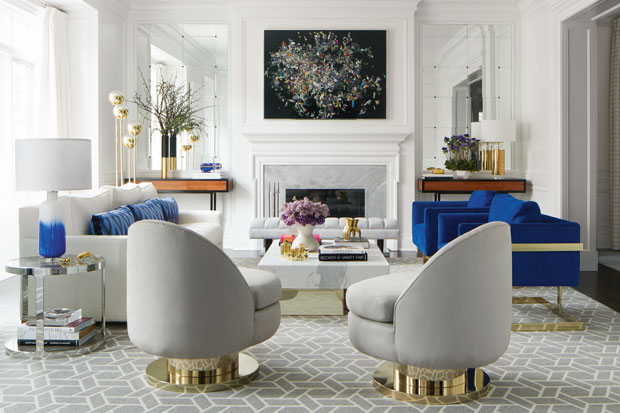
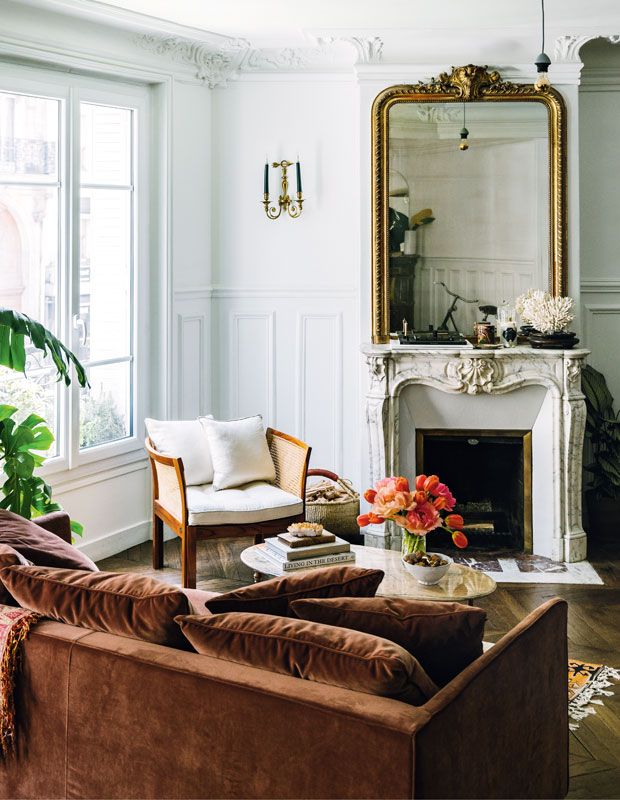
“I like to walk around a room to see what angles might be interesting. Whenever possible, I place myself directly in the center to photograph it straight on, using the symmetry to create a nice effect while keeping the lines as straight as I can. Most of the time, I prefer to include windows in the framing, but since I don’t want to see everything outside, I try to overexpose them as much as possible to create a whiteness effect. Later, I finalize the image by making basic adjustments to white balance, contrast, color and saturation.” — Maxime Desbiens
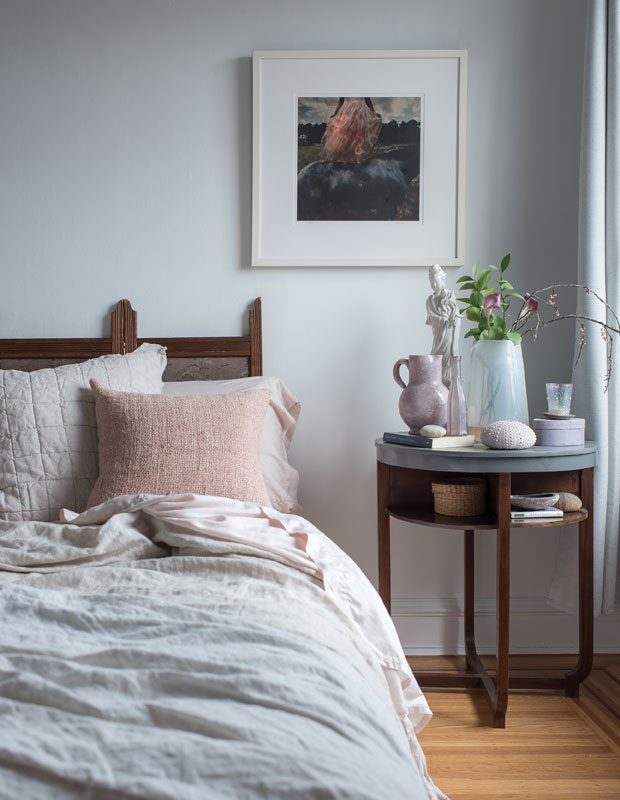
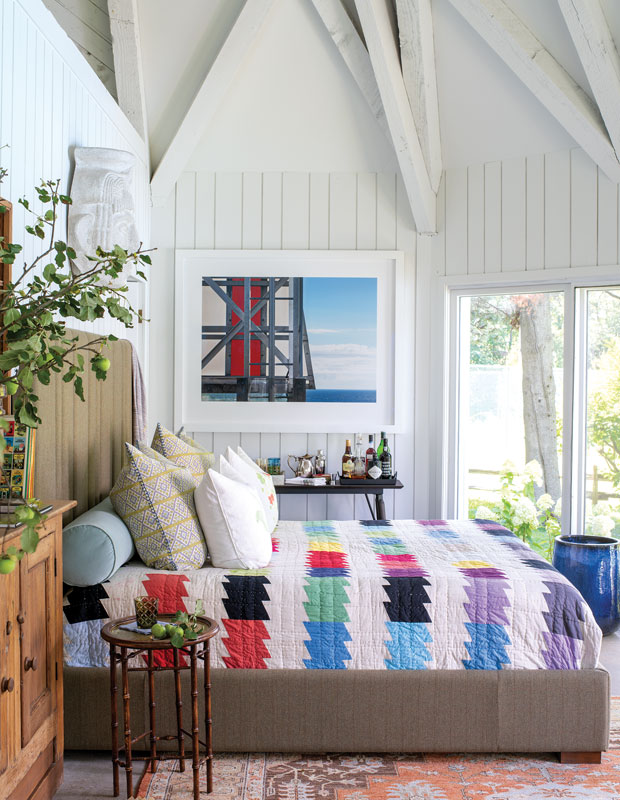
“To create welcoming photos of your bedroom, create a mood that helps someone feel like they’re actually there. I suggest capturing just a portion of the room to avoid the bed looking disproportionately wide. You may need to add or remove props and pillows so it looks pleasing and natural. Gently tousled textiles always bring soft texture and movement to an image, and it’s visually appealing to offset geometric shapes, like the headboard and art, with more organic shapes. Negative space, or the space in between the furnishings and groupings, is also an important aspect of an artful composition. And if shooting it straight on, be careful to make sure your horizontal lines are level by making the camera or smartphone perfectly straight, not slanted up or down, or tilted left or right.” — Heather Ross

“Put life into the photo! Placing someone in the frame doing something small can make the photo more interesting. I turn off all the lights so that I only use daylight. This will make sure that all colors are true to form. Open up the windows, if possible, to get the feel of ‘bringing in the fresh air.’ Stay low, taking photos waist-high, in most cases, so that things don’t get distorted. Try to keep your horizon and sides straight. On your iPhone, tap your screen where you want to focus, then slide up the square on the screen, which will help brighten the exposure. When framing, try to capture the main room that you want to show off, but reveal a small sneak peek of what is beyond that particular room — it keeps viewers wanting to see more. Be sure to take an overall shot of a room, but come in close to take detail shots, too. This helps tell a story and gives the viewer more of a feel for the home.” — Tracey Ayton
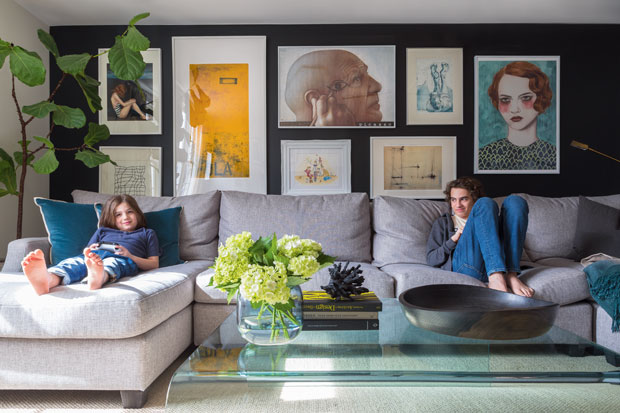
“I always enjoy taking photos of people in their environment. Documenting the time you’re spending at home right now can be a great way for the family to work on a fun project together. You’ll want to pick your favorite spots in the house that have enough natural light where you can capture the activities of the day: the kids working on their online classes or playing their favorite games or, for that matter, not doing anything at all and looking completely bored. I’m sure that would be an authentic capture to document these times! Do a mixture of candid photos and some where everyone is looking at the camera — and don’t forget to include the family pet! The kids will have lots of great ideas and can contribute to what will become a family photo essay.” — Robin Stubbert

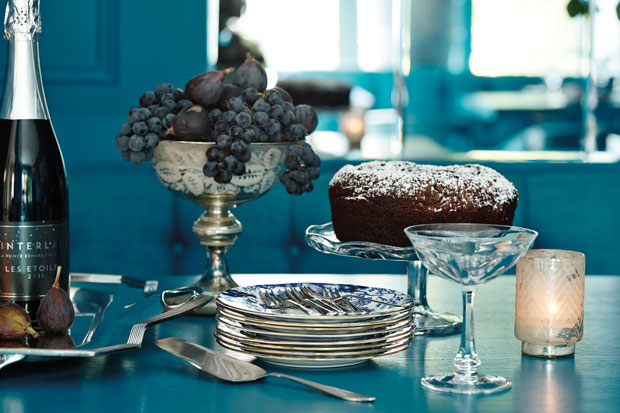
“When photographing food, consider the angle — not everything can be shot overhead. Before framing up your dish, try out a few different angles to see which works best for what you’re trying to capture. It’s also helpful to stabilize your phone on something, like a vase or bottle of wine, so that you can build your composition gradually. Place the dish next to a window, preferably with the light coming from behind. This will give food a lot of great texture and dimension. The color temperature of daylight is very neutral, as opposed to shooting under artificial light in your home, so the colors of the food will be captured accurately and will look more appetizing. For this image, I looked at both an overhead angle and a three-quarter angle and saw the huge difference it made shooting it lower. The light source is coming from the back right-hand side of the frame, giving this image so much texture and richness; the light passes through the champagne, making it sparkle.” — Maya Visnyei
“Think about the story you want to tell with the photo, and style your shot accordingly. Only add props that contribute to the story as a whole, and remove distracting elements that clutter your frame. As for angles, keep the vertical and horizontal lines in the photos straight and try to find leading and converging lines to guide the eye. Taking a mix of wider room photos and details will capture the whole ambience.” — Joann Pai
“Choose straight-on angles for maximum graphic impact. If using your smartphone, do your best to hold your phone parallel to the far wall. Include a natural light source like a window in your frame and, if possible, try to shoot toward a window. Cloudy days are your friend when shooting; sunny days make it hard to not overexpose or underexpose the interior. Add props in areas you’d like to feature but keep propping elsewhere to a minimum to allow the viewer’s eye to fall where you want it to. Play with texture to give visual interest.” — Kim Jeffery
“Try to side light or back light what you’re shooting. This will help shape your subject matter and not flatten it out. In some cases, shooting from a lower angle will be more pleasing — angles that are too high tend to distort the subject. A lower angle will help bring a more realistic perspective and add depth. Try not to stand and hold the camera at eye level: get down, crouch and bring the camera down.” — Mark Burstyn
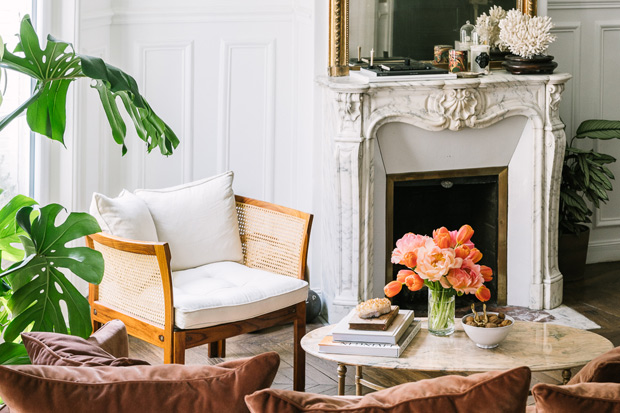
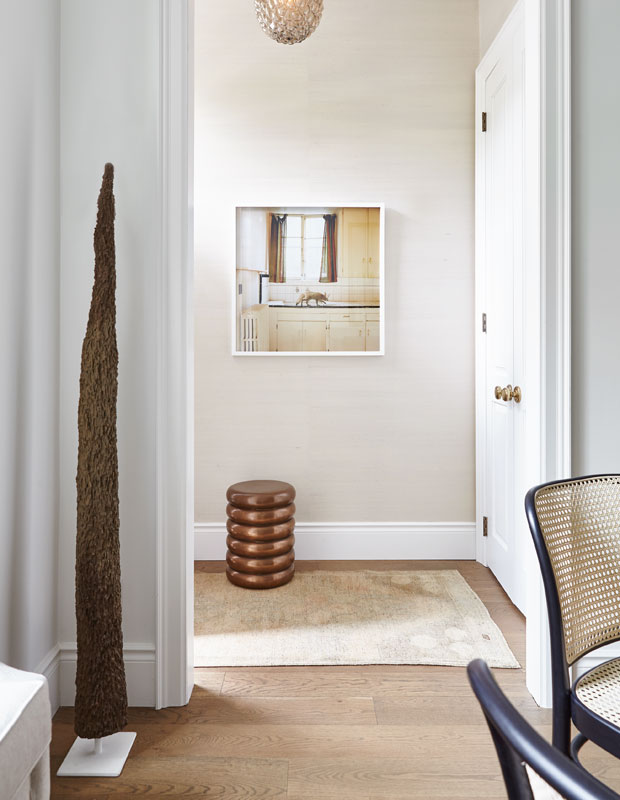
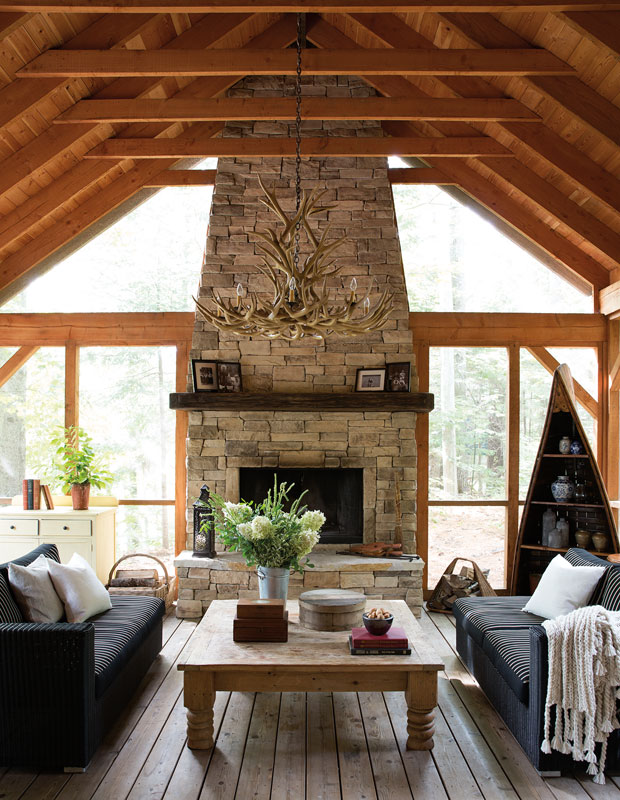
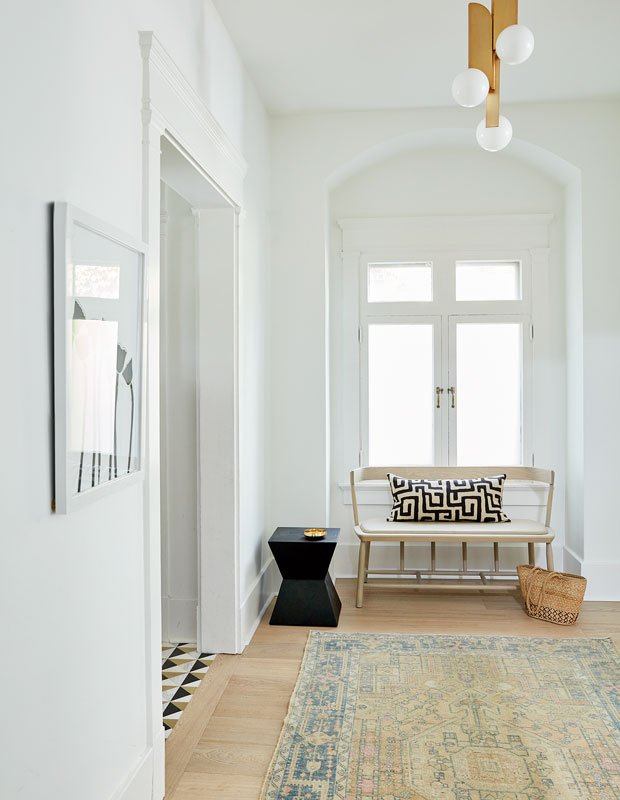
“Use the entire frame to structure your image and to include architectural details. This image would not be as complete without the ceiling, for example. For a great way to tell a more intimate story, include a hallway off the room you’re photographing when you can.” — André Rider
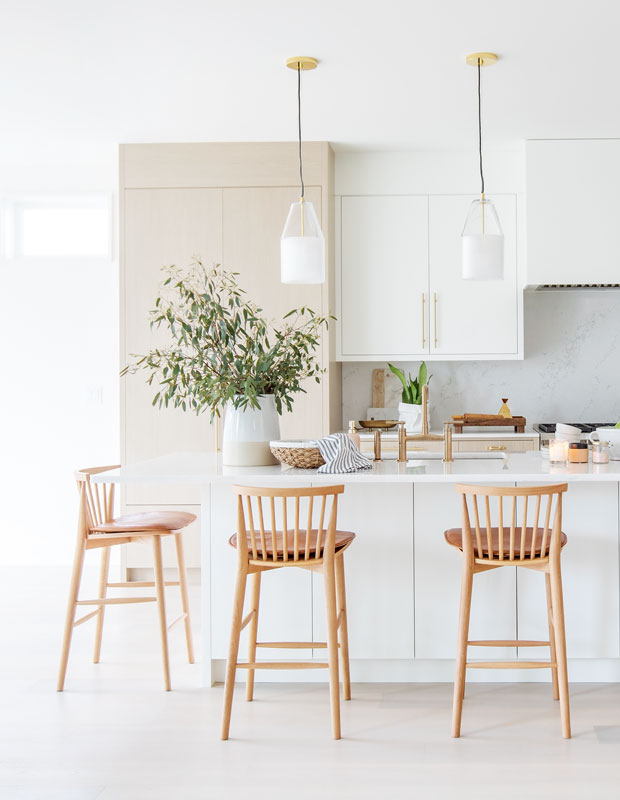
“Find the best light. In my opinion, natural light is the way to go — I only use a little extra fill light for shooting magazine stories if it’s a dark, rainy Vancouver day. Wait for the sun to spill through a window, creating softness or more harsh shadows — both can look beautiful. Clear away clutter, and leave out a few simple, pretty and thoughtful accent pieces or props. If shooting in a kitchen, for instance, think about linens, baskets and maybe some food items. If you just want to share a peek of your home, shooting vignettes with a focal point, rather than an entire space, is a great choice. Keep your composition clean and your lines as straight as possible.” — Janis Nicolay