

DIY Projects
November 23, 2015
DIY: Holiday Cookie Package
Assistant design editor Jennifer Koper shares a beautiful cookie wrapping idea for the holidays.
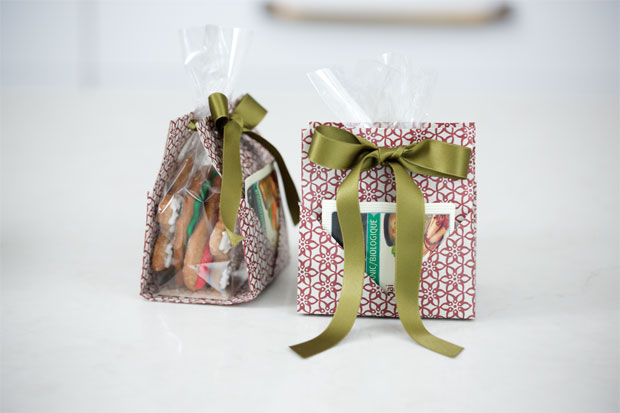
 I really enjoy giving and receiving baked goods around the holidays – especially when they’re wrapped in pretty packaging. Recently I was tasked with creating a unique cookie wrapping idea for the Pillsbury cookie challenge, alongside three other editors. My packaging idea was an origami-style container with two pockets so that you can add a little something extra, like a gift card or a tea bag, to go with your cookies.
We asked you to vote for your favorite idea, and my origami package garnered to most interest. Here are step-by-step instructions on how I made it along with a template so that you can make it, too!
Materials
You’ll need paper that can be cut to 19” x 9” (Note: I used Nepalese paper from The Paper Place, but you can use any paper that is stiffer or thicker than your average paper, like wrapping paper or leftover wallpaper), 19″ ruler (or longer), pencil, single hole punch, ribbon, cellophane bag(s), cookies or other goodies.

Step 1: Cut And Measure Paper
Cut paper into a 19” x 9” rectangle. (Note: this step is essential or the other measurements will not work). Along the back of the paper, draw and measure the following lines (refer to above template):
- Measure 5.5” x 2.5” rectangles from each corner and cut them out.
- Draw 2 lines running along the length of the rectangular paper, measured at 2.5” from either edge (denoted as fold lines #2 in the template)
- Draw 2 more lines running across the shorter vertices each at 8” from the edge (these lines are denoted as fold lines #3 in the template)
Step 2: Make Folds
Follow the below instructions or watch the video to learn how.
- Fold along the dotted vertical and horizontal lines numbered 2 and 3 in the template to make creases, and then unfold.
- Fold along the diagonal lines marked as fold lines number 1 in the template. Keep them folded.
- Fold in along fold lines number 2.
- Flip it over and start folding up along fold lines number 3.
- Tuck the long flaps into the pockets that your folding has made, as far as they need to go in order to cover any of the paper’s backside showing in the pockets.
- Fold the top, which will be approximately along fold line number 4.
Step 3: Package Cookies
Hold the two flaps at the top together, punch two holes with a hole puncher, and thread your ribbon through loosely. Fill a cellophane bag with cookies and insert it into the cookie package frame you made. Tighten and tie the ribbon, making sure to catch the cellophane bag so that it shuts. Snip excess cellophane shorter, and insert extra goodies into the pockets.
The more you make, the faster and easier the process becomes. Have fun packaging!
Find delectable holiday cookie recipes here!