Budget
This Budget-Friendly Fireplace Makeover Delivers Vintage Charm In Spades
Updated on November 28, 2023
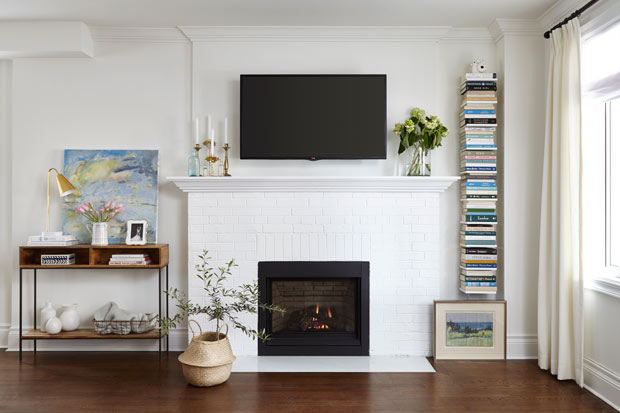
H&H digital editor Adena Leigh shares an inside look at her fireplace makeover.

Last spring, my husband and I purchased our first home. We fell for its friendly blue door, charming kitchen and leafy backyard, but there was one feature we were less than in love with: the fireplace. Due to an unfortunate ’90s renovation, the original brick mantel was covered with drywall, and the gas insert was too small for the scale of the surround. It was a far cry from the beautiful fireplaces we’d seen in other 100-year-old houses.
Working with a first-time homeowner’s wallet, I was determined to bring the character back. I looked to the original mantel for inspiration, and kept the current structure to stay on budget. Our new fireplace nods to the past while still feeling contemporary, and it changes the feel of our entire main floor. Colorful decor and greenery keep it looking fresh no matter the season — even if we don’t turn on the heat until fall. Here’s an inside look at the design process from start to finish…
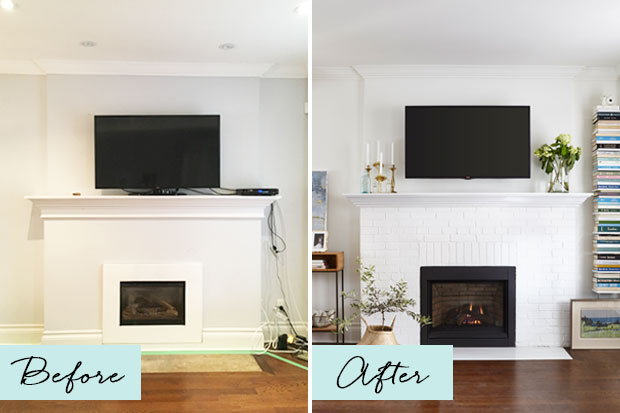
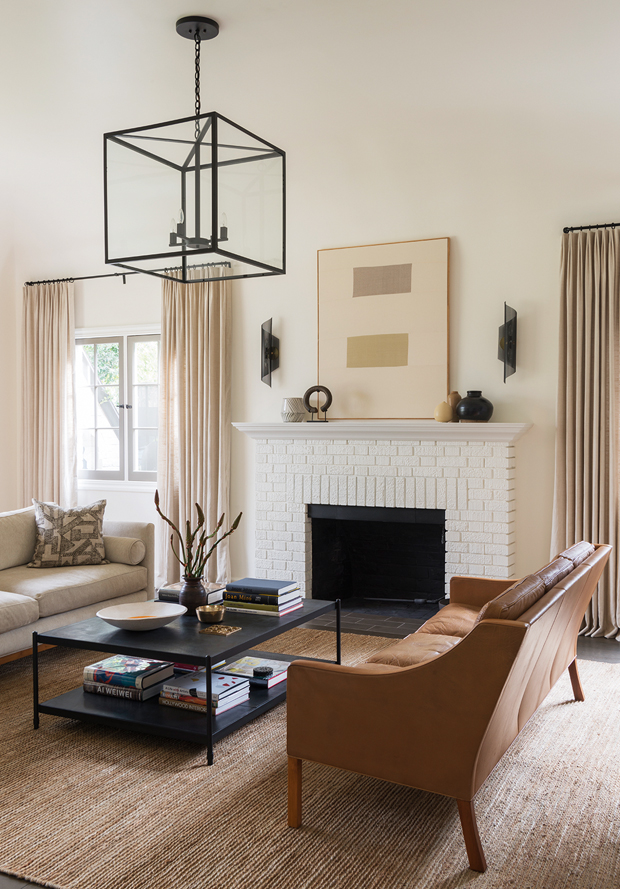
I wanted the fireplace to honor the bones of the house, and was set on removing the drywall to reveal the original brick mantel. But after peeking behind the gas insert with a flashlight, it was evident the brick couldn’t be salvaged. So, I decided to keep the drywall in tact and add brick veneer on top to mimic the original look. This image from the January 2018 issue of House & Home was my inspiration! It’s clean and contemporary while still relating to the home’s history.
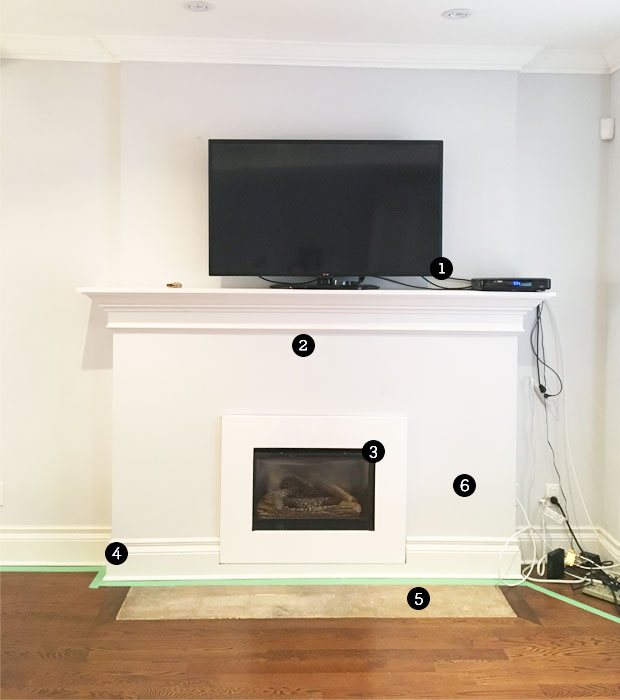
Now that the fireplace design was finalized, it was over to our contractors, the awesome team at Setter. Here’s what needed to happen…
- Mount the TV and hide the cords.
- Add brick veneer to the drywall.
- Expand the fireplace opening to complement the scale of the surround, and install a new gas insert.
- Remove the baseboards for a clean, crisp look.
- Replace the hearth.
- Brighten everything up with a fresh paint job.
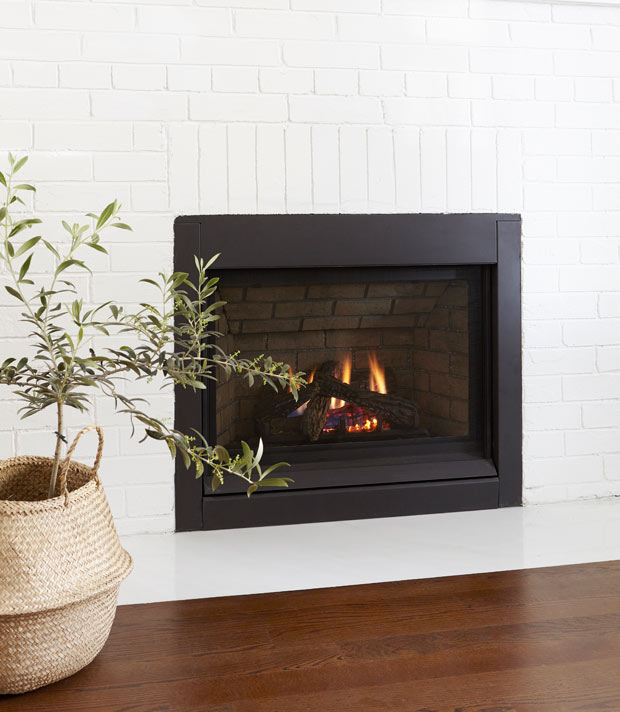
While I love the look of traditional wood-burning fireplaces, going this route had a number of pitfalls. Not only do they require a ton of maintenance, but we would have needed to get our chimney lined, which could have easily blown our budget. A gas log set was another option, but they require an open chimney vent, resulting in a draft. A gas insert, on the other hand, could provide cozy flames with the flick of a switch — but could it look as beautiful as the real thing? I was sold when I found Regency’s P33CE Panorama gas fireplace at Barbecue World, which I customized with a clean edge finish and rustic brick panel.
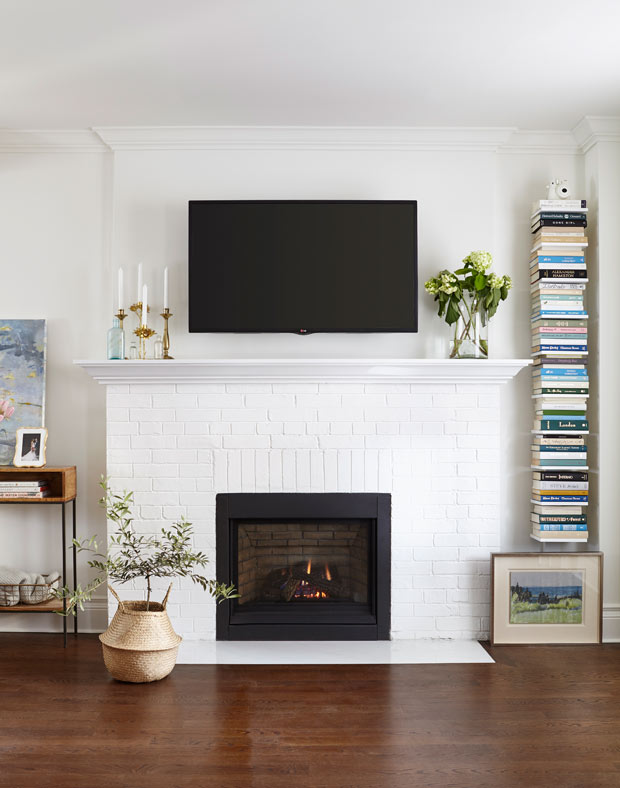
Setter connected us with a brick veneer pro, who was able to mimic the look of real brick. He even laid the brick veneer in a pattern authentic to the time our house was built 100 years ago. If you look closely, you’ll notice that every five rows, a line of smaller brick is placed. I now notice this brick pattern on historical buildings everywhere!
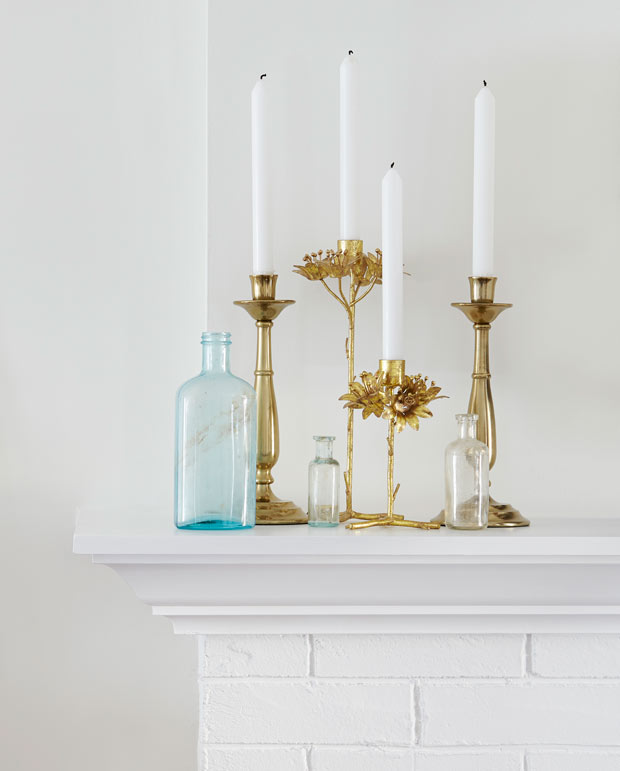
After spending hours poring over mantels on Pinterest, I realized that our current mantel was nothing a few brass candlesticks and vintage apothecary bottles couldn’t fix! We also removed the bottom few inches of molding for a more defined edge.
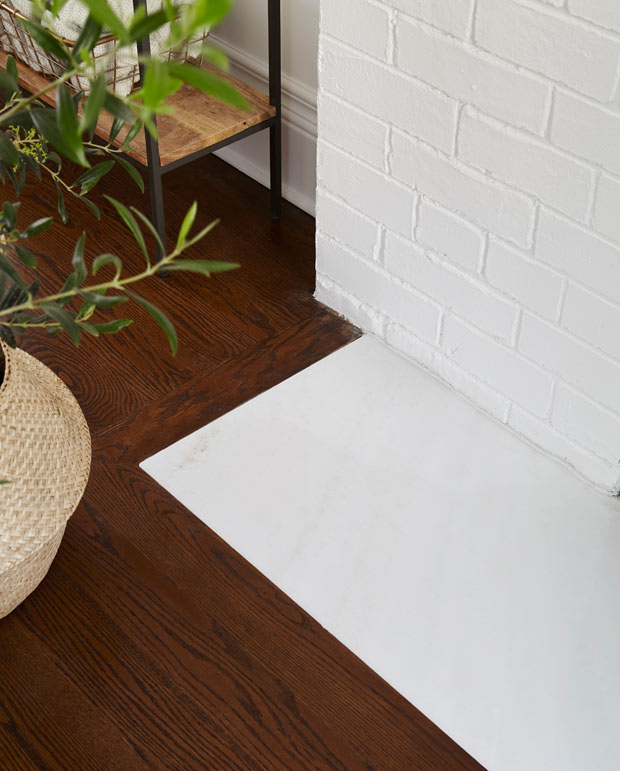
Hearths should be made of natural material that can stand up to heat, which is why marble is such a popular option. We sourced ours from Crystal Tile & Marble, and chose an off-cut to avoid having to purchase a whole slab. This Bianco Laser marble’s lack of veining and light color make it the perfect match for the whitewashed brick.
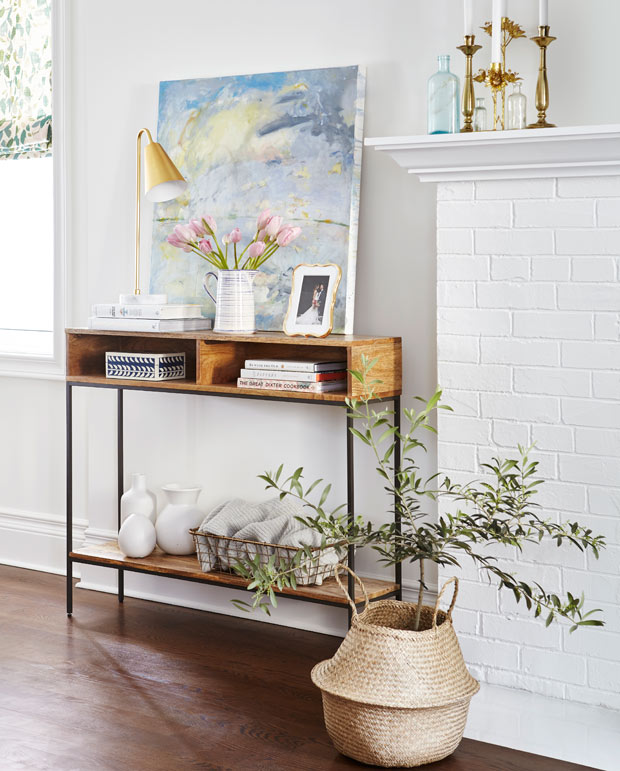
Our fireplace is off-center in our living room, making built-ins a less appealing option. Instead, I chose to go with freestanding storage in the form of a wooden console table to bring in some warmth. Colorful art, playful accessories and greenery add a fresh look.
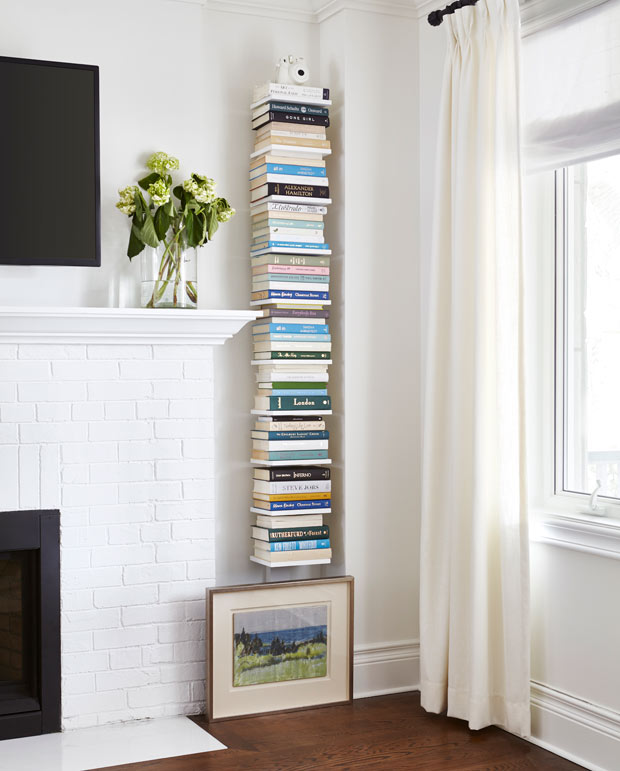
This tiny nook needed something small enough to fit and big enough to make a statement. With a box full of books sitting in our storage room, a stack of narrow floating shelves was the perfect solution!
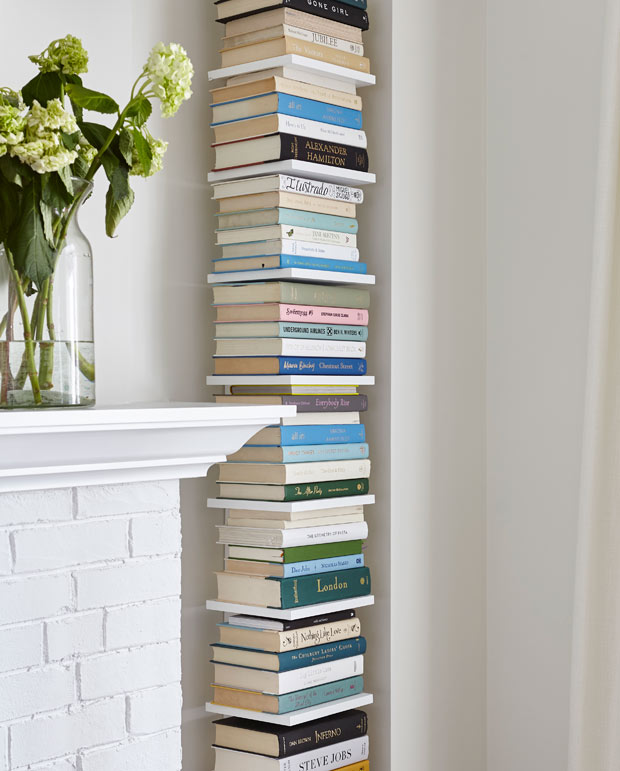
I placed my paperbacks spine-in so the weathered pages were visible, offering a hit of patina, and took the slips off our hardcover books to reveal the colorful covers. I supplemented our collection with vintage tomes from used book stores in bright hues for drama.

We couldn’t be happier with the end result! What do you think? Do you have any questions? I would love to hear from you! Let me know in the comments below or find me on Instagram @adenaleigh.
Valerie Wilcox
Adena Leigh

