Decorating & Design
May 9, 2017
How To Make The Most Exquisite Paper Flowers

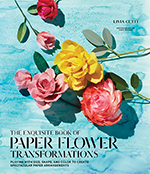
Unlike fresh-cut flowers, paper blooms last forever. And if you make them like floral stylist, crafter and creative director Livia Cetti, they might even be mistaken for the real thing. One of the top paper-flower artists in the U.S., Livia recently released her second book, The Exquisite Book Of Paper Flower Transformations. Below, we share a paper rose project from the tome. “I thought a lot about how to translate what I was literally seeing onto paper, and came up with the natural-looking Eden Rose” she says. “Instead of a stylized stamen, the Eden Rose doesn’t have a traditional center — you can’t see it on the bloom.” Find the step-by-step instructions below, and try playing around with different configurations as you make yours.

General materials:
- Scissors
- Green floral tape
- 18″ length 18-gauge reinforcement wire
- Wire cutters
For petals:
- Six 3″ x 20″ strips yellow tissue paper
- Fuchsia fabric dye
For flower bud ball:
- 20″ x 30″ sheet tissue paper (or use leftovers from the petals)
- One 18″ length 18-gauge pre-taped wire
For leaves:
- 19″ x 25″ sheet green Canson paper
- Hot glue gun
- Hot glue sticks
- Four 9″ lengths 18-gauge pretaped wire
- Four 1⁄2″ x 2″ pieces light-green tissue paper
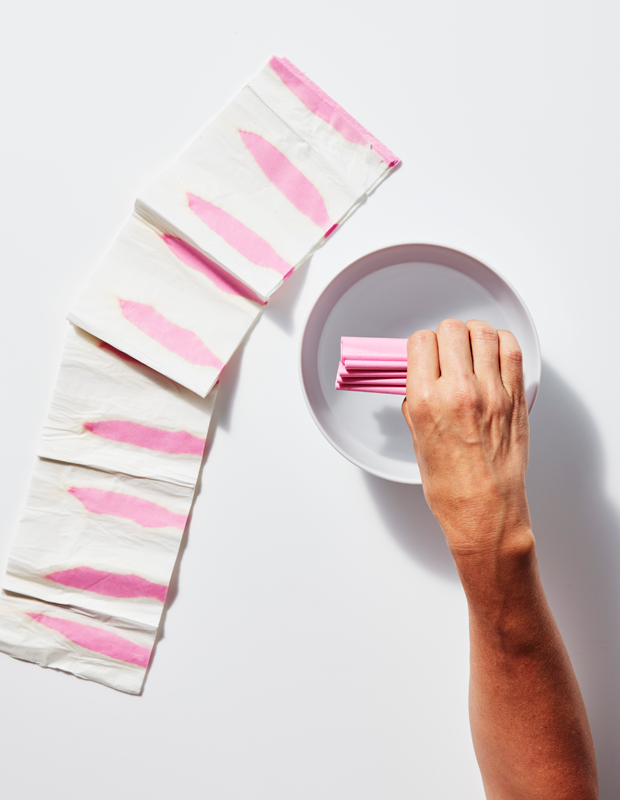
Gather strips of yellow tissue paper. Loosely fold the short end of the tissue paper stack several times until you have a bundle that is easy to hold and easily fits into the dyeing dish. Dip one lengthwise edge of the bundle 1″ (2.5 cm) into the liquid for about 3 seconds. Lift it out and let any excess solution drip off, then carefully unfold (but do not separate) the tissue bundle. Hang up the bundle of strips with a clothespin or other type of clip. Be careful when handling the whole bundle; tissue rips easily. If you’d like to reduce the drying time, use a blow dryer on a low, hot setting. Aim the dryer at your hanging batch of paper and move in a slow, circular motion. Otherwise, allow the paper to air-dry.
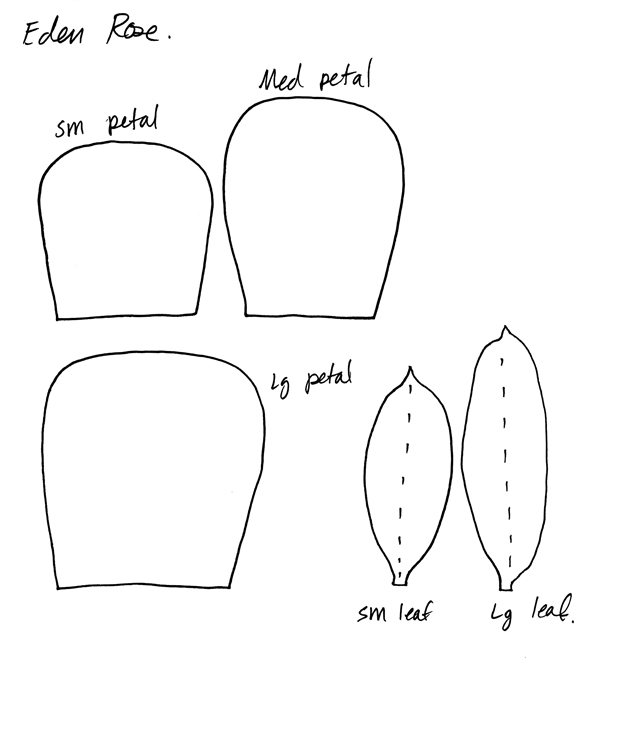
Photocopy or trace the Eden Rose Small, Medium, and Large Petal templates (click here for the free download) and cut out the petal shapes. Cut thirty-four 3″ x 3″ pieces from the tissue paper strips. Stack the pieces into 2 piles of 12 and 1 of 10, and place the small petal template on one stack of 12 so the top of the petal is at the dip-dyed edge of the paper. Trace the template onto the tissue and cut it out to make 12 small petals. Repeat with the medium and large petal templates for the remaining stacks, tracing and cutting 10 medium and 12 large petals, for a total of 34 petals.
* Save the leaf templates on the same page for Step 5.
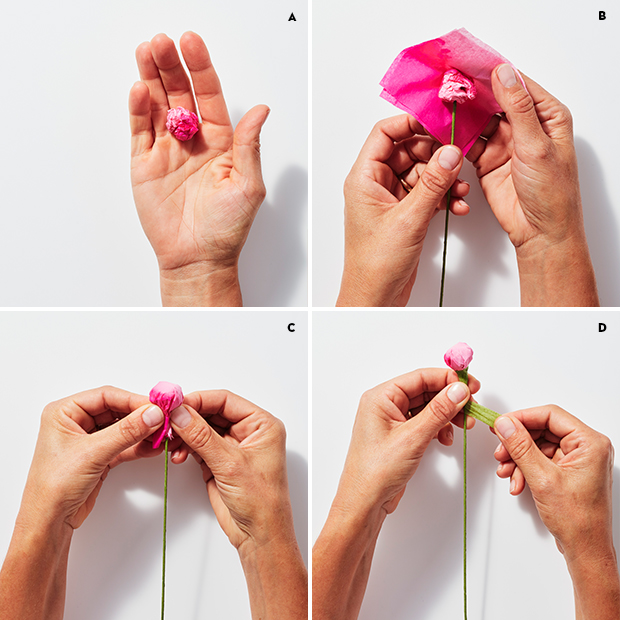
Construct a bud ball to use as the center. Crumple the piece of tissue for the bud center into a ball (A). Hold [the crumpled ball] in place at one end of the wire. Use two pieces of tissue paper for the outer layer, creating a smooth, wrinkle-free surface (B). Firmly grasping the paper edges, use floral tape to attach the bud to the taped wire (C). Hold the ball in one hand while wrapping the floral tape around the base with the other, taping, pinching, and turning the stem as you go (D). Again, make sure to maintain a smooth, wrinkle-free surface.
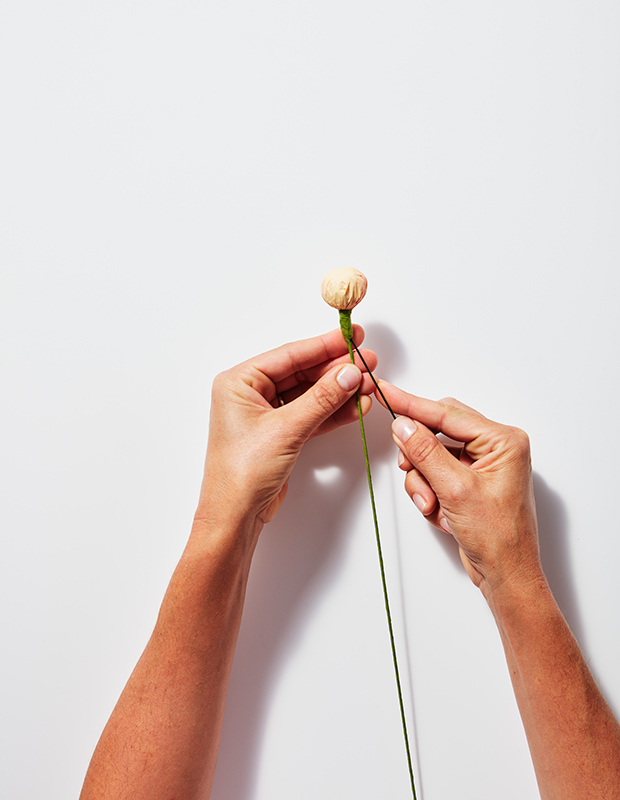
Place a reinforcement wire alongside the bud stem and insert the top of the wire into the base of the bud. Attach it by wrapping it with floral tape the full length of the flower stem.
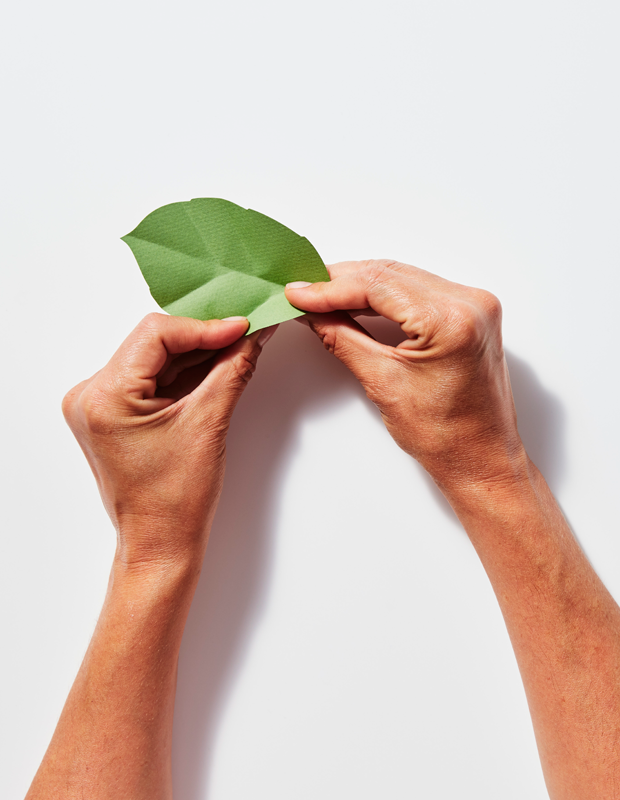
For the leaves, photocopy or trace the Eden Rose Leaf templates and cut out the leaf shapes. Trace 2 small and 2 large leaves onto the green Canson paper and cut them out. Gently crease (but do not fold) the leaf along the guidelines provided on the template to create veins.

Using the glue gun, apply a line of hot glue to the underside of the leaf (the smooth side of the paper) from the middle center to the base. Attach the wire to the back of the leaf by placing it in the glue (A+B). While the glue is still sticky, place the light-green tissue strip over the wire and leaf area, making sure that half is covering the wire on the leaf and half is covering the stem (C). Gently pinch the tissue paper to the stem once the glue has dried, after about 3 to 5 minutes. Apply floral tape starting just beneath the base of the leaf, covering the remaining length of exposed wire (D).

Place 1 small petal on top of another, then fan them apart 1⁄2″ to make a double-petal.

Using the edge of a closed pair of scissors, shape the top edge of three of the double-petals, creating a gentle curl inward.
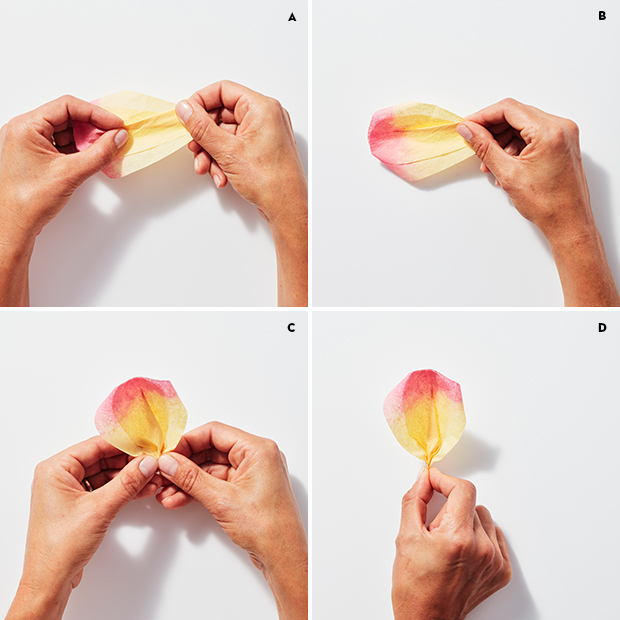
To give the small double-petals a cupped shape, add a triangular fold, known as a dart. This fold extends the length of the petal, from the bottom to just below the top. The 3-point fold for the dart should extend from the bottom of the petals to 1⁄2″ from the top. (A + B). Gently gather the base of each small double-petal to give it a cupped shape (C + D). Repeat with the remaining small petals to make a total of 6 small double-petals.

Place 1 medium petal on top of another, then fan them apart 1⁄2″ to make a double-petal. Using the edge of a closed pair of scissors, shape the top edge of the double-petal, creating a gentle curl outward. To give the medium double-petals a cupped shape, add a dart (see Step 9). Repeat with the remaining medium petals to make a total of 5 medium double-petals. Create 6 large double-petals in the same manner used for the medium double-petals, curling and darting as you did.

Place the first small double-petal at the base of the large bud ball center, positioning it so that the petal obscures the top of the bud ball center. Position a second small double-petal opposite the first petal at the same angle so that the first petal swirls inside of it to create a pleasing, spiraled center.

Secure both petals in place with floral tape, wrapping the tape down and around the wire twice, to about 1⁄2″ below the base. Where you begin to wrap the tape is the tapeline. Repeat with the remaining small double-petals to encircle the center tightly; make sure to begin taping each at the tapeline that you established with the first set.
Place the gathered end of one medium double-petal opposite the base of the last small double-petal. The top of the petal should be 1⁄4″ above the small double-petal center you just created. Because these petals are darted and curled, they create the center volume of the rose. Add the remaining medium double-petals, gradually encircling the center and turning the bloom with the addition of each petal, spacing them to create a full, round shape.

Attach the large double-petals in the same manner as the medium. There should be no sparsely petaled areas. Fluff the layers of petals to open the bloom. Bend the flower stem forward at a 30-degree angle at the base of the bloom.

Bend the first large leaf stem at a 60-degree angle and attach it 3″ below the flower base. Bend two small leaf stems at 60-degree angles, and attach them to each side of the remaining large leaf to create a leaf cluster. Attach the leaf cluster to the opposite side of the main stem 1 1⁄2″ below the first leaf.
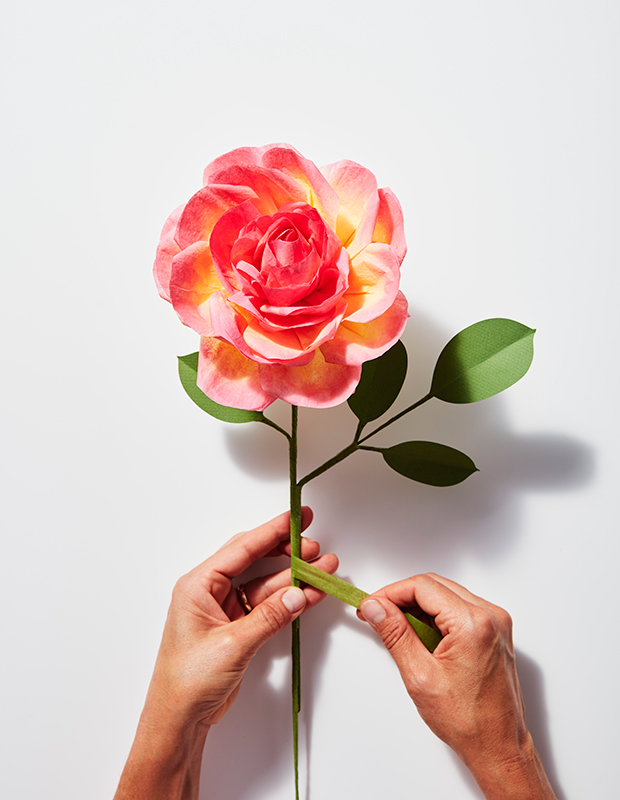
Using wire cutters, trim the flower to the desired length. Turn the flower upside down and wrap the cut stem end with floral tape to finish.
Kate Maths

