

Decorating & Design
April 11, 2016
DIY: Batik Wall Hanging
Assistant design editor Jennifer Koper shares how to make a beautiful batik wall hanging.

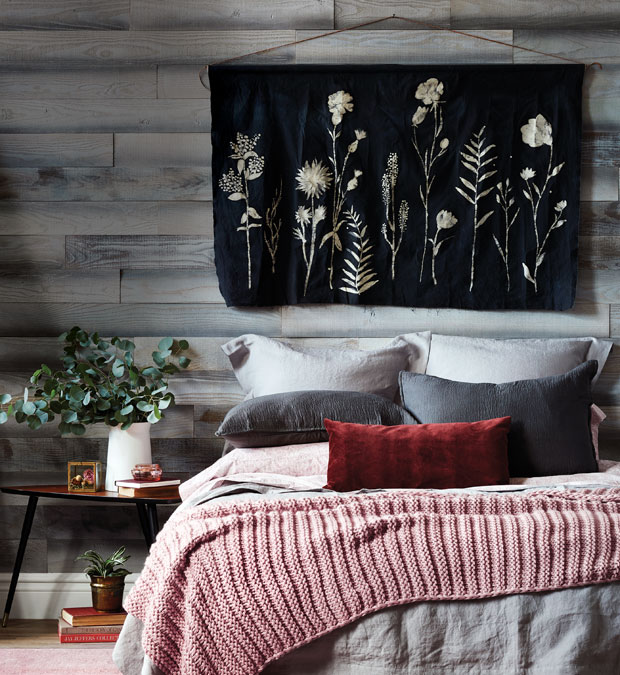
Wall hangings and tapestries are on-trend right now, and I’ve seen all sorts of different styles lately. For the “Winter Garden” story in our February issue, I decided to make a wall hanging that doubles as an inexpensive headboard using the ancient wax-resistant technique known as batik. Inspired by dried flowers, I drew freehand blooms onto a large piece of fabric, but the great thing about this project is that you can customize it to suit your own style, size requirements and color scheme.
Materials
You’ll need 1 yard of unbleached cotton, paraffin or soy wax (note paraffin gives a more crackled effect), fabric dye (I used black MX Reactive Dye from G&S Dyes), sodium carbonate, salt and/or whatever additional items your dye instructions require, fabric soap that contains synthrapol (I used T.N.A soap from G&S Dyes), stir stick, bucket, rubber gloves, cardboard topped with a garbage bag or plastic to protect work surface, pencil, iron, ironing board, old cloth to protect iron, paper towels, various paint brushes or tjanting tools, wax pot or double boiler and heating element, wooden dowel, leather rope, screw eyes, sewing kit or sewing machine and thread.
Step 1: Prep The Fabric
Wash the fabric with a fabric soap that contains synthrapol to remove any chemicals or sizing in the fabric. Let dry. Iron to remove any wrinkles (optional).
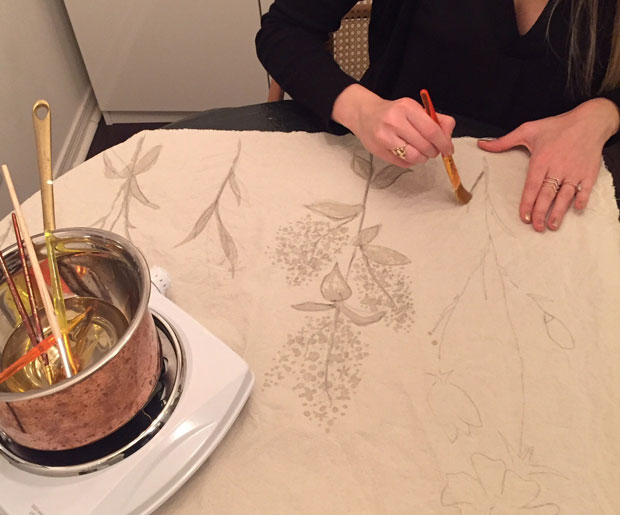
Step 2: Wax The Drawings
Protect work surface with cardboard topped with a garbage bag or plastic. Lay fabric on top and lightly draw your design freehand onto the fabric using pencil. Melt your wax using a wax pot or double boiler. (Be careful not to let it get above 240° as it could emit fumes or catch fire.) Dip paint brush into the melted wax and fill in the drawings. The wax should penetrate through the fabric – you’ll know it’s not if a white film sits on top. If this happens, move the wax back to heating element to warm up and try again.
Step 3: Dye The Fabric
Mix your dye following the product’s set of instructions – the dye I used required a cup of salt – in a standalone bucket, instead of a tub or sink to avoid any unwanted staining. Pre-soak your fabric in water so that it takes the dye more evenly. Dip your fabric into the dye (I recommend giving it a lot of space in the bucket; this will prevent the wax from cracking). Let the fabric soak for the amount of time specified on the instructions (I let it soak for 60 minutes total). The longer the fabric soaks, the darker the fabric will become. Put on your rubber gloves and remove the fabric from the dye. Rinse the fabric under cool water until the water runs clear. Hang it to dry.
Step 4: Remove The Wax
Layer newspapers and or paper towels underneath and on top of the waxed fabric on an ironing board. Place an old towel or cloth on top and iron. The heat of the iron will melt the wax off and cause it to absorb into the paper towel/newspaper. Wash the fabric with a mild detergent (optional).
Step 5: Put On Display
Sew a sleeve at the top of the wall hanging for the dowel to fit through. (The dowel should be the width of your wall hanging or a little longer.) Add two screw eye hooks to the ends of the dowel, string a leather rope through the hooks, and tie the ends.
If you’d like to purchase a batik wall hanging, visit Jennifer’s Etsy shop.
1. Donna Griffith 2. Courtesy of Jennifer Koper
House & Home February 2016 Issue