

Decorating & Design
March 10, 2017
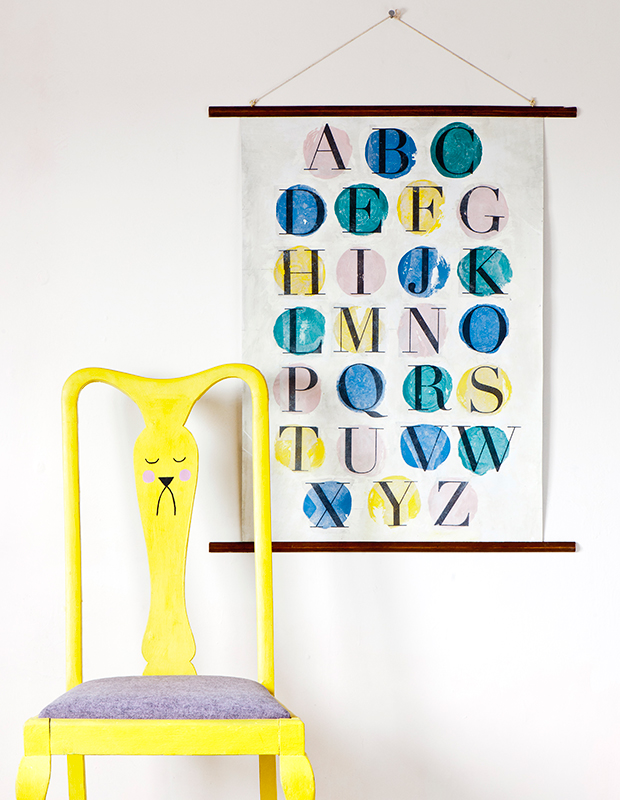
This DIY Alphabet Art Is Perfect For A Kid’s Room!
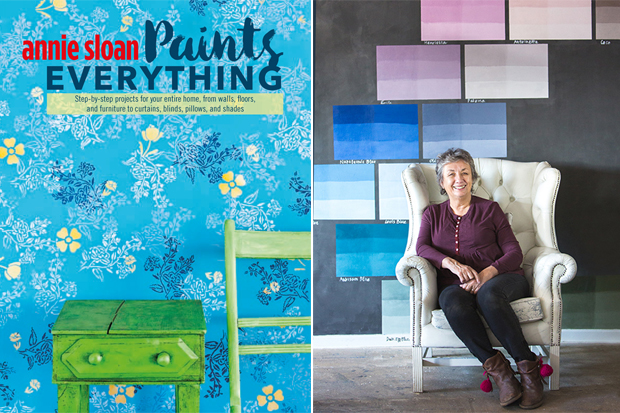
Annie Sloan, author and creator of Chalk Paint™, shares how to make the Alphabet Transfer Banner from her new book, Annie Sloan Paints Everything.
Sometimes, you see old blinds in secondhand stores or when you move into a new home, and wonder what you can do with them, because they never fit anywhere apart from the place they were intended for. This is a brilliant solution. The blind shown here was made into a banner with a simple transfer design.
For an alphabet, you will need space for 26 letters in seven rows, with four letters in five of the rows and two lines with three letters. If you find measuring stressful, either get someone to help you — as I did — or do a more irregular placing of the letters. I found an alphabet free of copyright that I could print out. You will need to print the letters reversed (as a mirror image), so that they are not backwards once transferred.
It is important to take your time to do this project well. Allow the paint and the paper cutouts to dry thoroughly for several hours, or overnight. If you don’t, then the paint can rub off too easily and the printed ink can smudge and run.
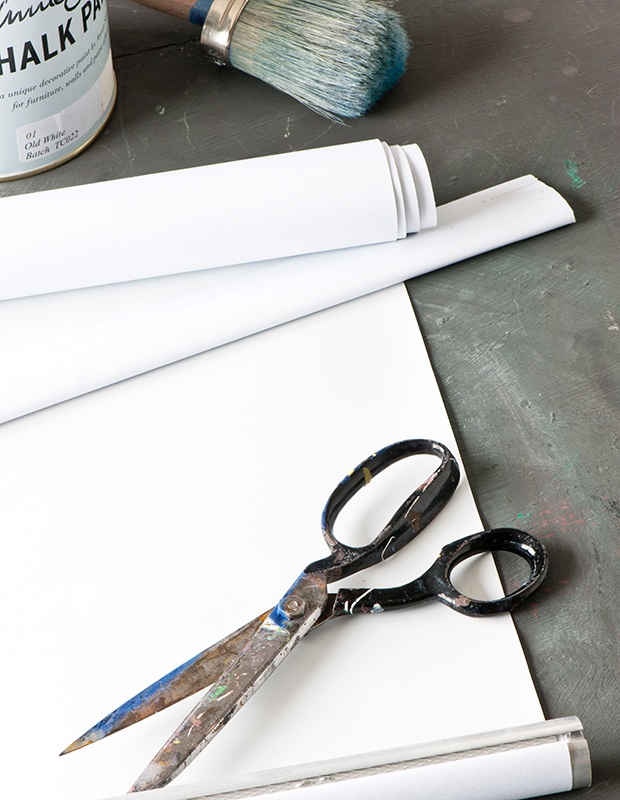
You will need:
- Chalk Paint™ in Provence, English Yellow, Antoinette, and Greek Blue
- Old blind
- Scissors
- Pencil
- Yardstick (meter ruler)
- Medium oval bristle brush
- Small flat brush
- Reversed alphabet letters (see Introduction above), printed on ordinary computer printer paper
- Annie Sloan Découpage Glue and Varnish
- Clean, dry, lint-free cloths
- Clear wax
- Small wax brush
Cut the top and bottom off the blind so that you have one piece of fabric. Place the blind on your work surface with the fabric side facing uppermost.
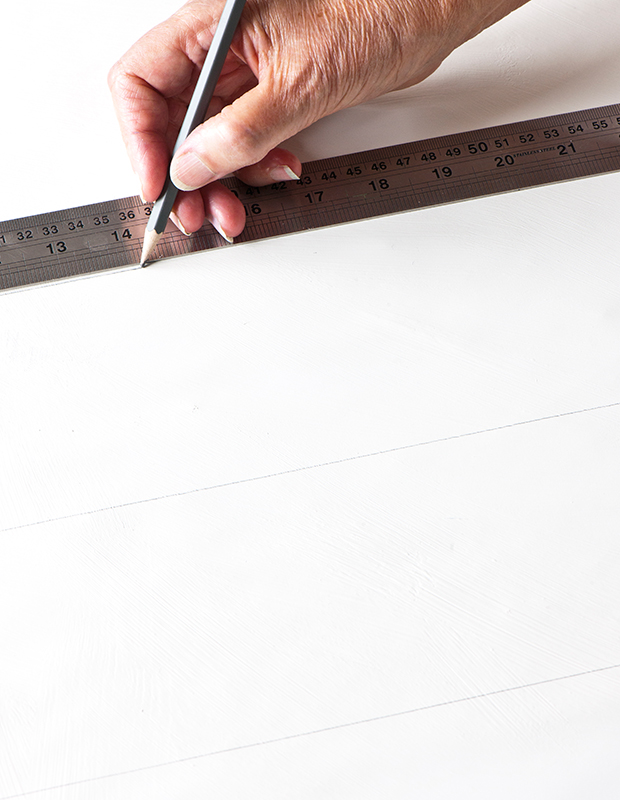
Draw lines lightly in pencil on the blind, measuring carefully with the yardstick (meter ruler) so that you have a line going through the center of each letter. I marked a spot on the line where each circle of color would be.
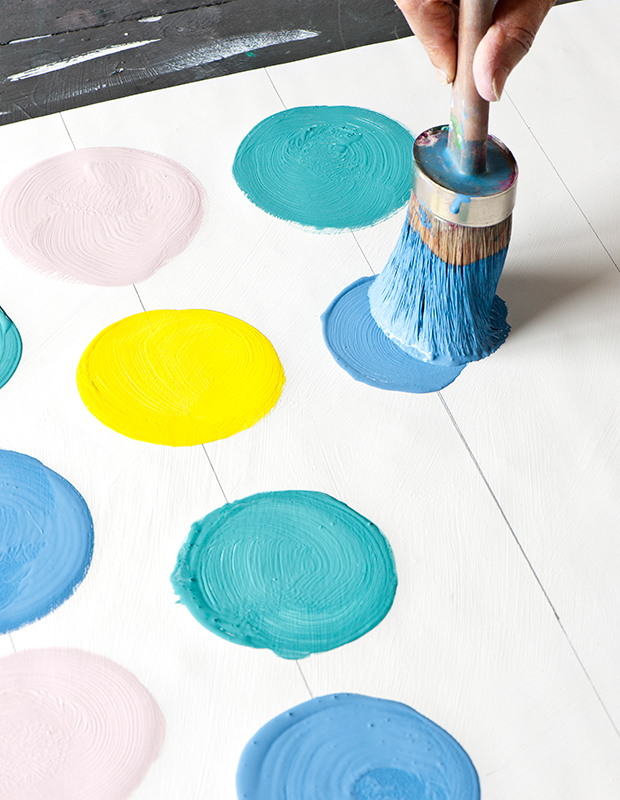
I chose four colors and then used the oval bristle brush to paint each one with a swirling twist to give a bit of movement to the shape.
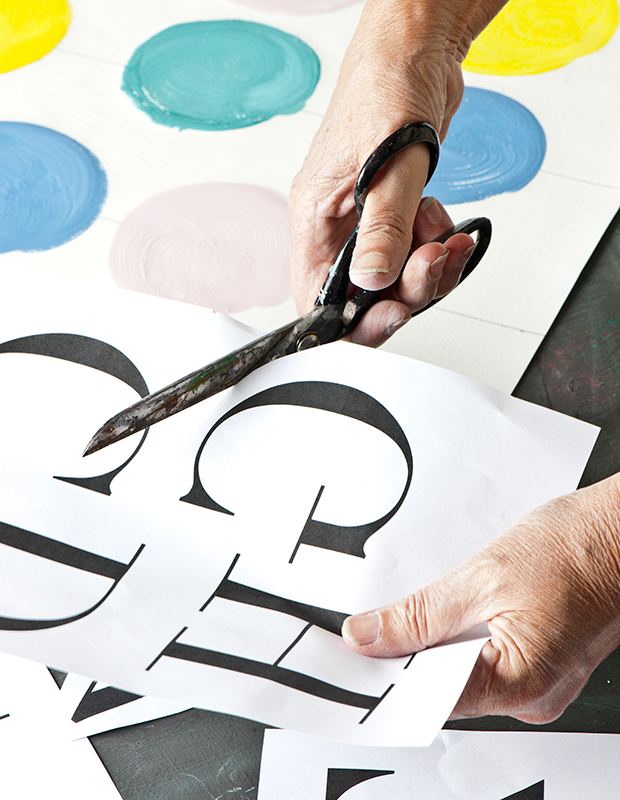
Roughly cut out the letters in whatever way you want, bearing in mind that the more paper you leave on the pieces, the more you will have to remove later.
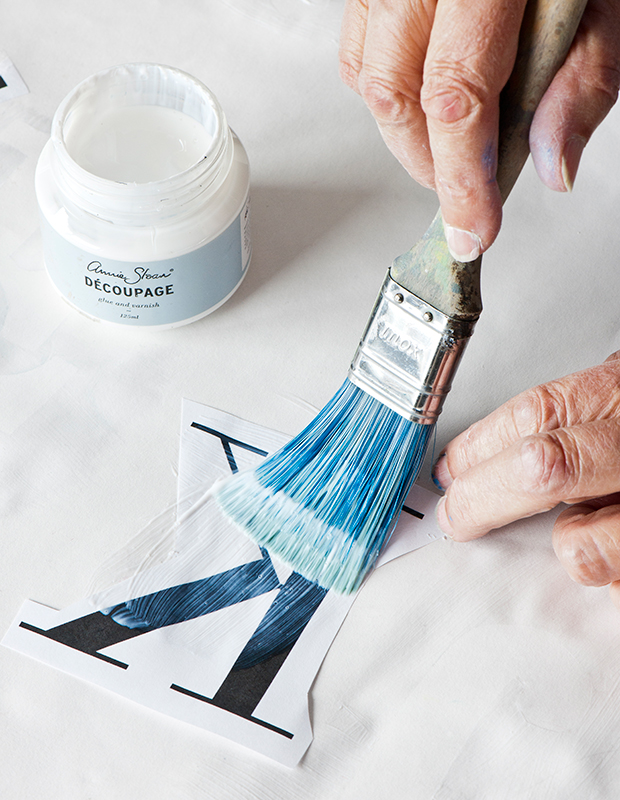
With the print side facing upward, use the flat brush to coat the first letter transfer with découpage glue.

Stick the transfer immediately on its painted spot. Let dry thoroughly for several hours at least. Repeat for each of the letters.
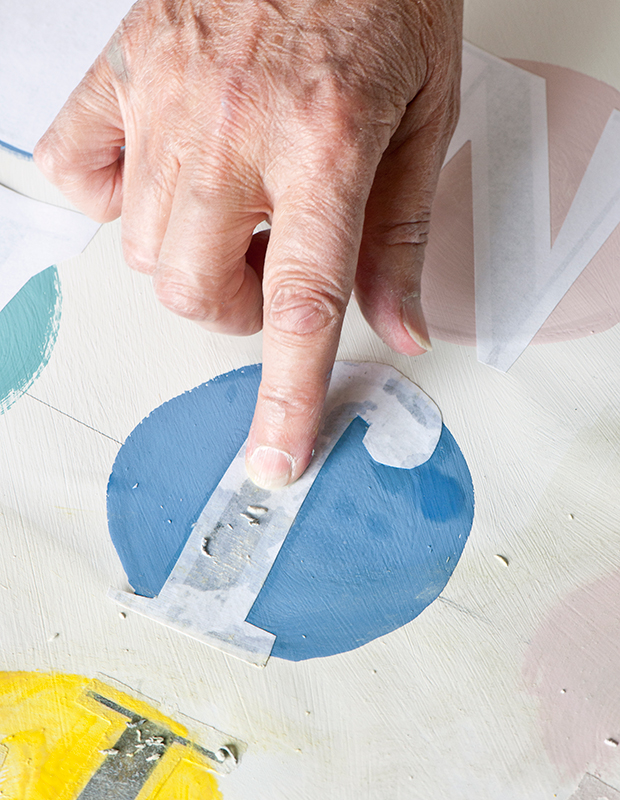
Soak the transfers with some water using your finger, rubbing at the same time to remove the paper. Use a cloth to help you remove the paper and allow to dry. You may need to take off more paper because, as it dries, you will find that the paper is still very white in places and less so in others. If the paper is still white and solid, then remove this by adding more water.

Note: Some parts might break and split. Bear in mind that some of the paper will disappear when you wax the finished banner. Apply clear wax with the wax brush and remove excess wax with a clean cloth.
Christopher Drake © CICO Books
Annie Sloan Paints Everything, published by CICO Books