

Decorating & Design
DIY: Mini Crochet Wreaths
Updated on November 17, 2023
H&H’s Tess Ciarloni shares step-by-step instructions for this holiday craft.
I’ve never really been someone who decorated my 350-square-foot condo for Christmas. I usually spend a lot of time with my family during the holidays and would typically be gone at work all day, so decorating seemed like a waste of time. This year, of course, is a little different. With that in mind, I decided to amp up the Christmas decorating so that my home would feel more festive.
When it came to decorating, I didn’t want to go the typical red and green route. I wanted something that was more winter-inspired and wouldn’t clash with my existing decor. Pinterest was my lifesaver when I stumbled upon a braided wreath with dried eucalyptus and wooden beads. As soon as I saw it, I knew that was the perfect way to add some subtle holiday cheer to my apartment. Plus, I had all the materials on hand which felt a little like a Christmas miracle.
Scroll down to see how I did it!
Supplies will vary based on how many wreaths you want to make, or what scrap yarn you have, so I’ve listed out the supplies that I used to make all five. Each wreath was a slightly different size and crochet stitch. From smallest to largest, the inside diameter of my wreath sizes are:
- 1.5″ (single crochet)
- 3″ (single crochet)
- 3.25″ (double crochet)
- 4.25″ (single crochet)
- 5.25″ (first round half double crochet, second round single crochet)
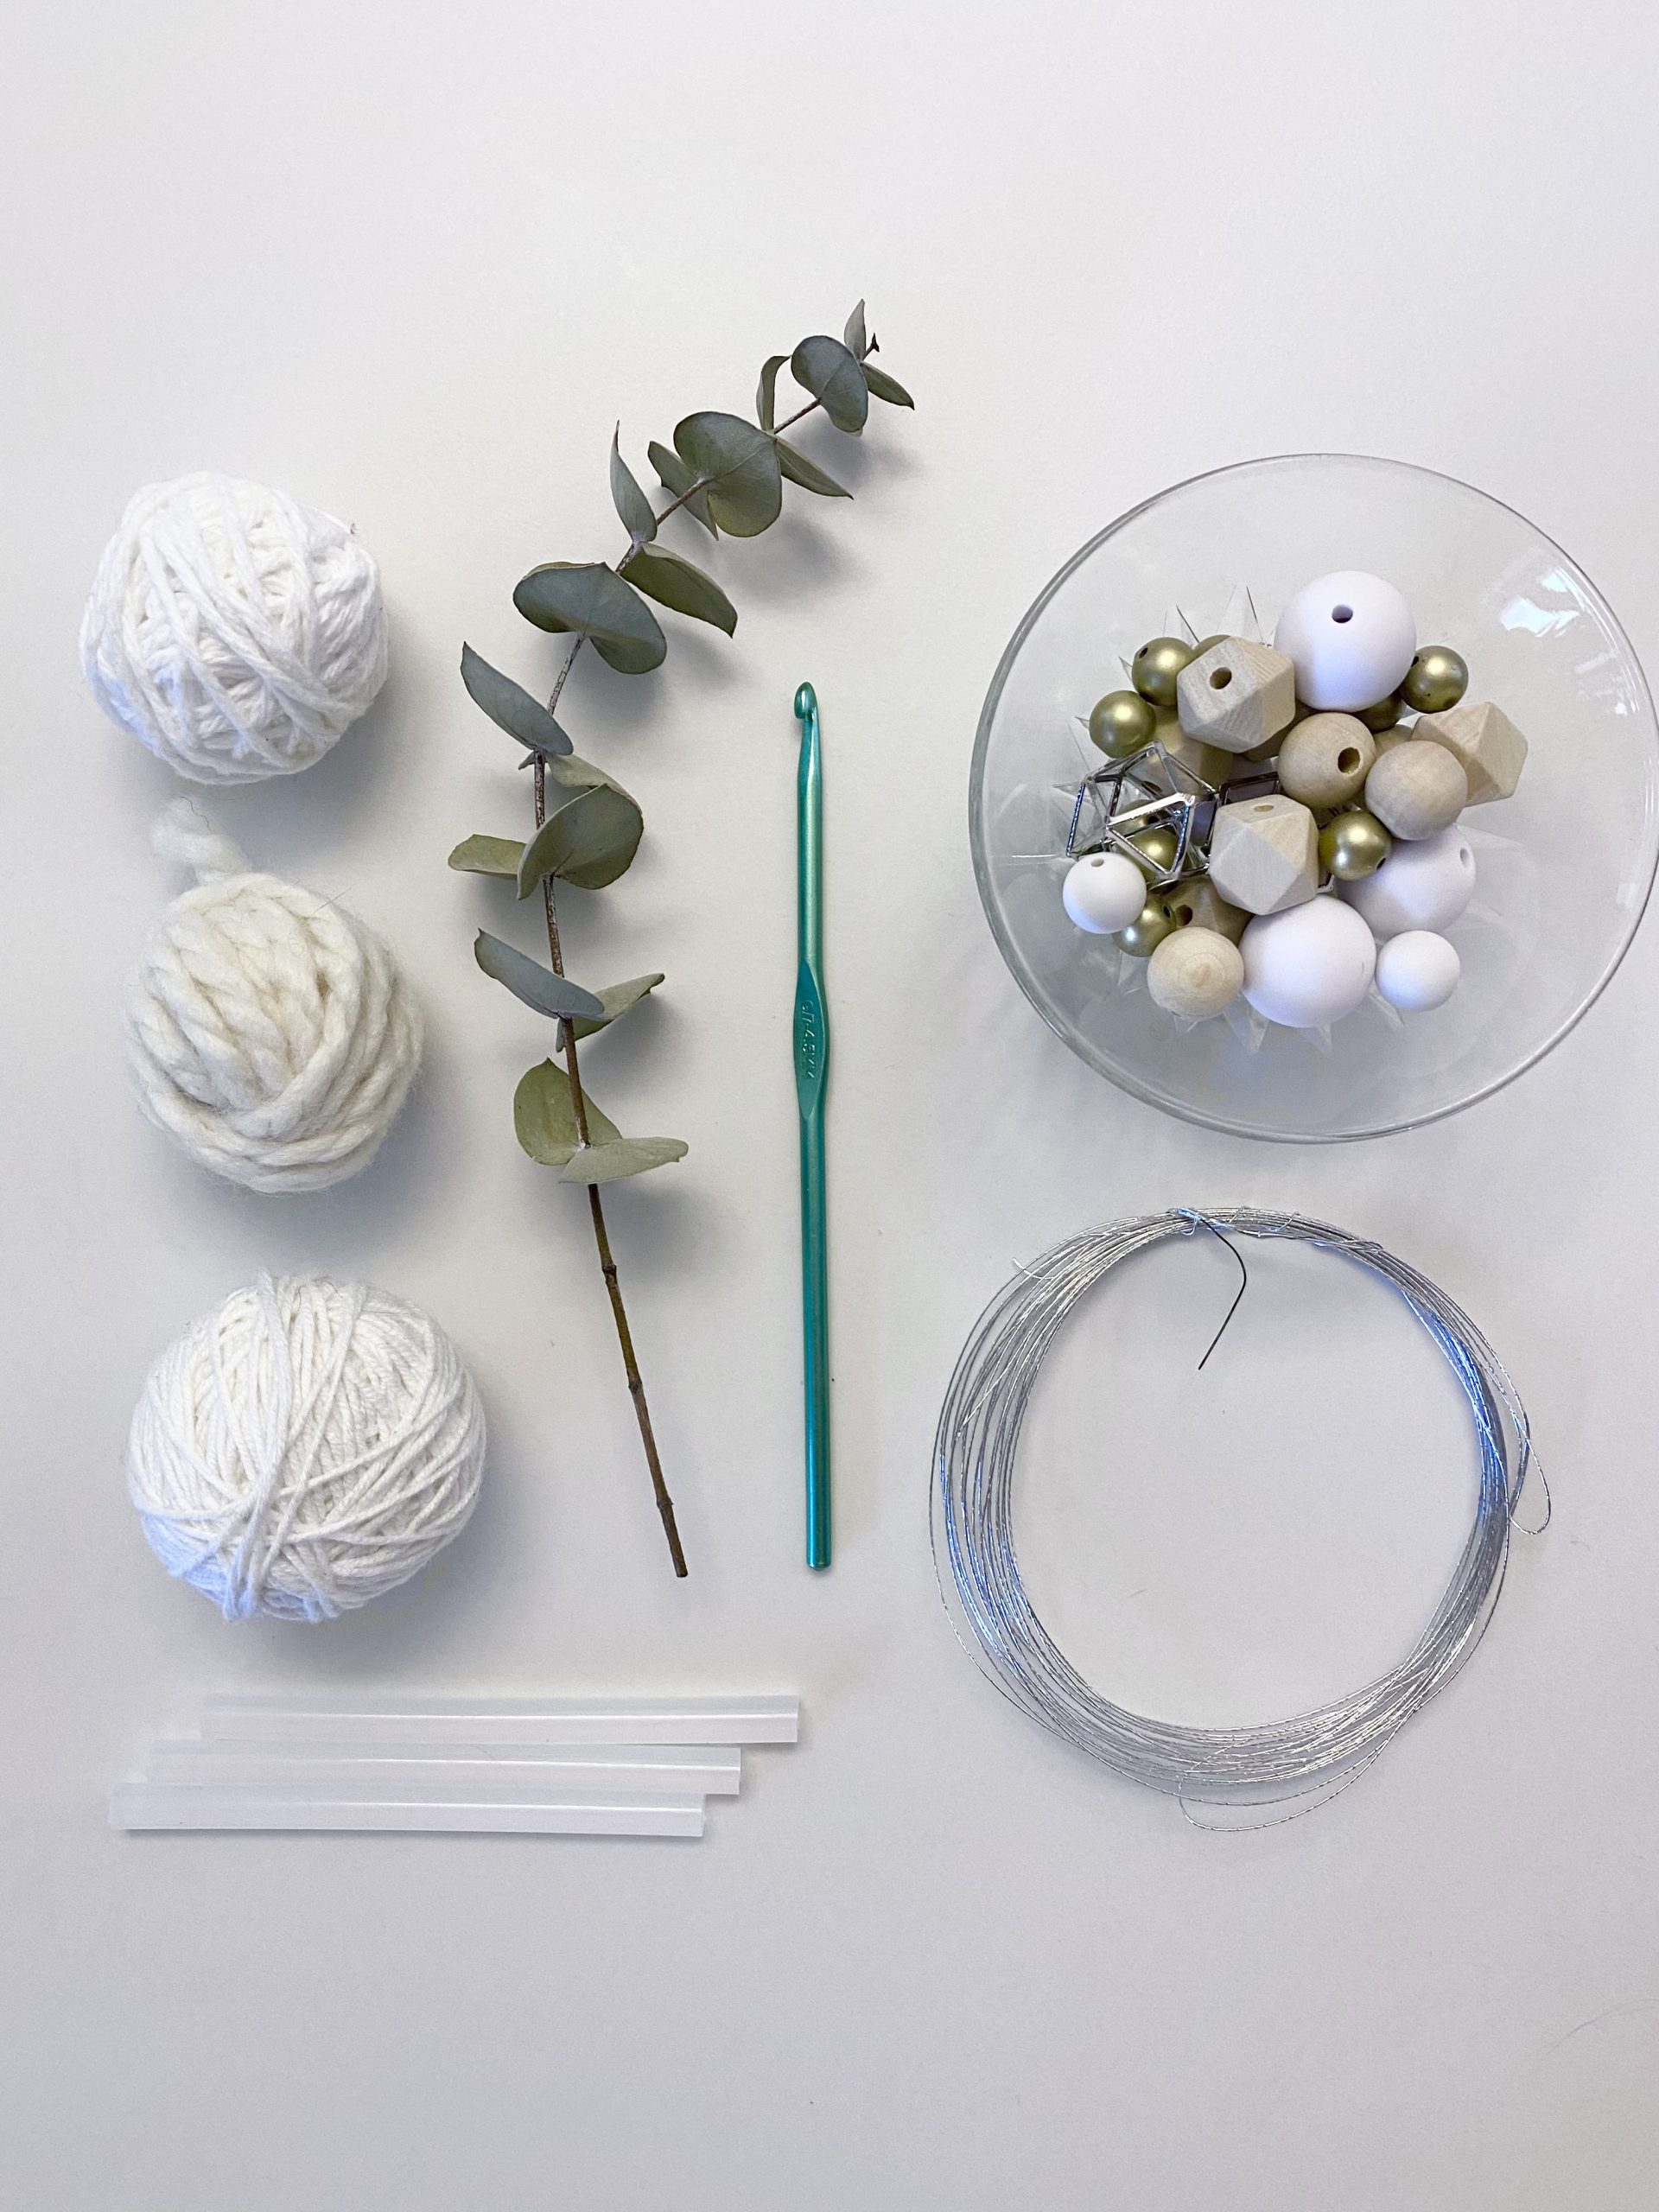
What You’ll Need:
- 3 small balls of yarn about the size of a tennis ball in varying weights and colors. (I used cream and white.)
- 3 to 4 branches of dried eucalyptus or other greenery
- 4- to 5-mm crochet hook
- 30 to 35 wooden, white and gold painted beads
- Hot glue gun
- 3 glue sticks
- Lightweight craft wire (I used 1.5 spools that I got at the dollar store. It came in a pack of 3.)
- Scissors
- 5 nails or hooks for hanging
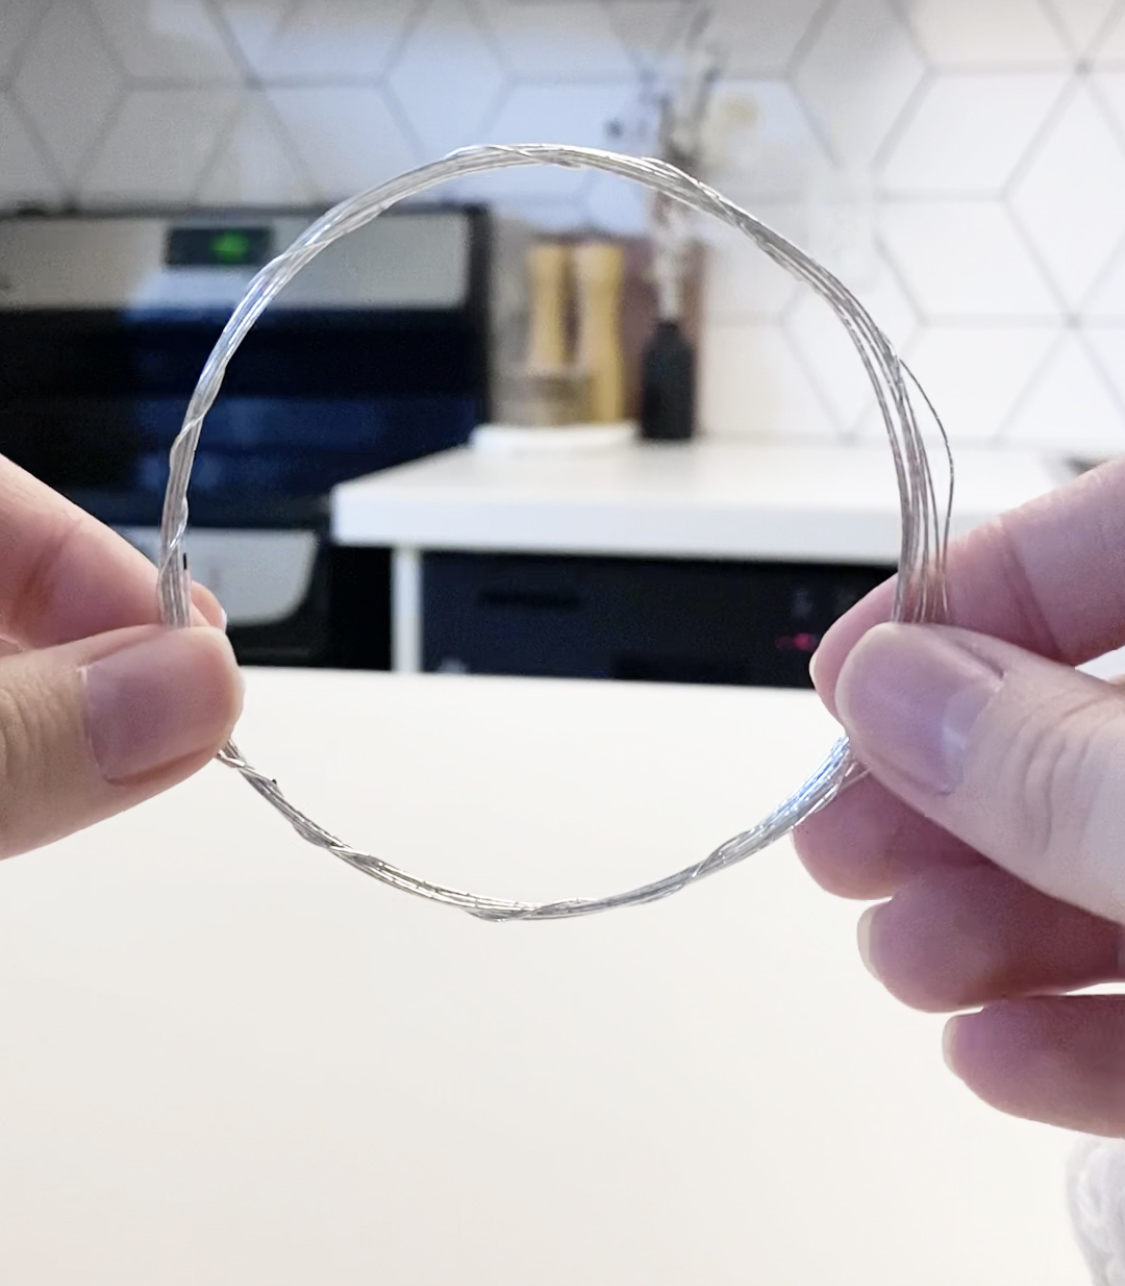
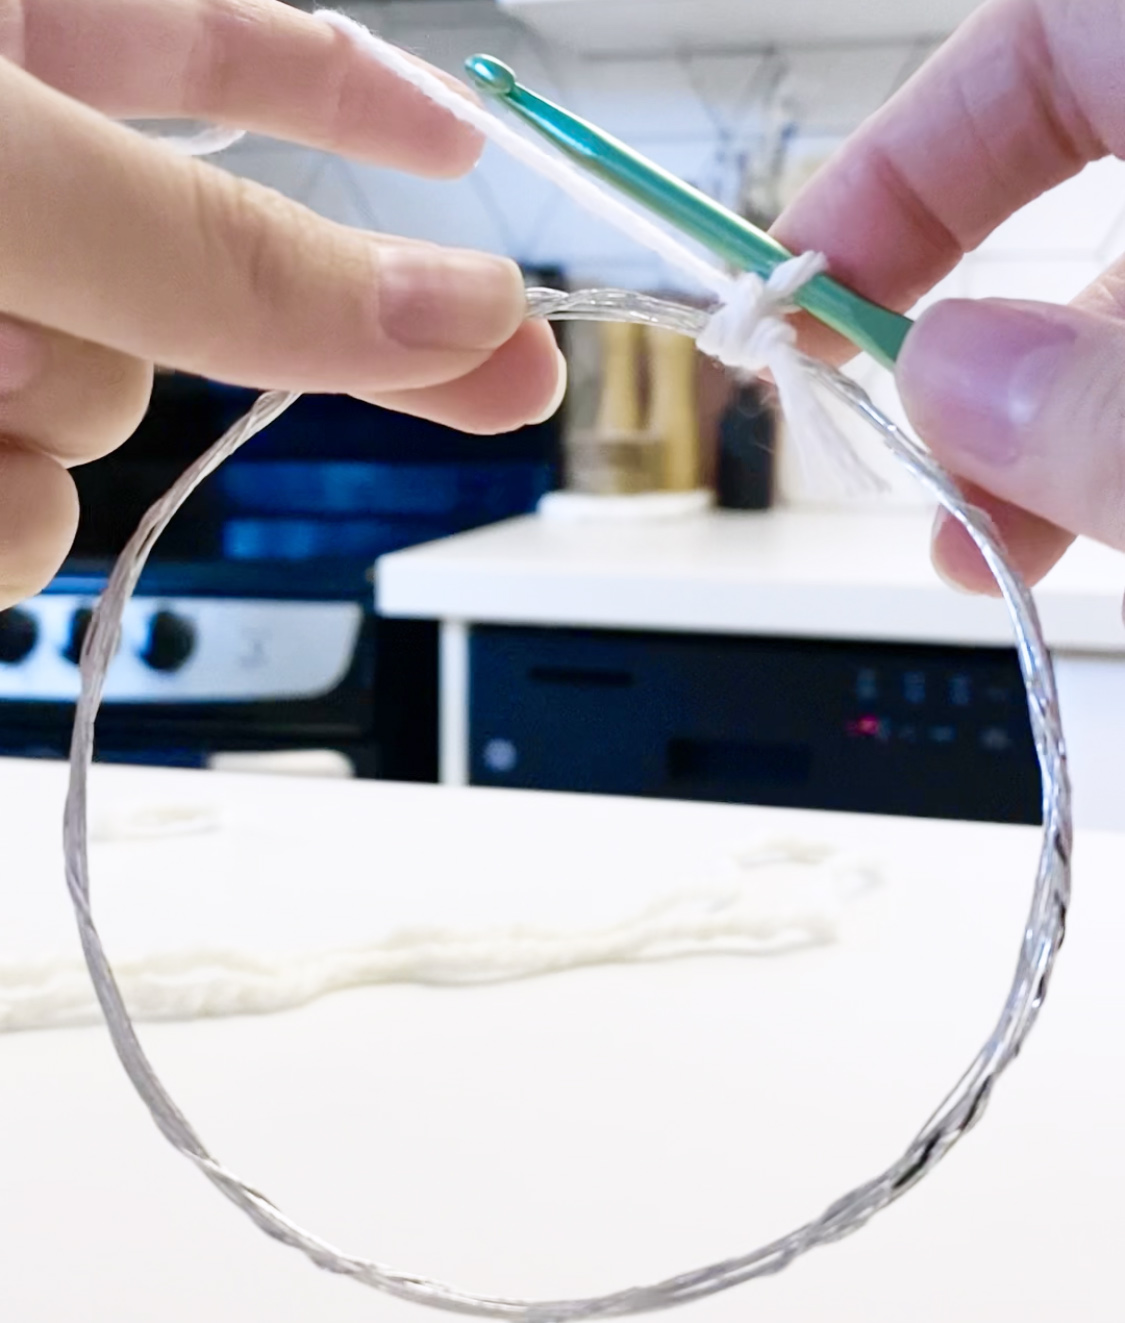
Step 1: Start by making the wireframe for your wreath. If you’d like to make a wreath that is 3″ in diameter, make your wireframe just slightly bigger than that. Each wireframe is made from a continuous length of wire that’s wrapped around itself about 6 to 8 times. The bigger the wreath, the more layers I used to add some structure. To keep the circle shape, tightly wrap the loose ends around the frame.
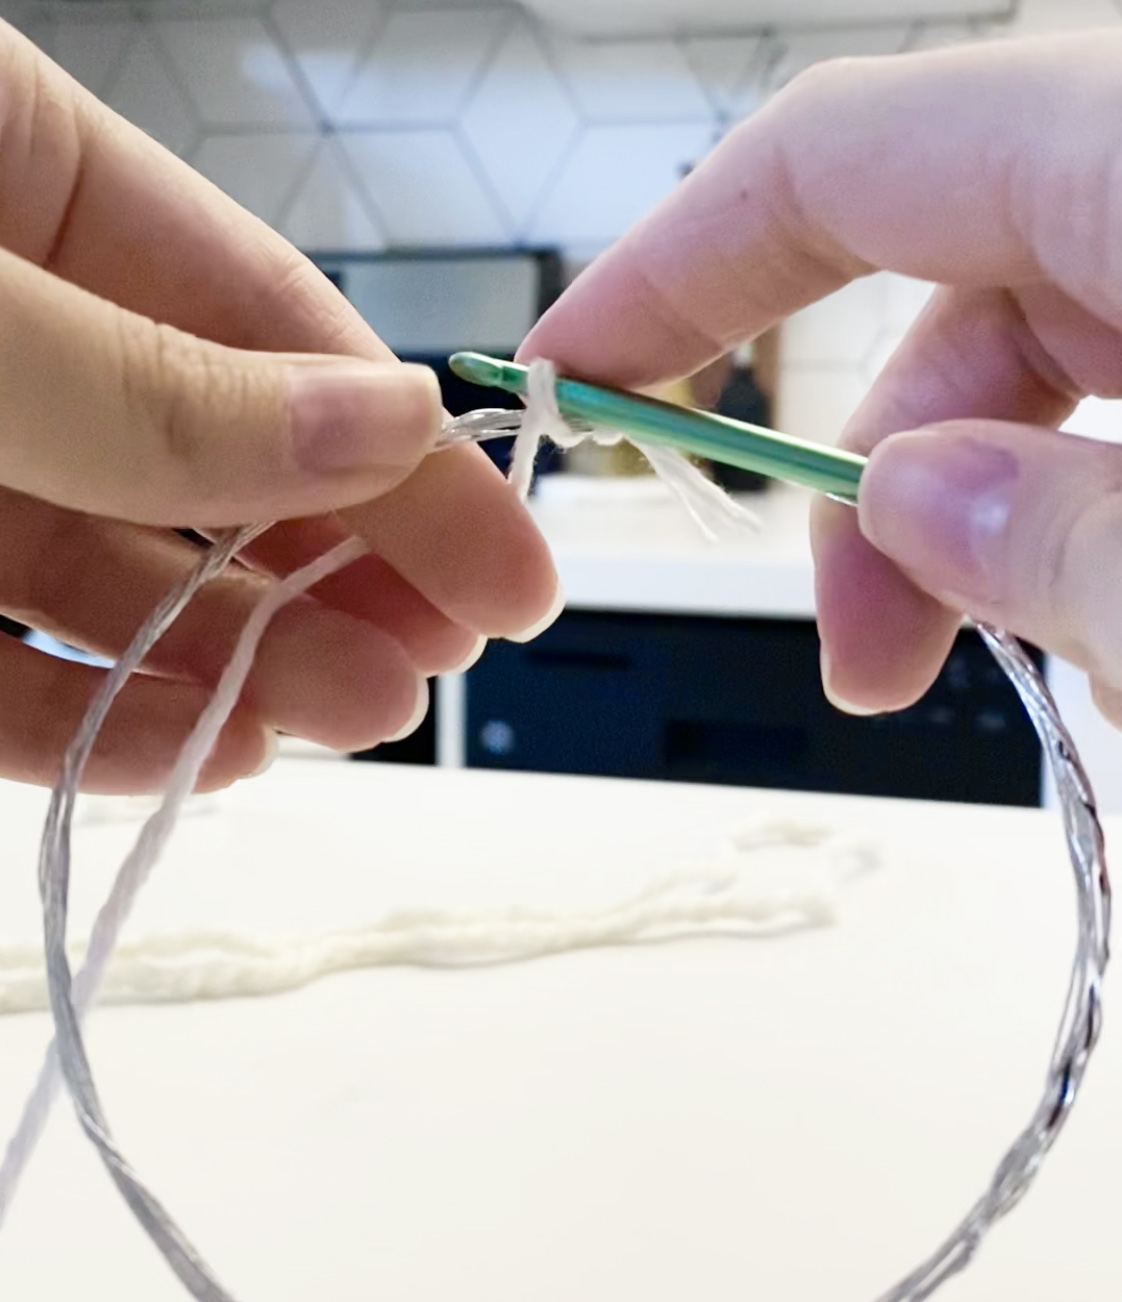
Step 2: Now it’s time to start crocheting! Tie your string around the wireframe, then insert your crochet hook under the ring and pull the yarn through the ring. With your crochet hook positioned above the ring, hook the yarn through the hook and pull through the yarn loop which will make a chain around the ring.
Step 3: Now, you’re going to single crochet all the way around the ring, making sure you’re crocheting to encase the wire in the stitches. Once you’ve almost made it back to the start of your crocheting, gently push the stitches together to ensure that they’re packed tightly and there won’t be any gaps where you can see the wire. I played around with a few different types of stitches, depending on the weight of my yarn and how thick I wanted the crochet to be. (Details can be found with the list of supplies.)
Step 4: Once you’ve reached the beginning of your stitches, slip stitch into the first stitch, cut your yarn with a 2″ tail and tie a knot to secure it all. You can thread your yarn through a stitch on the back of the wreath to make sure it’s not sticking out on the front, then cut any excess length of yarn.
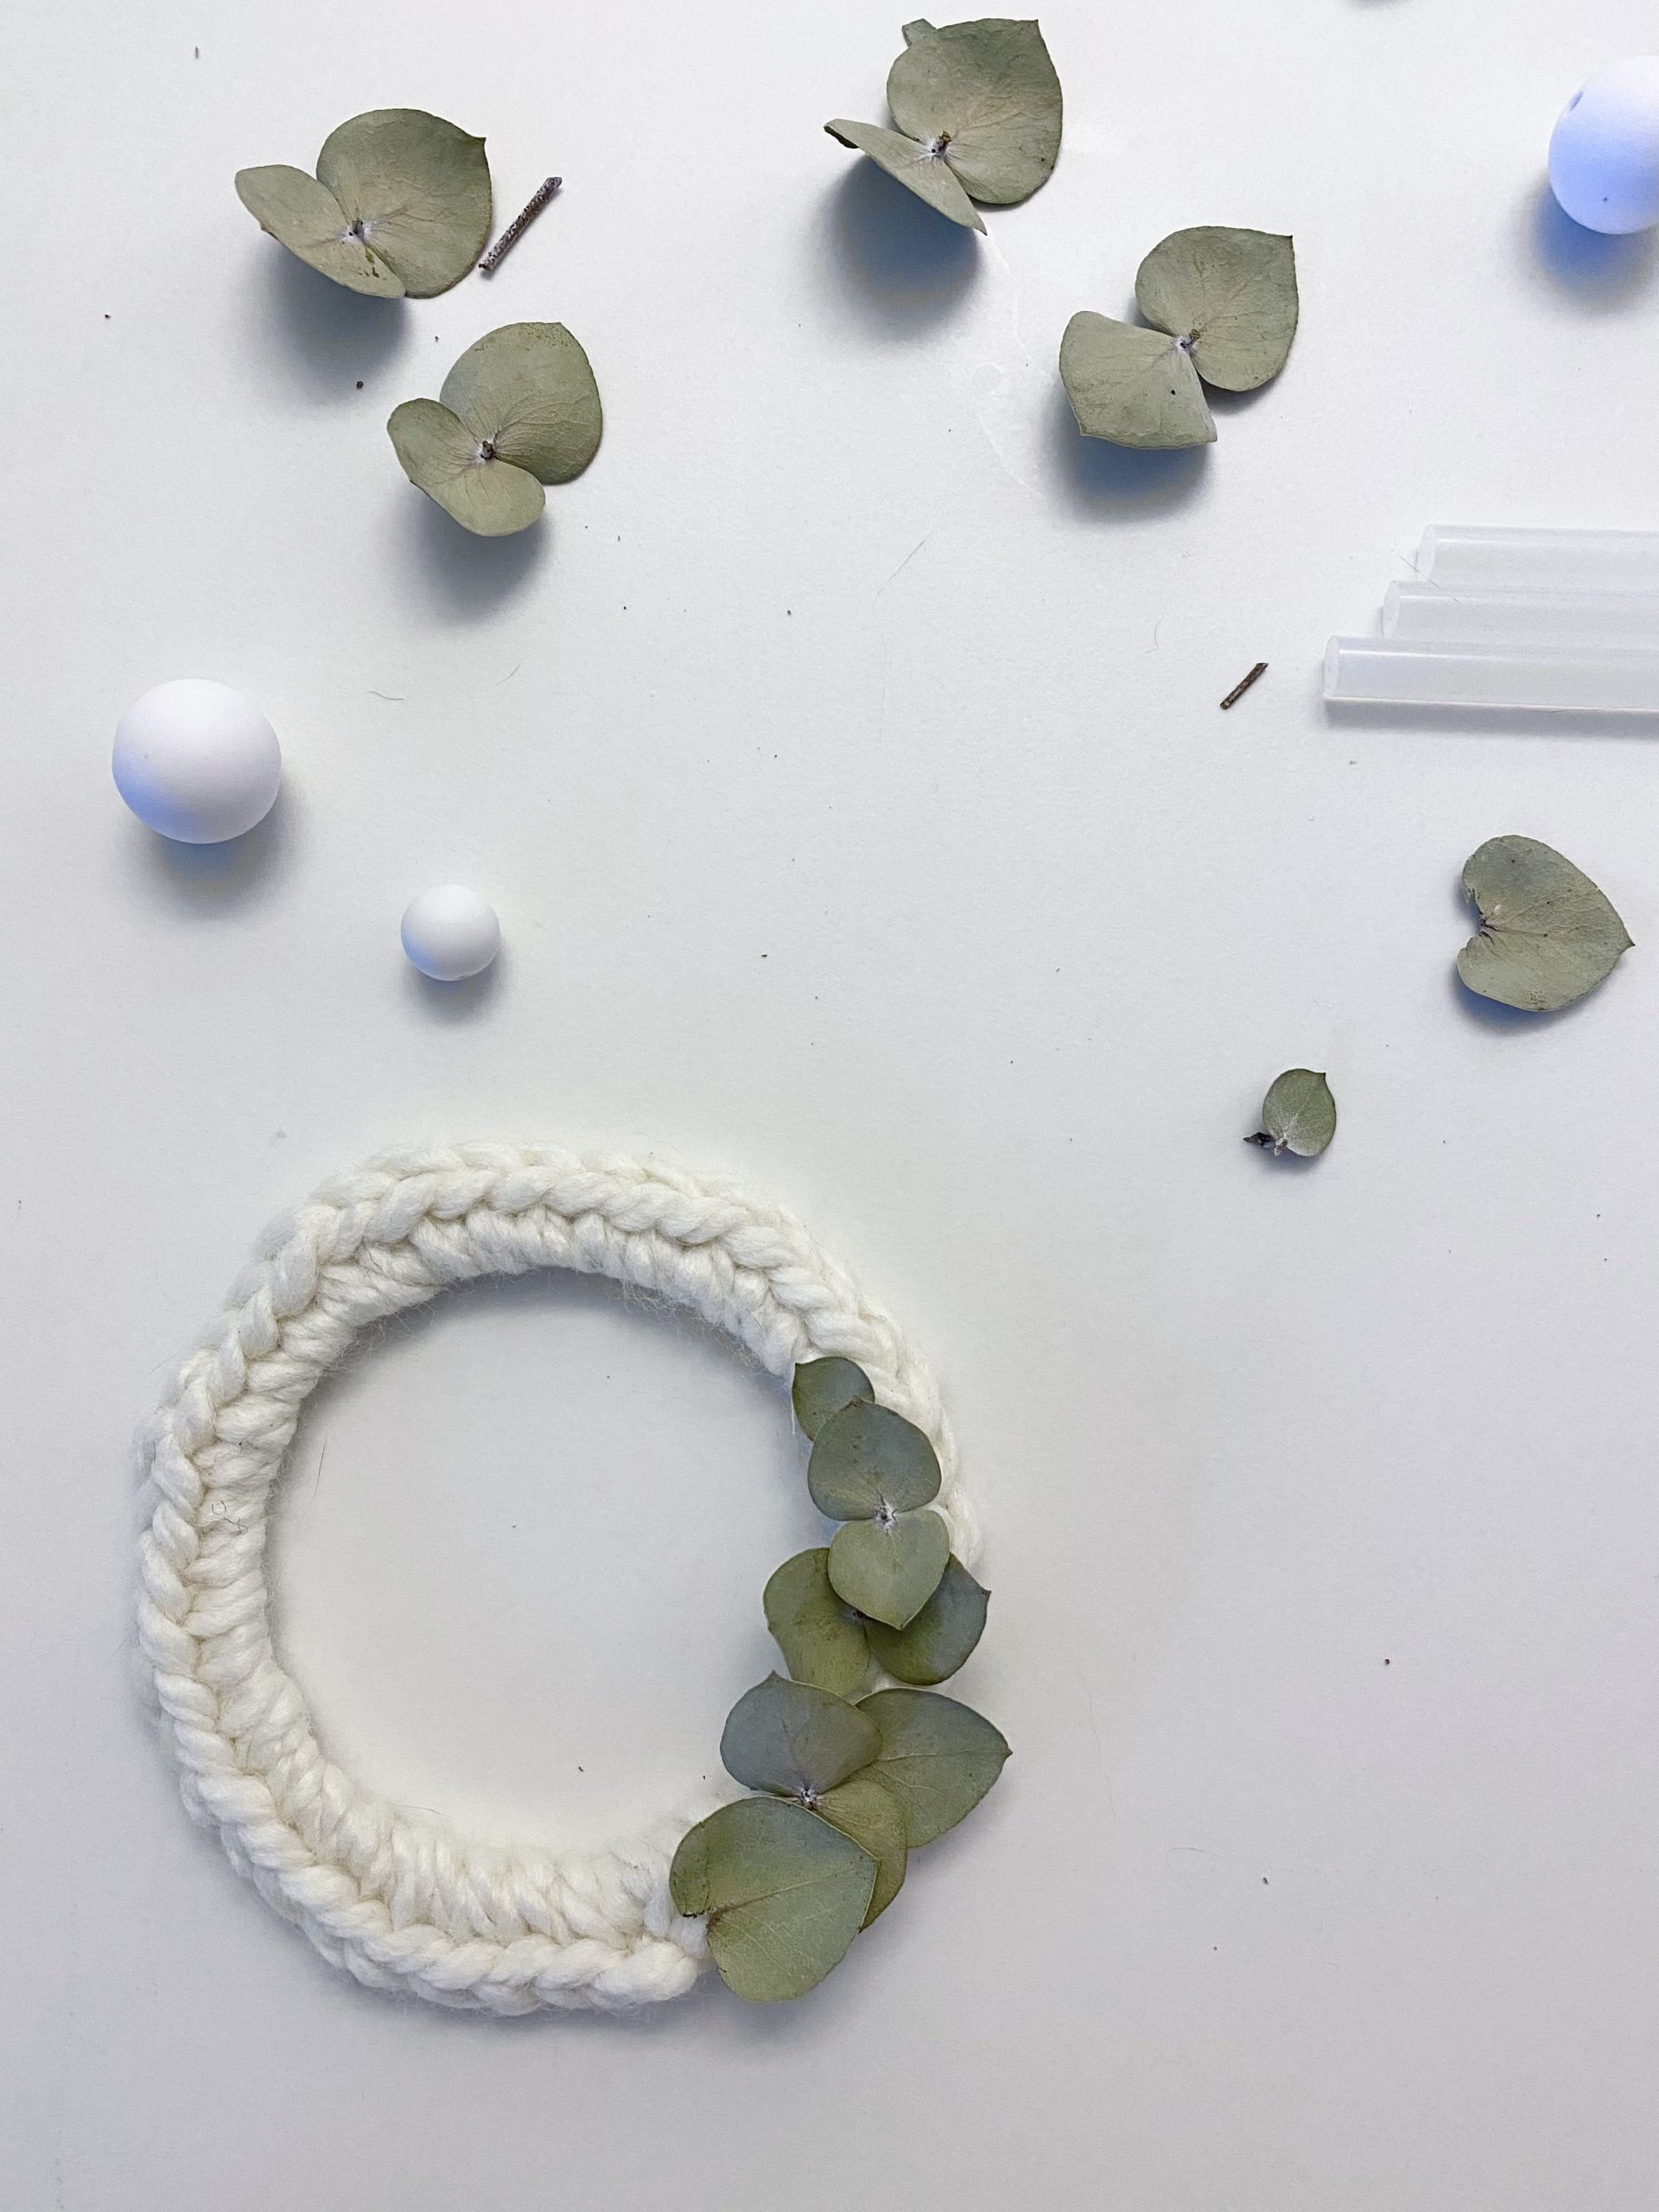
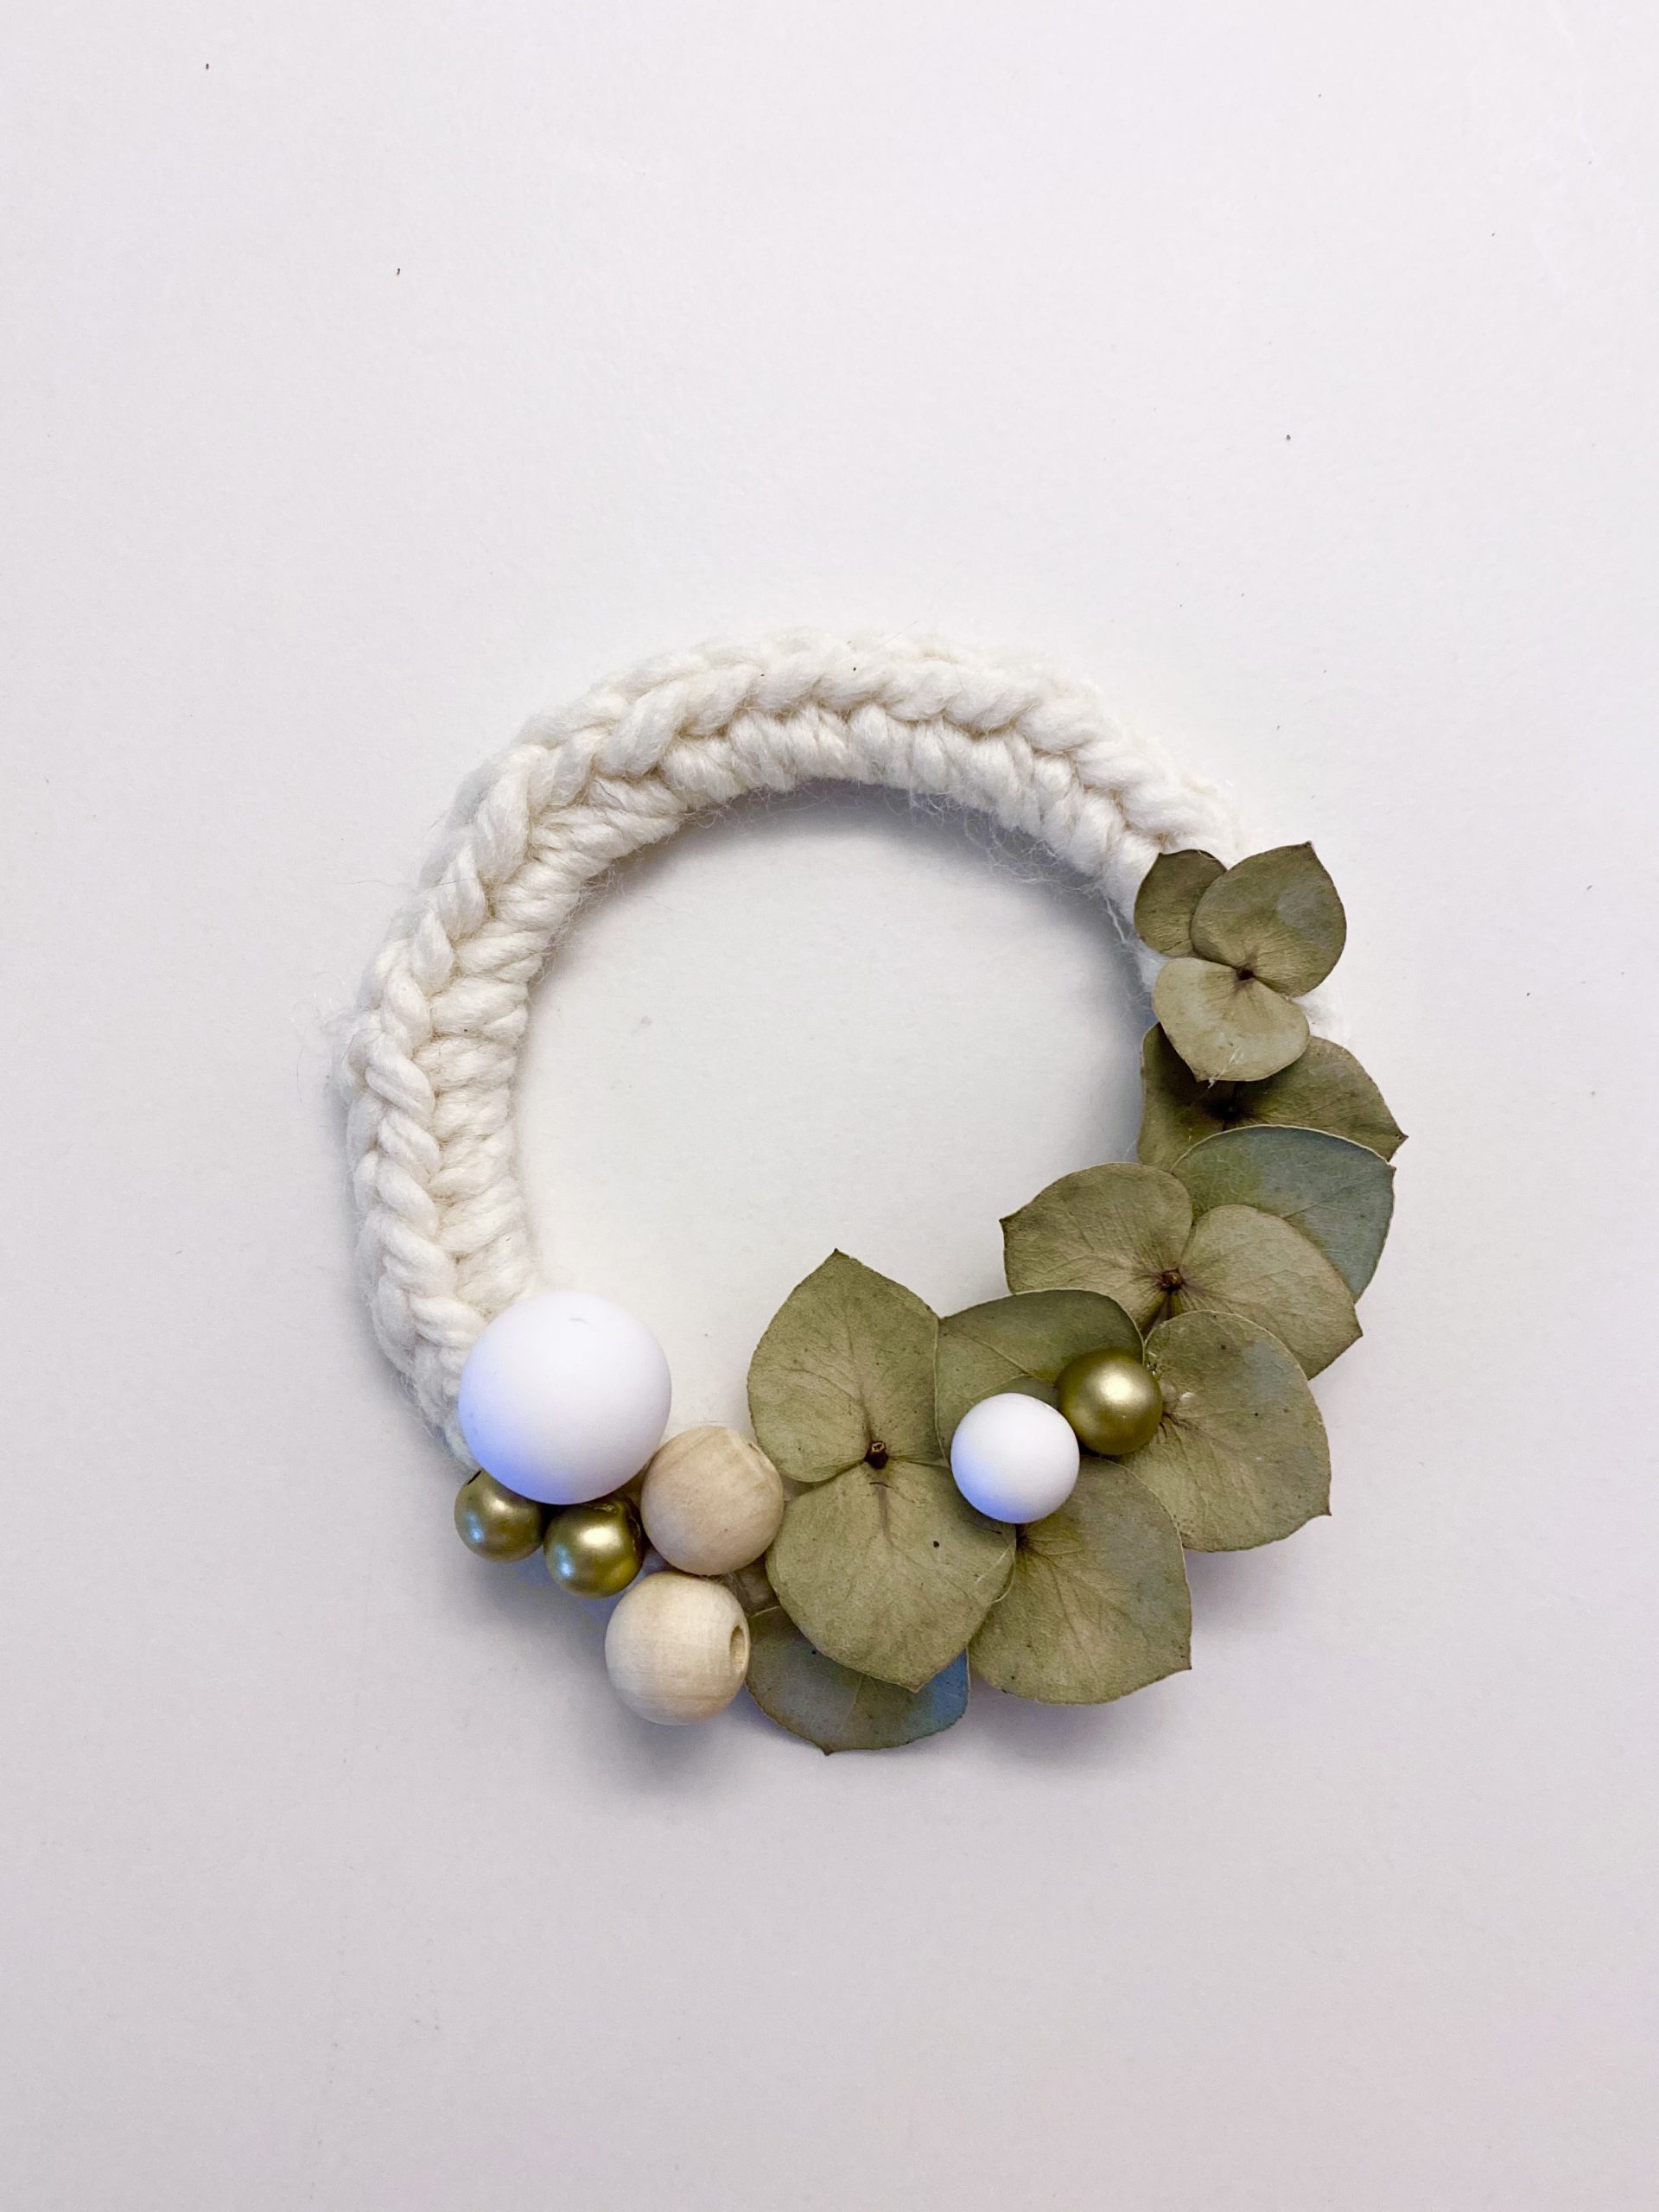
Step 5: Next up: add the dried greenery! I wanted my foliage and beads to be asymmetrical, but I also wanted to make sure that the beginning/end of the crocheting would be covered by the greenery. Knowing this helped me to plan the position of my greenery. Place your wreath in front of you and turn the beginning of your crocheting to the 6 o’clock position. Take your scissors and very gently cut the greenery off of the stem. I had to be really careful with my eucalyptus to prevent it from breaking.
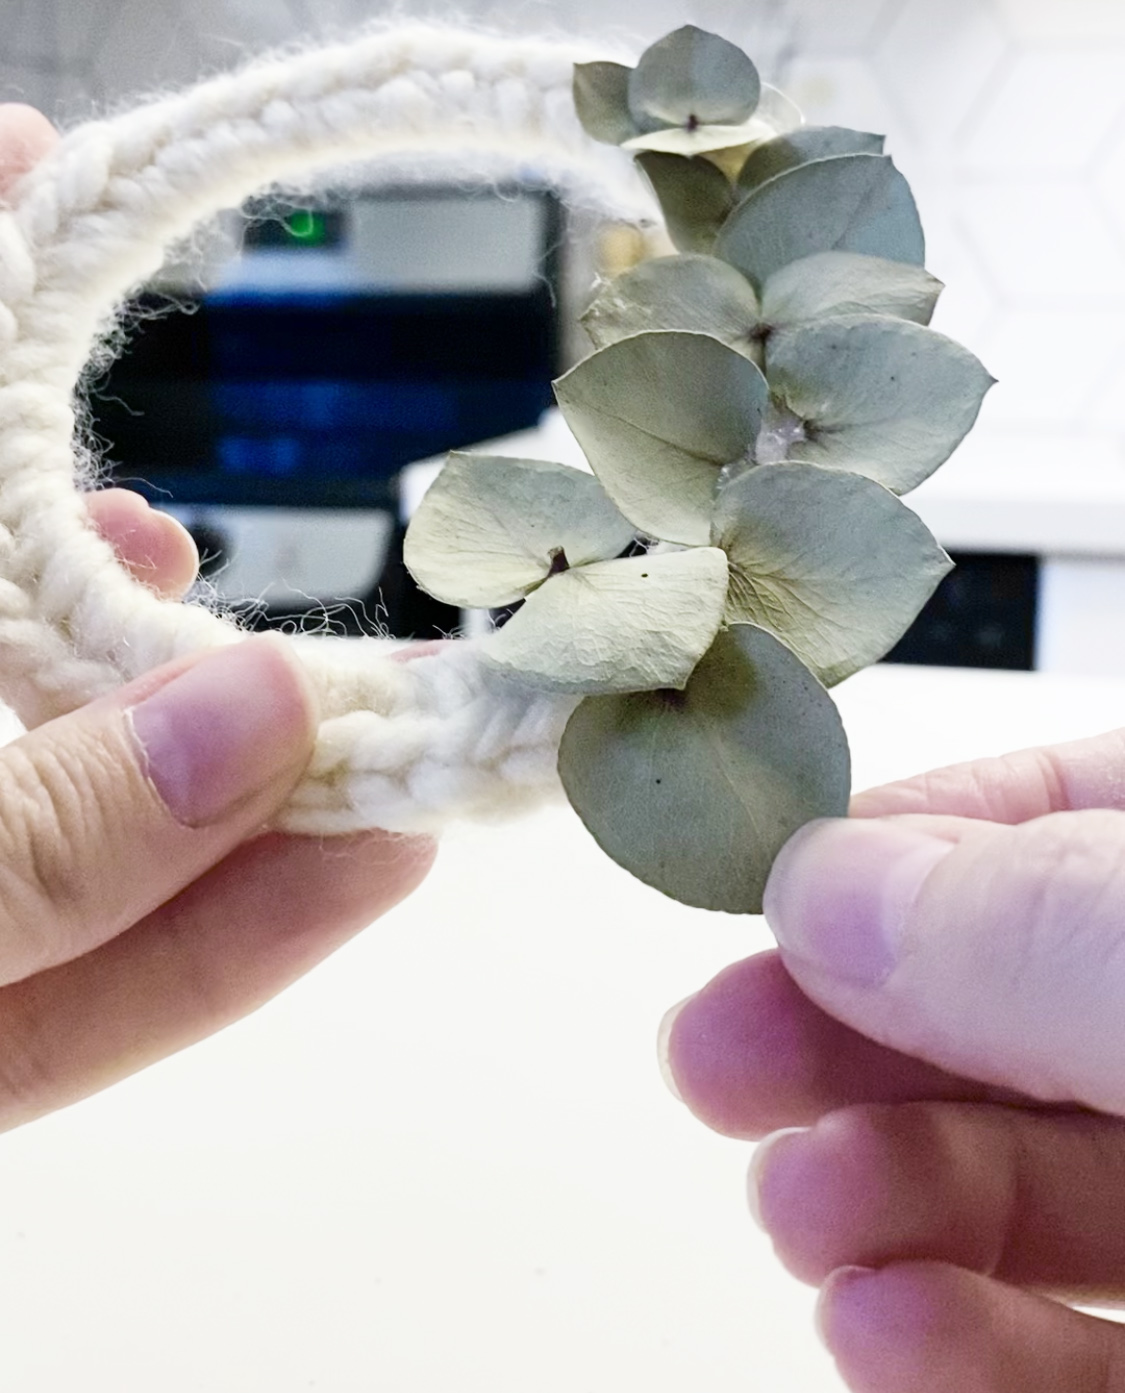
Step 6: Starting with the smallest leaves that you have, glue them onto the wreath starting from about the 1:30 or 2 o’clock position. Keep glueing on leaves, increasing the size, until you reach the 6 or 7 o’clock position.
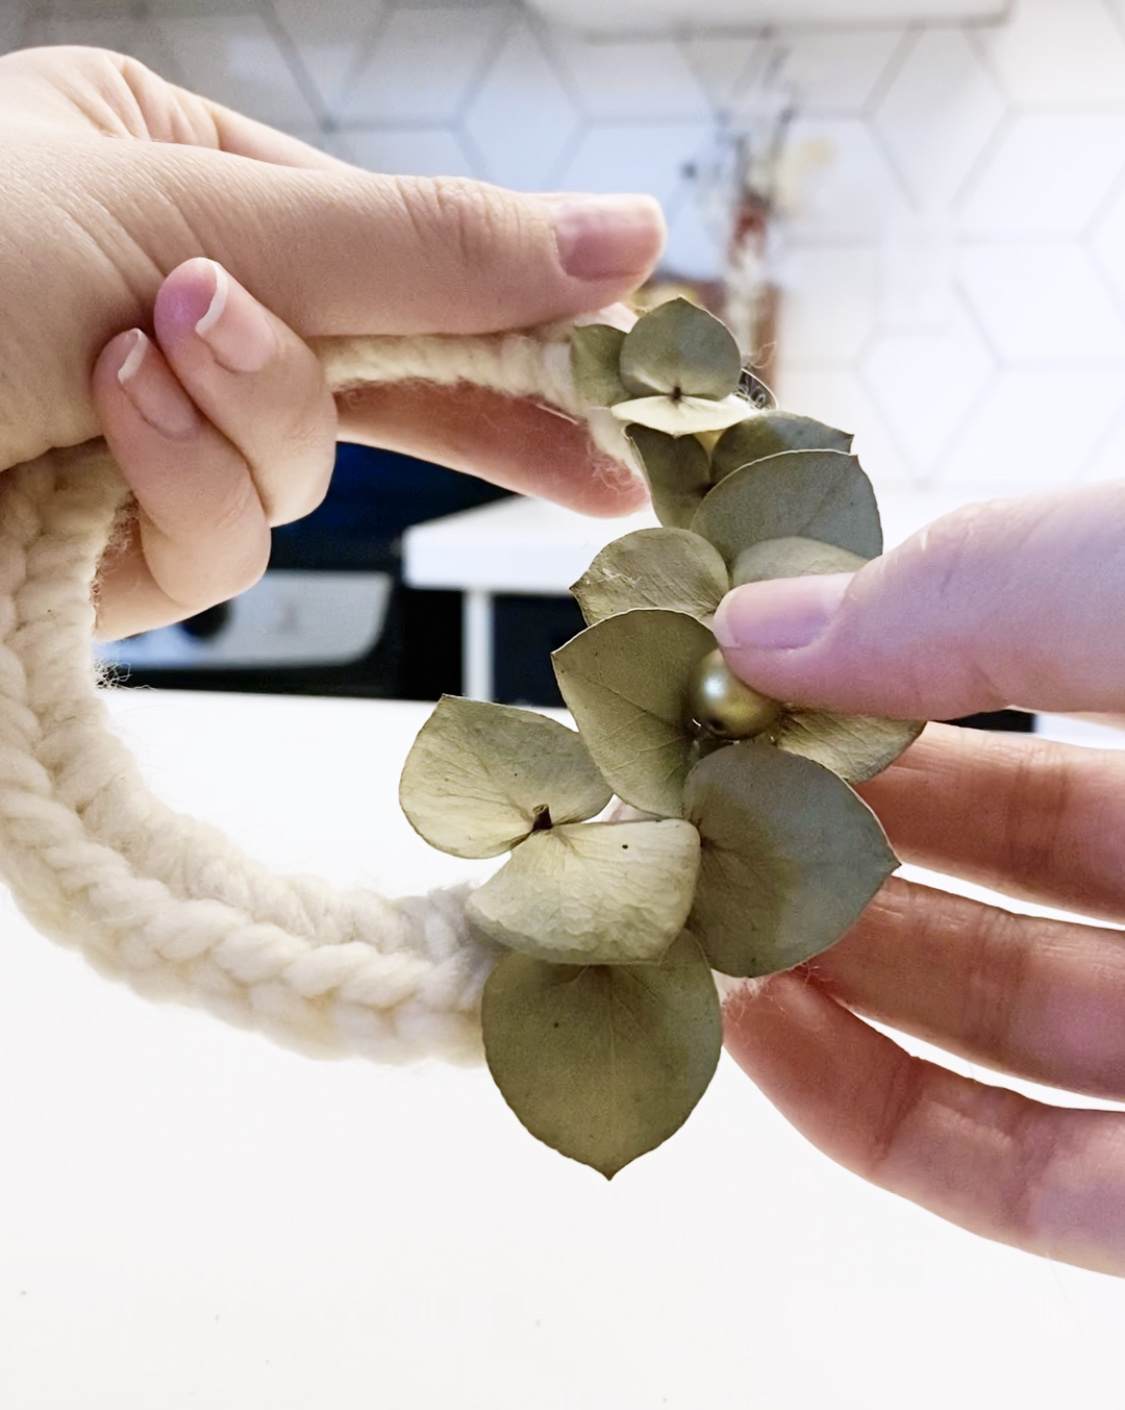
Step 7: Once you’re happy with the placement of your greenery, start to add your wooden beads. I chose to do small clusters of beads that slightly overlapped the greenery and ended at about 7:30/8 o’clock. It’s up to you how you’d like to position them!
Step 8: Stand back and take a look at your wreath, and see if there are any tails of hot glue that you need to remove. If not, you’re ready to hang them up!
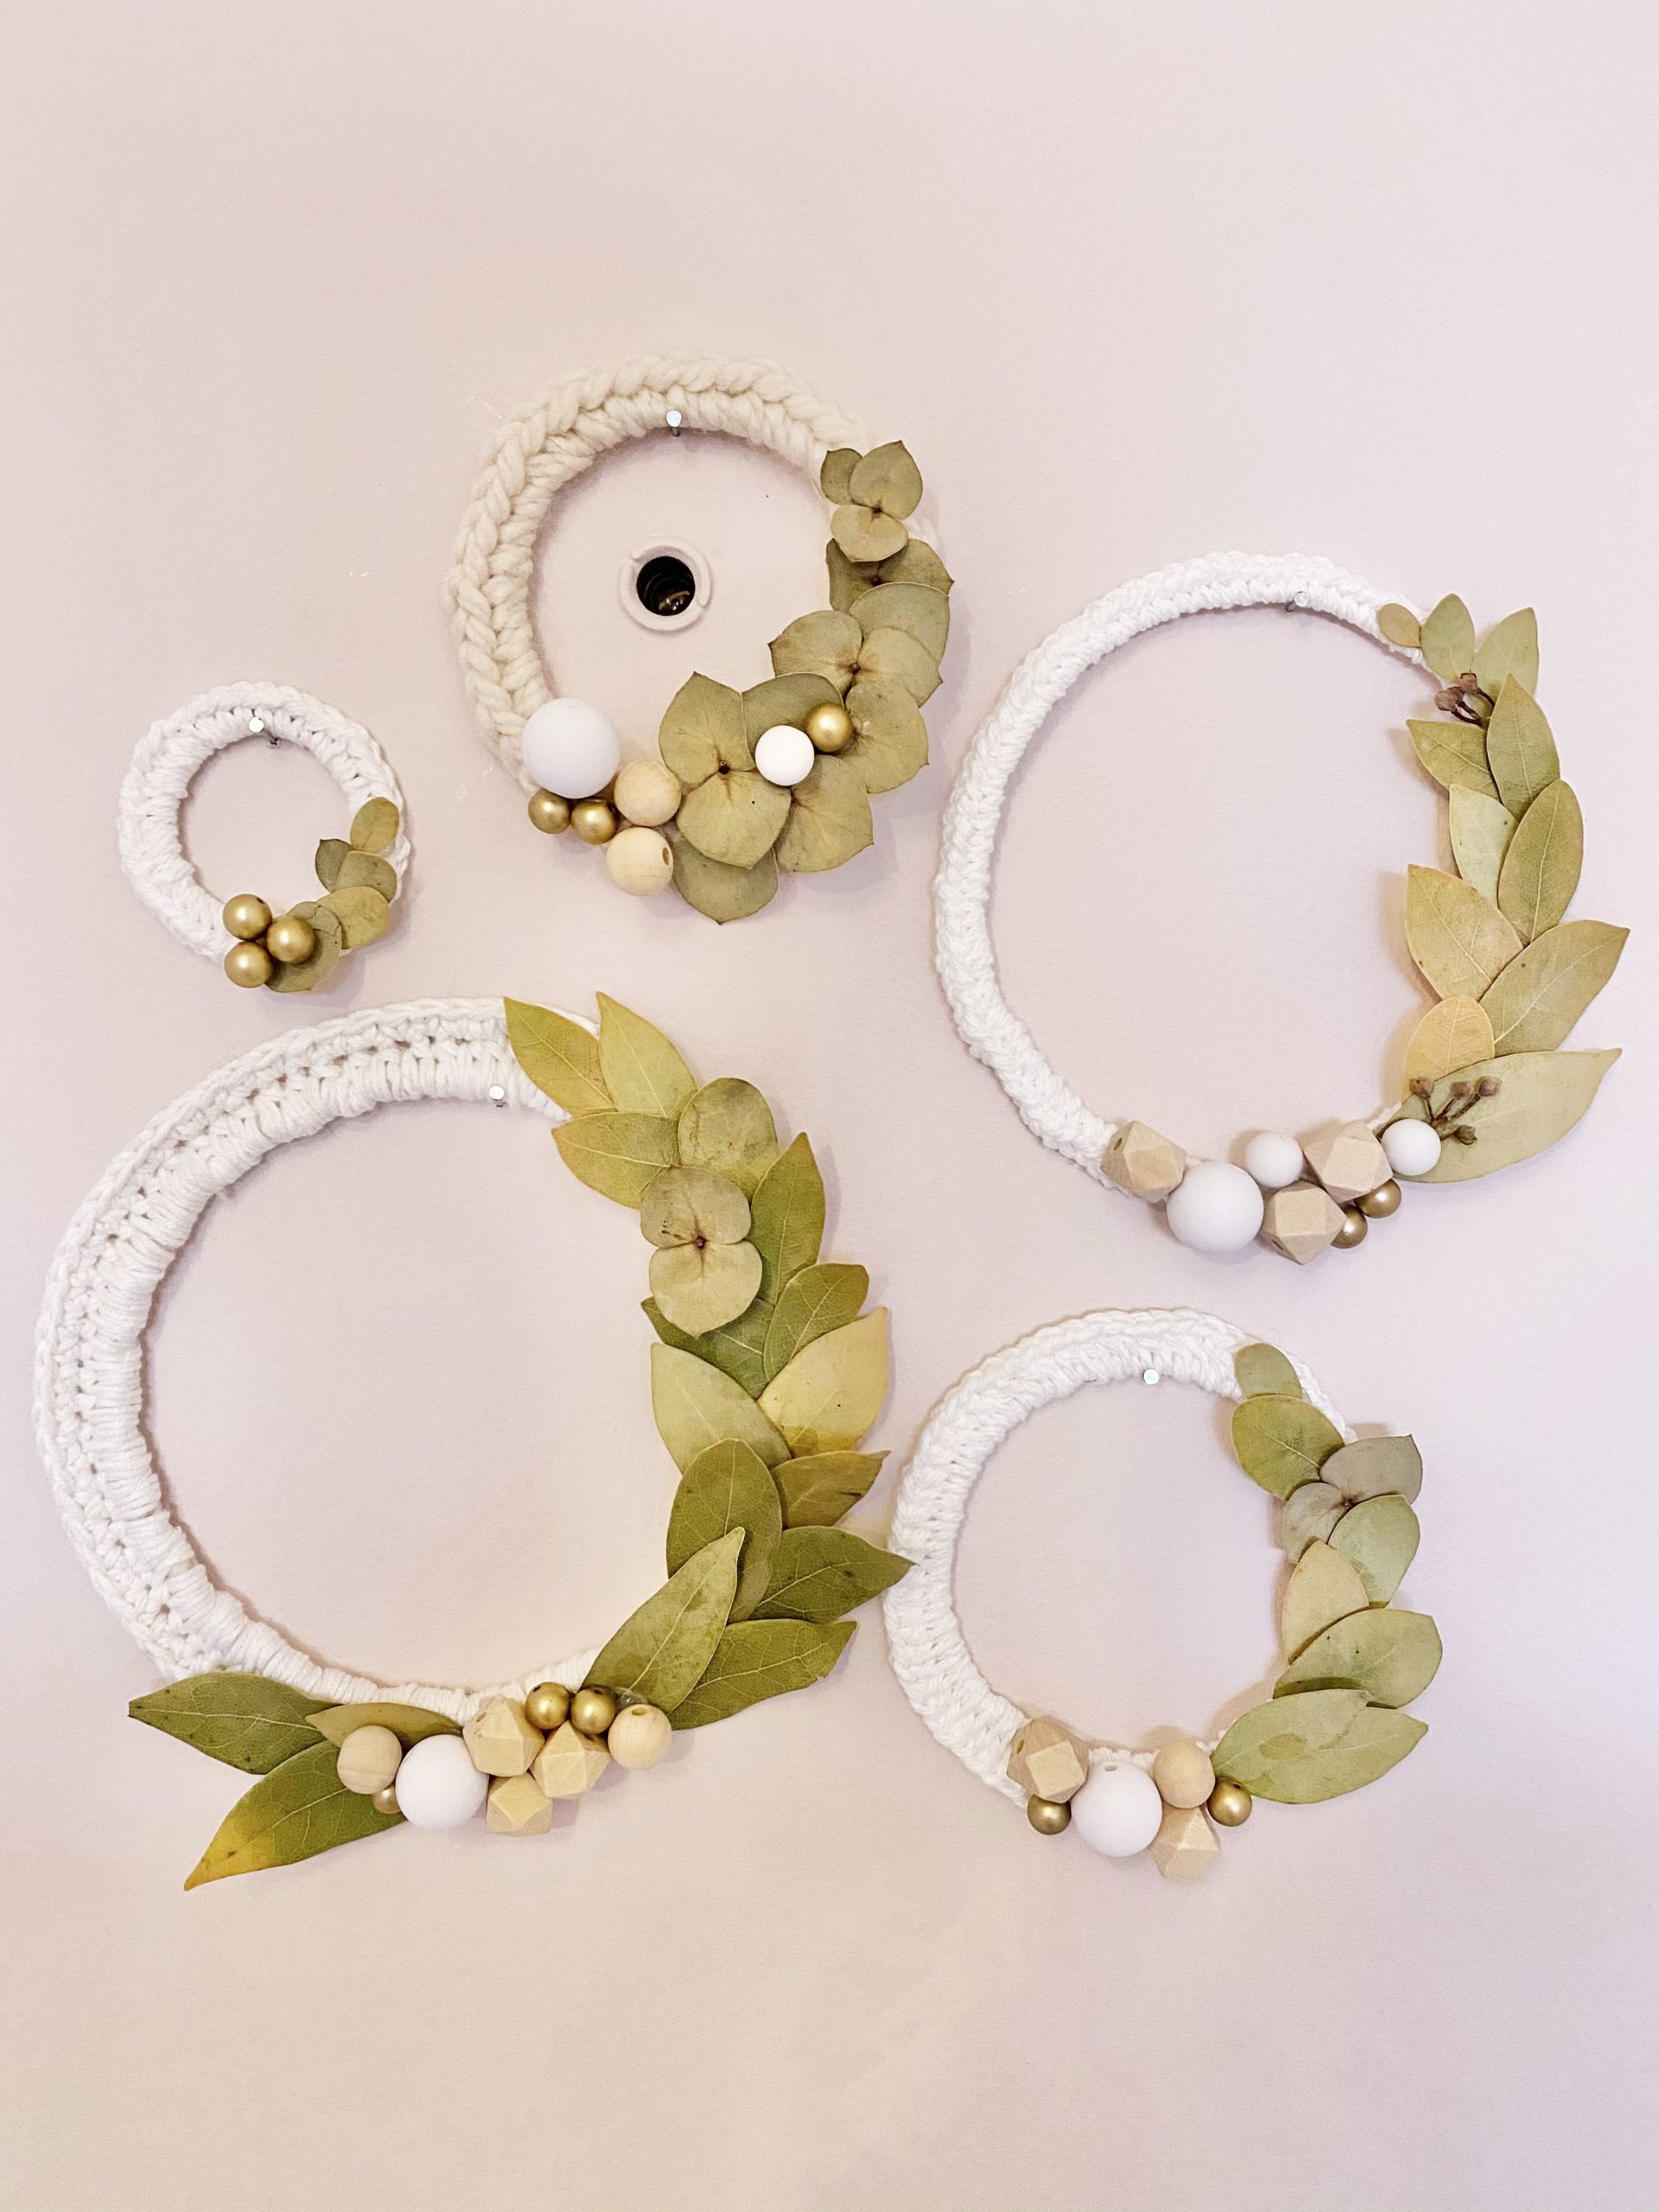
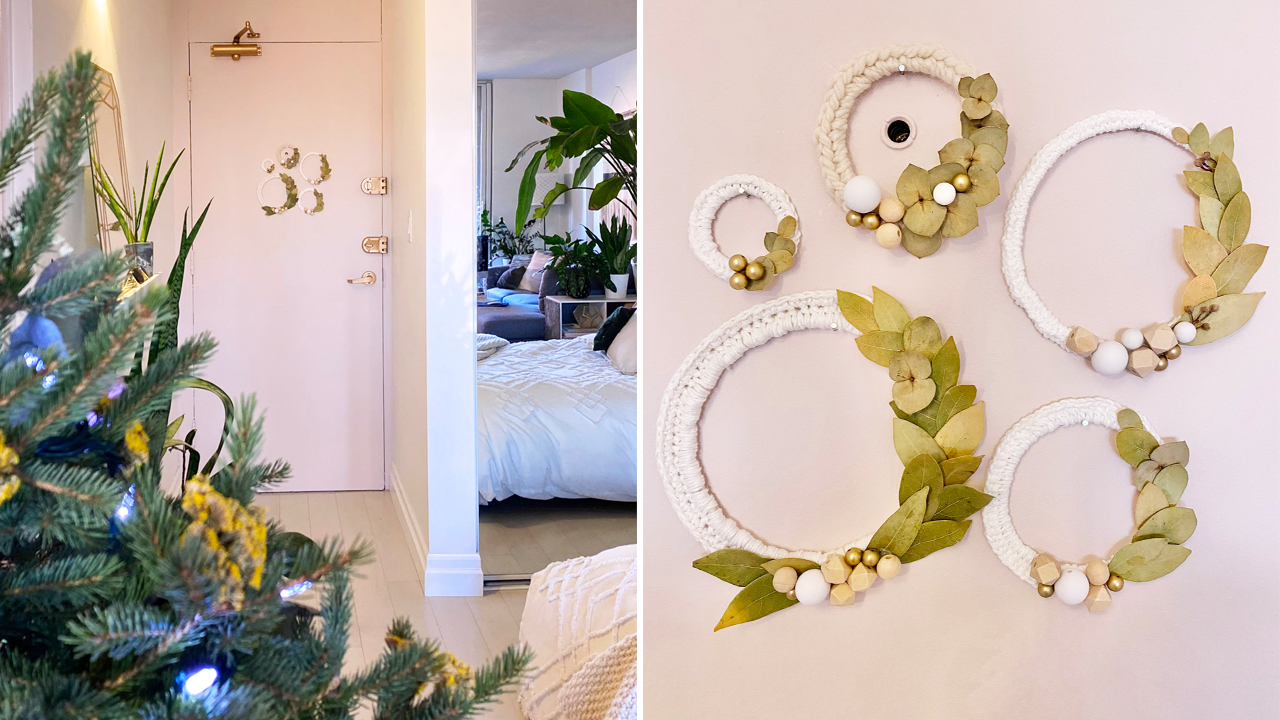
Step 9: Decide where you want to hang your wreaths and mock-up how you’d like to position them before hanging them on the wall. I chose to put mine on the back of my door, so I hammered a small nail into the door and hung each one. I even placed one around the peephole!
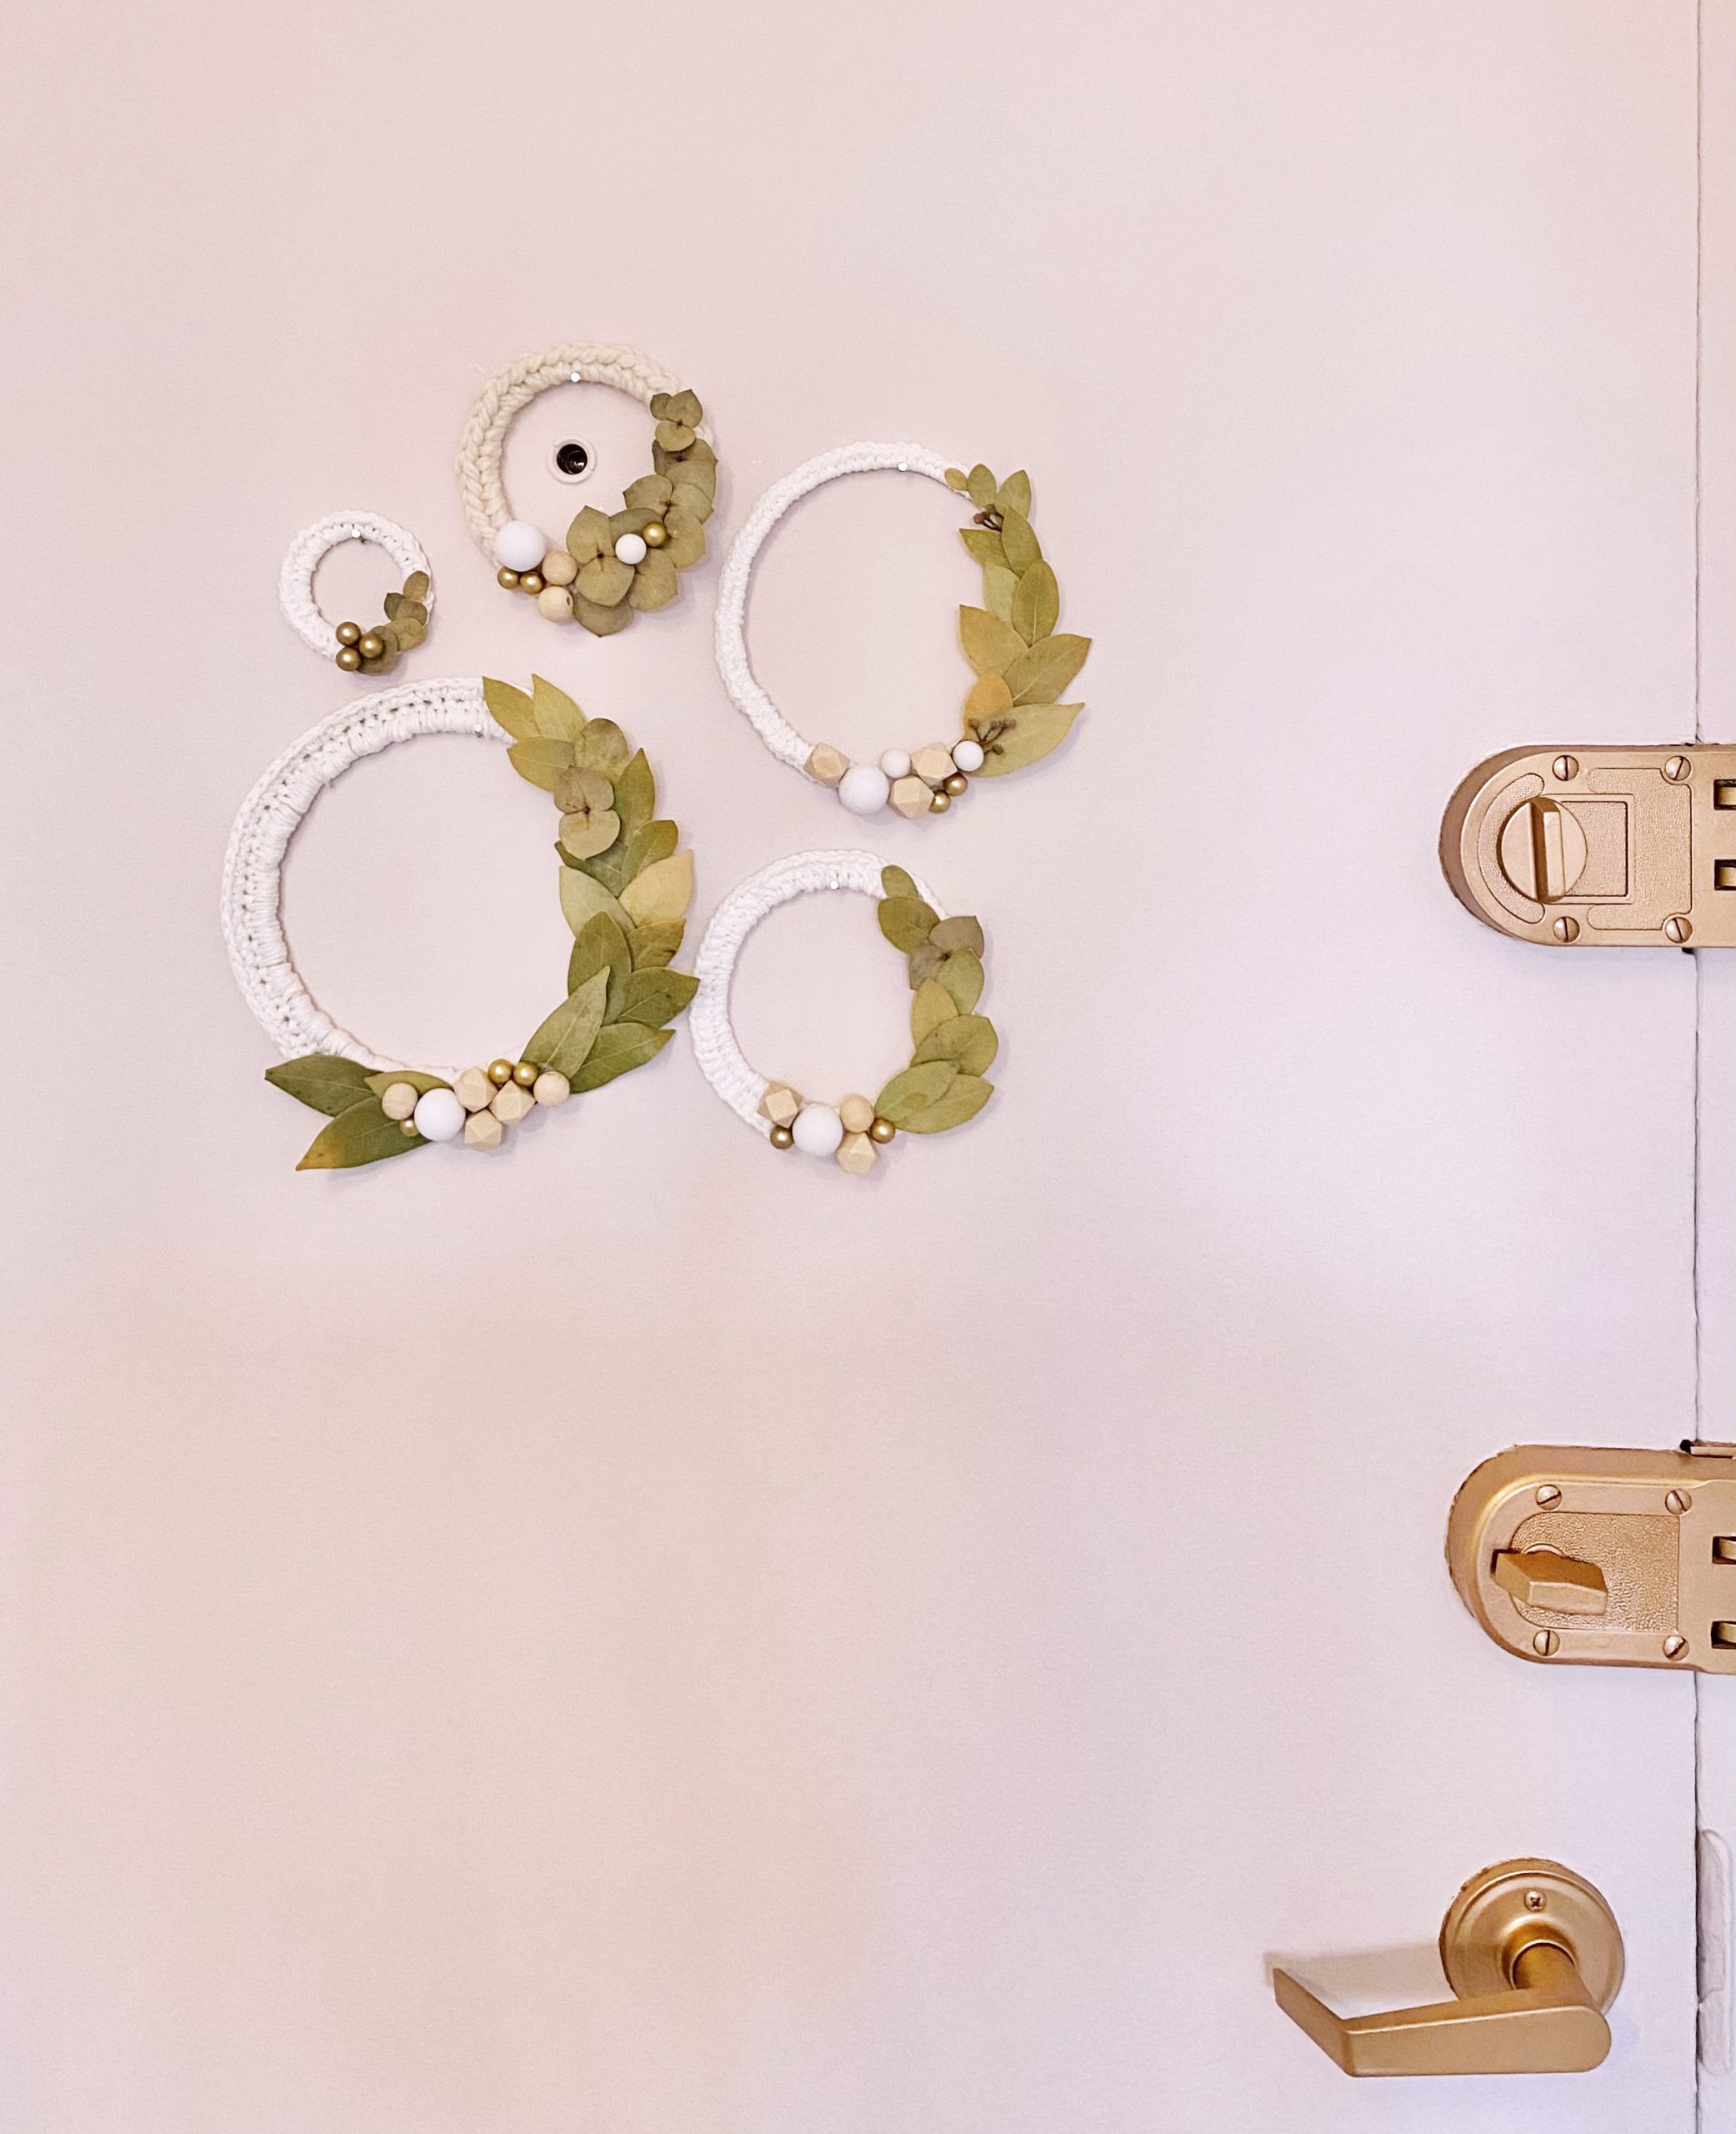
Here is a more pulled back version of them on the door! I love the way the small gold beads pick up the gold in the door hardware.

This is the full look with a glimpse of my Christmas tree. The wreaths add just enough Christmas cheer to my apartment. Plus, they’re on the smaller side which works well with the scale of my bachelor!